How to Build Base Cabinet (With PDF Plans)
Want to build your own base cabinets but feel stuck in the planning stage? I get it. When I first started woodworking, cabinet plans seemed too hard to figure out.
Here’s the good news: making base cabinet plans is simpler than you might think. I’ve spent years building cabinets, and I’ll show you the exact steps I use to create clear, useful plans.
In this guide, I’ll walk you through each part of cabinet planning – from basic measurements to final touches.
By the end, you’ll know how to make plans that work for your space and skill level.
An Overview of Base Cabinets
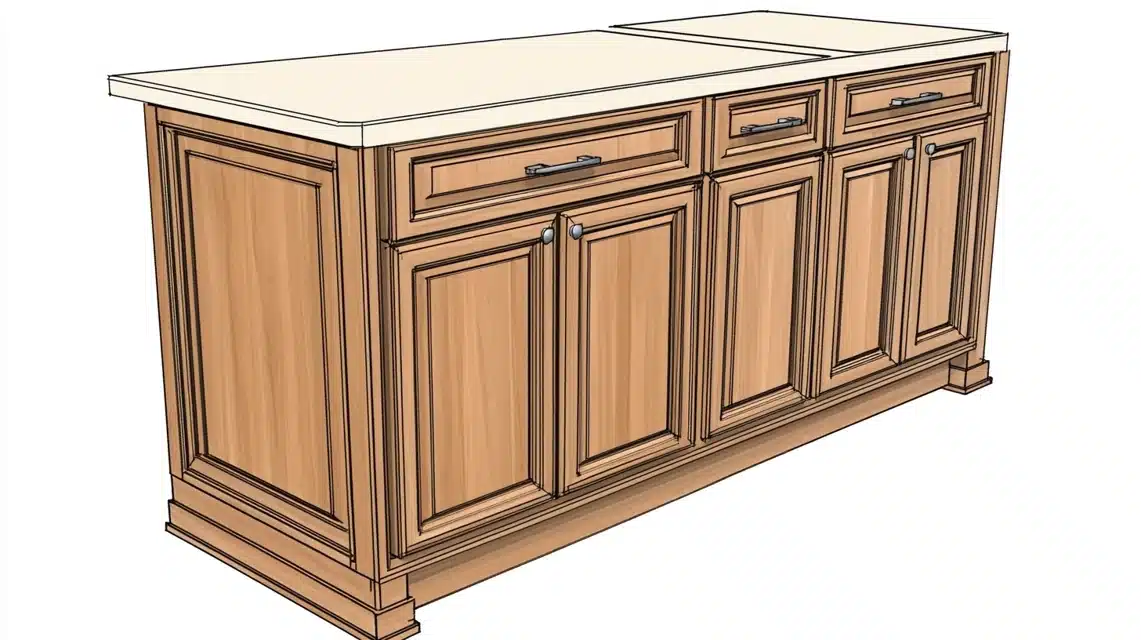
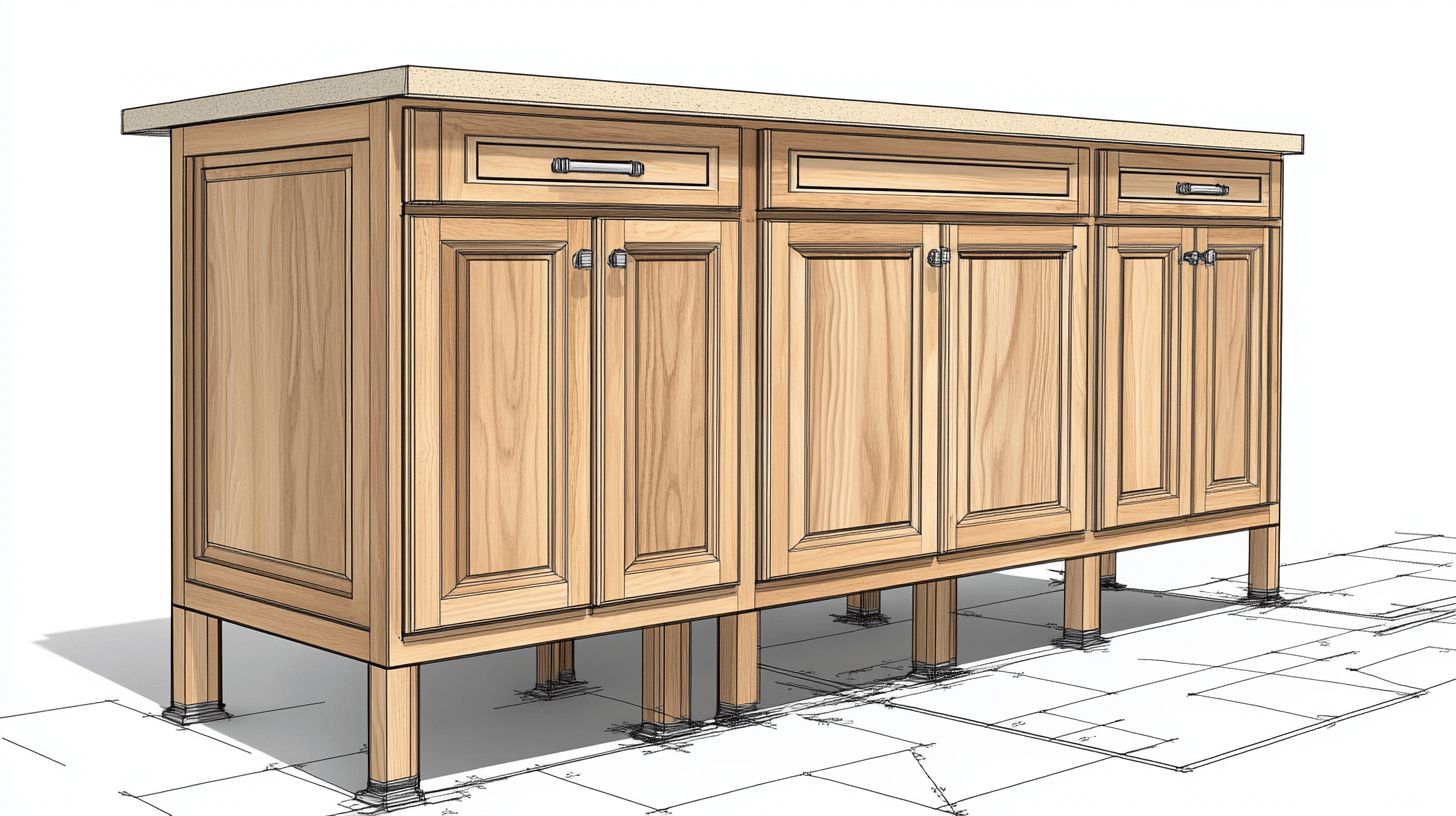
Base cabinets are the workhorses of any kitchen setup. As someone who has built many cabinets, I can tell you they’re essential storage units that sit directly on the floor.
They form the bottom section of your kitchen layout and support your countertops.
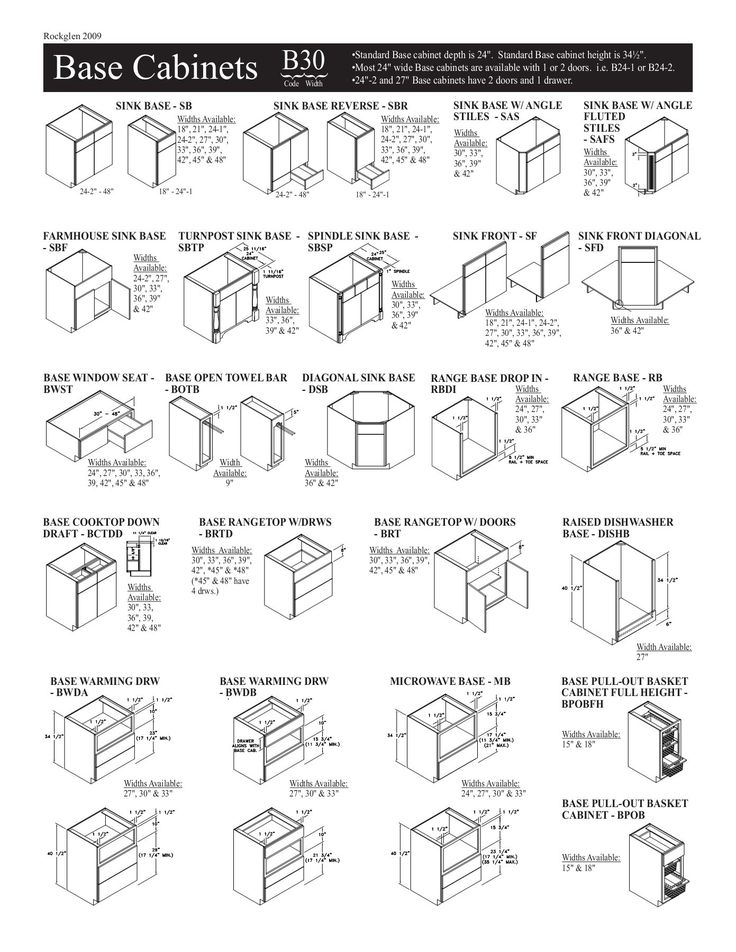
Types of Base Cabinets
1. Standard Base Cabinets
- These make up most of your kitchen storage
- Include one or more drawers at the top
- Have doors that open to shelf space below
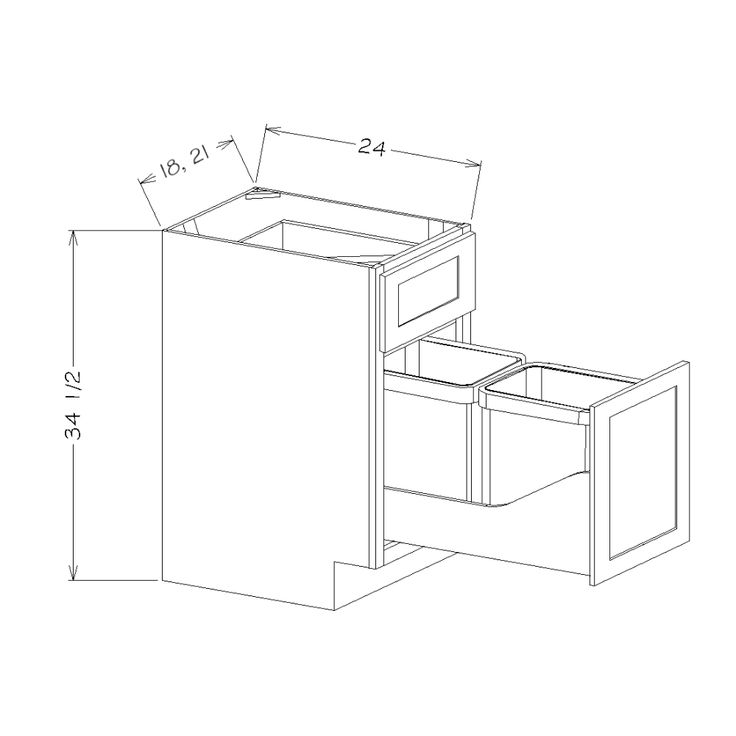
2. Drawer Base Cabinets
- Made up of multiple drawers
- Perfect for storing utensils, pots, and pans
- Usually placed near cooking areas
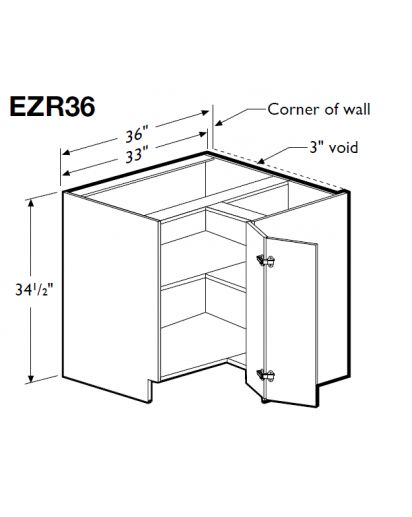
3. Corner Base Cabinets
- Designed to fit into 90-degree corners
- Often include lazy susans or pullout shelves
- Help use space that might otherwise be wasted
4. Sink Base Cabinets
- Made to hold your sink
- It has a false drawer front at the top
- Includes space for plumbing
Standard Dimensions
| Feature | Measurement |
|---|---|
| Height | 34.5 inches (without countertop) 36 inches (with countertop installed) |
| Depth | 24 inches (from wall to front face) 23.75 inches (for cabinet box) |
| Width | Ranges from 9 to 48 inches Most common widths: 15, 18, 21, 24, 30, 33, 36 inches Corner cabinets: 36 inches per side |
| Interior Space | Shelf depth: 22.5 inches Height between shelves: 14 inches Drawer height: 5 to 7 inches |
These measurements follow standard building codes and ensure your cabinets work well with other kitchen items. They also help create a smooth workflow in your kitchen.
How to Plan Your Cabinet Project
1. Measure Your Space
- Take full room measurements, including wall lengths
- Note the locations of doors, windows, and outlets
- Mark spots where plumbing and gas lines come through walls
- Write down ceiling height to plan for any tall cabinets
- Leave room for appliances that will sit between cabinets
2. List Your Storage Needs
- Count your pots and pans to plan drawer sizes
- Look at your current storage items to know what’s working
- Make notes of things that need better storage spots
- Think about special items that need custom storage
- Plan spots for trash bins and cleaning supplies
3. Create a Basic Layout
- Draw your room on graph paper, with each square as one inch
- Put appliances in first since they need fixed spots
- Start with corner cabinets, then work outward
- Leave enough space between cabinet rows for walking
- Check that doors and drawers have room to open fully
4. Pick Your Materials
- Choose a wood type for cabinet faces and boxes
- Select hardware like hinges and drawer slides
- Pick handles and pulls for doors and drawers
- Choose lumber grade based on visible parts
- List amounts of each material needed
5. Make Detailed Plans
- Draw front views of each cabinet
- Create side-view drawings with all parts shown
- Label every piece with the exact sizes
- List cutting measurements for each part
- Include notes about joints and assembly steps
6. Set Up Your Timeline
- Break the project into small tasks
- Give each task a time estimate
- Add extra time for drying and finishing
- Plan around your free time
- Make a materials shopping schedule
7. Calculate Costs
- Price all materials and hardware
- Add the cost of tools you might need
- Include extras for mistakes
- Figure in finishing supplies
- Keep a budget worksheet
Step-by-Step Process of Creating Base Cabinet
Tools & Materials Required
| Category | Items |
|---|---|
| Power Tools | – Table saw – Jigsaw – Router – Power drill – Staple gun |
| Measuring & Marking Tools | – Measuring tape – Pencil – Level – Square |
| Materials |
– 3/4-inch plywood (Birch or Maple preferred) – Hardware (pulls and knobs) |
Step-by-Step Process for Building
1. Cut Main Pieces
- Rip plywood into 22-inch wide strips
- Cut side panels
- Cut bottom panel (1.5 inches shorter than final width)
- Cut support strips
2. Make Toe Kicks
- Mark 3.5 inches high and 4.5 inches deep
- Cut notches with a jigsaw
- Sand edges smooth
3. Build Cabinet Box:
- Drill pocket holes in the bottom panel and strips
- Attach the bottom panel 5 inches up from the bottom
- Install support strips at the top front and back
- Add back support strip
4. Create a Face Frame
- Cut 1x4s to 1.75 inches wide
- Make pieces for sides and top/bottom
- Join using micro pocket holes
- Attach to cabinet box front
5. Add Interior Features
- Install drawer slide spacer blocks
- Drill shelf pin holes if needed
- Add drawer slides
- Attach the back panel with staples
6. Build Doors
- Cut door frame from 1x3s
- Route grooves for panels
- Insert 1/4-inch plywood panels
- Glue and clamp
7. Make Drawers
- Build drawer boxes with plywood
- Assemble with pocket holes
- Install slides
- Attach drawer fronts
8. Finishing
- Sand all surfaces
- Apply primer
- Caulk gaps
- Paint with cabinet enamel
- Install hardware
- Hang doors
- Add shelves
An Approximate Budget Required for Building
| Category | Item | Cost Range ($) |
|---|---|---|
| Essential Materials | Two sheets 3/4″ plywood | 120-140 |
| One sheet 1/4″ plywood (backs) | 35-40 | |
| Face frame lumber | 45-60 | |
| Wood for doors | 60-75 | |
| Drawer materials | 40-50 | |
| Hardware Needs | Door hinges (6 pairs) | 30-40 |
| Drawer slides (3 pairs) | 45-60 | |
| Door/drawer pulls (6) | 30-45 | |
| Shelf pins | 10-15 | |
| Screws and fasteners | 20-25 | |
| Finishing Items | Wood glue | 8-10 |
| Sandpaper | 15-20 | |
| Primer | 25-30 | |
| Paint | 35-45 | |
| Caulk | 5-8 | |
| Basic Tool List | Circular saw | 60-80 |
| Drill/driver | 80-100 | |
| Measuring tools | 30-40 | |
| Basic hand tools | 50-75 | |
| Clamps | 40-60 | |
| Total Estimates | Materials only | 400-500 |
| With basic tools | 650-800 | |
| Per cabinet cost | 135-170 |
List of Some Downloadable PDF Plans
1. Base Cabinets with Doors
2. Base Cabinet with Drawers
3. Base Cabinet Combination Unit
How to Install the Cabinets Easily
Tools You’ll Need
- Level (2-foot and 4-foot)
- Drill and screws
- Shims
- Pencil and tape measure
- Stud finder
- Clamps
- Helper (for larger cabinets)
Step-By-Step Installation Process
1. Prepare The Space
- Remove baseboards where cabinets will sit
- Mark all wall studs with pencil lines
- Find and mark plumbing or electrical points
- Clean floor surface well
- Check floor level at several points
2. Check Wall and Floor Conditions
- Use a long level to find high spots on the floor
- Mark the highest point on floor with a pencil
- Test walls for plumb (straight up and down)
- Note any wall bumps or curves
3. Start With Corner Cabinet
- Place cabinet in corner
- Check for level front-to-back
- Put shims under the cabinet at low spots
- Make sure the face is plumb using a level
- Check that the cabinet is square to both walls
4. Attach First Cabinet
- Put 2-3 shims behind the cabinet at stud points
- Drive screws through back support into studs
- Use a level to check again after screwing
- Make sure screws go into the support strip
- Trim extra shim material with a knife
5. Adding Next Cabinet
- Place the second cabinet next to the first
- Line up front edges perfectly
- Clamp cabinets together at face frames
- Check for level and plumb again
- Add shims as needed
6. Join Cabinets Together
- Drill pilot holes through face frames
- Use three screws per joint
- Keep faces aligned while screwing
- Check doors for proper gaps
- Make sure drawers still work right
7. Continue Down The Line
- Keep checking the level as you go
- Maintain even gaps between cabinets
- Shim each cabinet individually
- Secure to the wall at every stud
- Check everything stays straight
8. Final Adjustments
- Double-check all cabinets are level
- Adjust door hinges if needed
- Test all drawers open smoothly
- Cut off visible shims
- Fill any screw holes
9. Add Toe Kicks
- Measure spaces under cabinets
- Cut toe kick material to fit
- Attach with small nails or clips
- Caulk top edge if needed
10. Last Checks
- Test all doors and drawers
- Look for any gaps to fill
- Clean up any marks
- Make sure all screws are tight
- Check cabinet backs touch the wall
Safety Precautions to Take
- Safety Gear: Always wear safety glasses, ear protection, and a dust mask when cutting or sanding wood.
- Tool Safety: Unplug power tools when changing blades or bits and keep fingers away from cutting edges.
- Clean Space: Keep your work area free of wood scraps and sawdust to avoid trips and falls.
- Proper Lifting: Bend at the knees, not the waist, when lifting heavy cabinets and get help for large units.
- Ventilation: Work in a well-aired space when painting or using wood finishes.
- First Aid: Keep a first aid kit nearby and know where fire safety equipment is located.
A Cost Comparison Analysis of Building Vs. Buying
| Aspect | Building Your Own Cabinet | Buying Pre-Made Cabinets |
|---|---|---|
| Materials Cost | $155-200 per cabinet | Stock Cabinets: $200-300 Semi-Custom Cabinets: $400-600 Custom Cabinets: $800-1200 |
| Tools Cost | One-time investment: – Basic power tools: $300-400 – Hand tools: $100-150 – Clamps: $50-75 |
Included in price |
| Time Investment | 6-8 hours per cabinet Additional learning time for new skills |
Ready-made; no time required for assembly |
| Customization | Full control over materials, sizes, and finishes | Stock Cabinets: Limited sizes and standard finishes Semi-Custom Cabinets: More size and finish choices Custom Cabinets: Fully customizable |
| Quality | Dependent on skill level and materials used | Stock Cabinets: Basic quality Semi-Custom Cabinets: Better quality materials Custom Cabinets: Premium materials |
| Hardware | Hinges and pulls: $20-25; Drawer slides: $15-20 | Stock Cabinets: Basic hardware included Semi-Custom and Custom Cabinets: Higher-quality hardware options |
| Paint/Finish Options | Custom finishes with paint and primer: $30-40 | Stock Cabinets: Standard finishes Semi-Custom and Custom Cabinets: More finish options |
| Installation | DIY installation | Custom Cabinets: Includes professional installation |
Best Customization & Personalization Tips to Follow
1. Storage Solutions That Fit Your Needs
- Add pull-out trash bins near sink areas for easy cleanup
- Install tilt-out trays in fake drawer fronts for sponge storage
- Put in dividers for baking sheets and cutting boards
- Create special slots for storing pot lids upright
- Build drawer dividers sized for your utensils
- Make sections for storing small appliances
2. Drawer Customization Ideas
- Install soft-close drawer slides for smooth operation
- Add double-tiered drawer inserts for more storage space
- Build shallow drawers for cooking tools and utensils
- Make deep drawers for pots and pans storage
- Include charging stations in top drawers
- Create spice drawer inserts with angled slots
3. Door Style Options
- Build simple shaker doors for a clean look
- Make raised panel doors for traditional styles
- Try flat panel doors for modern spaces
- Create glass insert doors to show nice dishes
- Add mesh panels for a farmhouse-style
- Include ventilation slots in pantry doors
4. Interior Cabinet Features
- Install pull-out shelves for better access
- Add lazy susan corners for easy reach
- Put in vertical dividers for cookie sheets
- Create wine bottle storage racks
- Make pull-out spice racks next to cooking areas
- Install under-shelf lighting systems
5. Size Adjustments
- Change standard depths for specific uses
- Modify heights for tall items storage
- Adjust widths to fit your space perfectly
- Create extra-deep drawers where needed
- Make narrow cabinets for small spaces
- Build tall cabinets for ceiling storage
6. Special Function Add-ons
- Install butcher block tops in prep areas
- Add tip-out hamper bins in laundry rooms
- Create hidden pet feeding stations
- Build slide-out step stools in toe kicks
- Make pull-out workstations
- Install built-in knife blocks
7. Finishing Touches
- Use different paint colors inside drawers
- Add liners to protect shelf surfaces
- Install cabinet lighting under shelves
- Put in magnetic door catches
- Create labels for organized storage
- Add corkboard panels inside doors
Some Common Challenges & It’s Solutions
| Challenge | Solutions |
|---|---|
| Door Alignment Issues | • Use a door mounting template for exact hinge spots • Install adjustable hinges for fine-tuning • Mark center lines on face frames before hanging • Double-check measurements before cutting doors • Use spacers to keep gaps even while mounting |
| Drawer Fit Problems | • Build drawer boxes 1 inch smaller than opening • Install drawer slides level and parallel • Use spacer blocks behind drawer slides • Check the squareness of drawer boxes • Sand drawer sides if they’re too tight |
| Material Warping | • Store wood flat in your workspace • Let wood adjust to room temperature • Use wood with lower moisture content • Add extra support to wide shelves • Keep cabinets away from water sources |
| Uneven Floors | • Find the highest floor point first • Use solid wood shims, not plastic • Place shims under the plywood bottom • Check level both front-to-back and side-to-side • Support cabinets fully, not just at the edges |
| Wall Issues | • Scribe cabinet sides to fit wall curves • Use filler strips for uneven gaps • Build slightly smaller than opening • Add extra shims behind crooked walls • Check wall angles before cutting parts |
| Paint Problems | • Sand between each coat • Use wood filler on any gaps • Apply primer before paint • Paint in thin, even coats • Let each layer dry fully • Use foam rollers for a smooth finish |
| Hardware Installation | • Make templates for handles and pulls • Drill pilot holes to prevent splitting • Use hardware installation jigs • Mark all holes before drilling • Test fit before final mounting |
| Corner Cabinet Gaps | • Plan for fillers in corner spots • Cut fillers at slight angles to fit • Use scribe molding to fill gaps • Make sure corners are square • Add extra support in corners |
Conclusion
Building your own base cabinets is a task you can handle. I’ve shared the steps I use, from basic planning to final installation. Now it’s your turn to put these tips into practice.
Remember, you don’t need fancy tools or years of woodworking skills to make good cabinets. Just follow the measurements, take your time with cuts, and check levels often. Start with one simple cabinet, and build your skills from there.
The best part? You’ll save money and get exactly what you want. Plus, every time you open those cabinet doors, you’ll feel proud knowing you built them yourself.
Ready to start? Grab your measuring tape, make your plan, and begin building. Your perfect cabinets are waiting to take shape.

