29 Flower Pot Painting Ideas for Kids and Adults (Easy, Cute & Creative)
Want to turn plain flower pots into something special? Painting them is easier than you think.
All you need is some paint and basic supplies to create pots that match your style.
This blog shows you cute designs, kid-friendly ideas, and creative options for adults. You’ll learn step-by-step how to paint pots and which supplies work best.
Ready to get creative? Let’s start painting.
How to Choose the Perfect Flower Pot Painting Idea
Picking the right design for your flower pot is simple. Just think about these few things.
- Match Your Skill Level: Choose designs you can handle. Beginners should stick with solid colors or stripes. Experienced painters can try detailed patterns or scenes.
- Fit Your Space:Your pot should match your home. Modern spaces need clean geometric designs. Farmhouse decor works with pastels and distressed looks. Bohemian rooms love bright, bold colors.
- Think About Location: Indoor pots can have any design. Outdoor pots need simple patterns and weather-resistant paint.
- Keep Colors Simple: Use 2-3 colors. Green plants pop against warm tones like yellow or coral.
- Match Pot Size: Small pots need simple designs. Large pots can handle bold patterns.
- Paint What You Love: Use your interests for inspiration. Ocean themes, nature designs, or geometric patterns all work great.
- Test First: Sketch your idea on paper before you paint.
Pick a design that matches your skills and fits your home. Start simple and enjoy the process.
Cute Pot Painting Ideas Everyone Loves
Creative and fun, cute pot painting ideas that add charm, color, and personality to your home, garden, or desk, perfect for beginners and all ages.
1. Pastel Smile Pots

Paint your pot in a soft pastel shade like blush pink, mint green, or baby blue.
Add a simple curved line for a smile using black or white paint. This minimalist design brings instant charm without overwhelming the pot.
The single facial feature keeps it clean and modern.
2. Bunny Rim Accent Pots
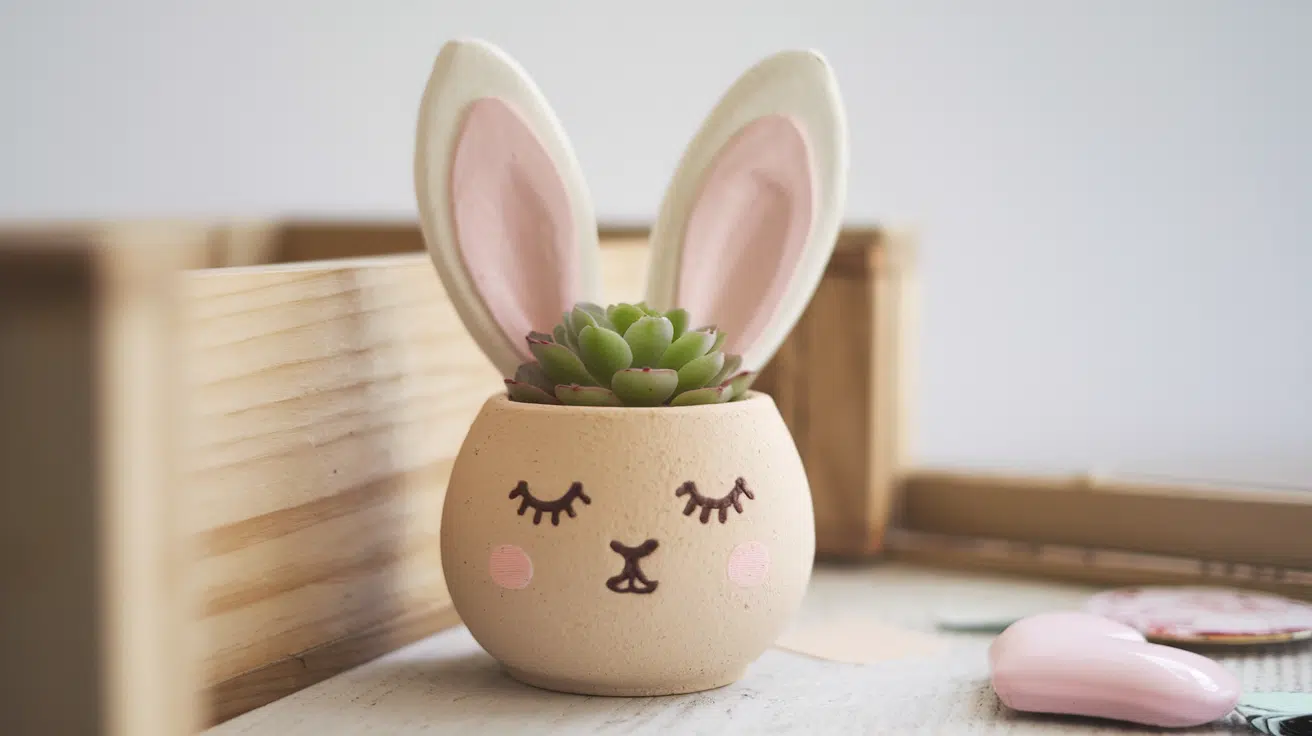
Keep the main pot in a neutral color like cream, beige, or light gray.
Paint just the rim to look like bunny ears, using soft pink for the inner ear and white for the outer.
This subtle animal touch adds personality while keeping most of the pot simple. It works perfectly with small succulents or herbs.
3. Panda Half-Face Pots
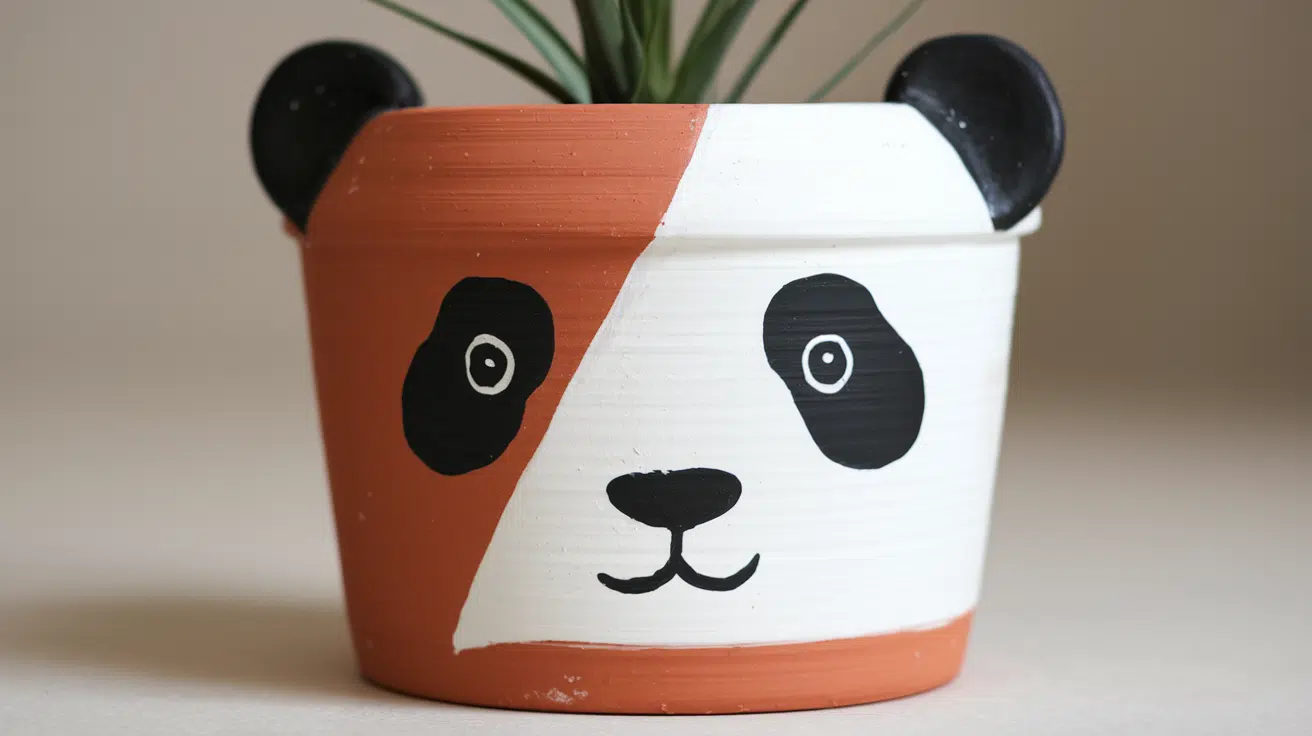
Paint a panda face on only one side of your pot for an asymmetrical look. Use black circles for the eye patches and ears, with a white base color.
Add a small nose and mouth to complete the expression.
This design gives your pot a playful peek-a-boo effect from different angles.
4. Frog Eye Top Pots

Paint large googly eyes right on the top edge or rim of your pot.
When you add plants, they’ll look like wild hair sprouting from the frog’s head. Use bright green for the pot base and white circles with black dots for eyes.
This creates an interactive look that changes as your plant grows.
5. Strawberry Seed Pots
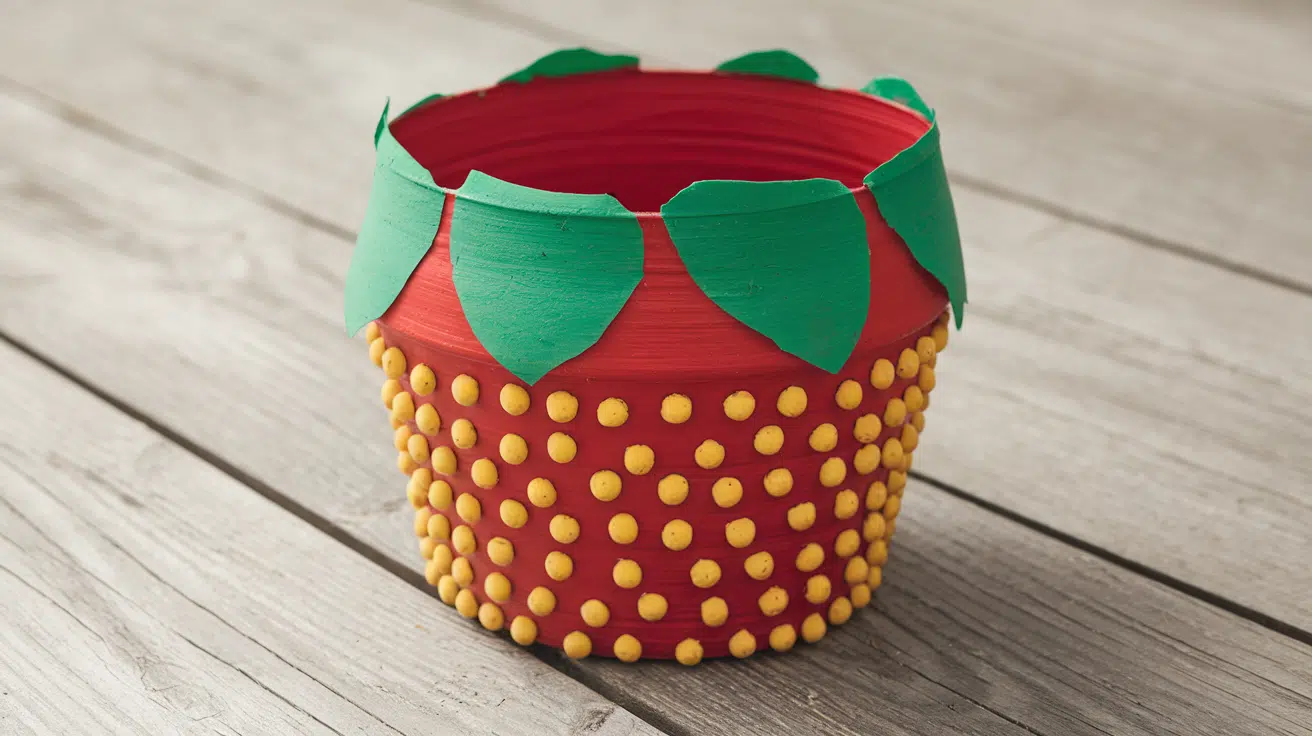
Cover your pot in bright red paint as the base color. Add tiny yellow or white dots evenly across the surface to mimic strawberry seeds. Paint the rim in fresh green to represent the leafy top.
This fruity design is cheerful and instantly recognizable.
6. Watermelon Gradient Pots
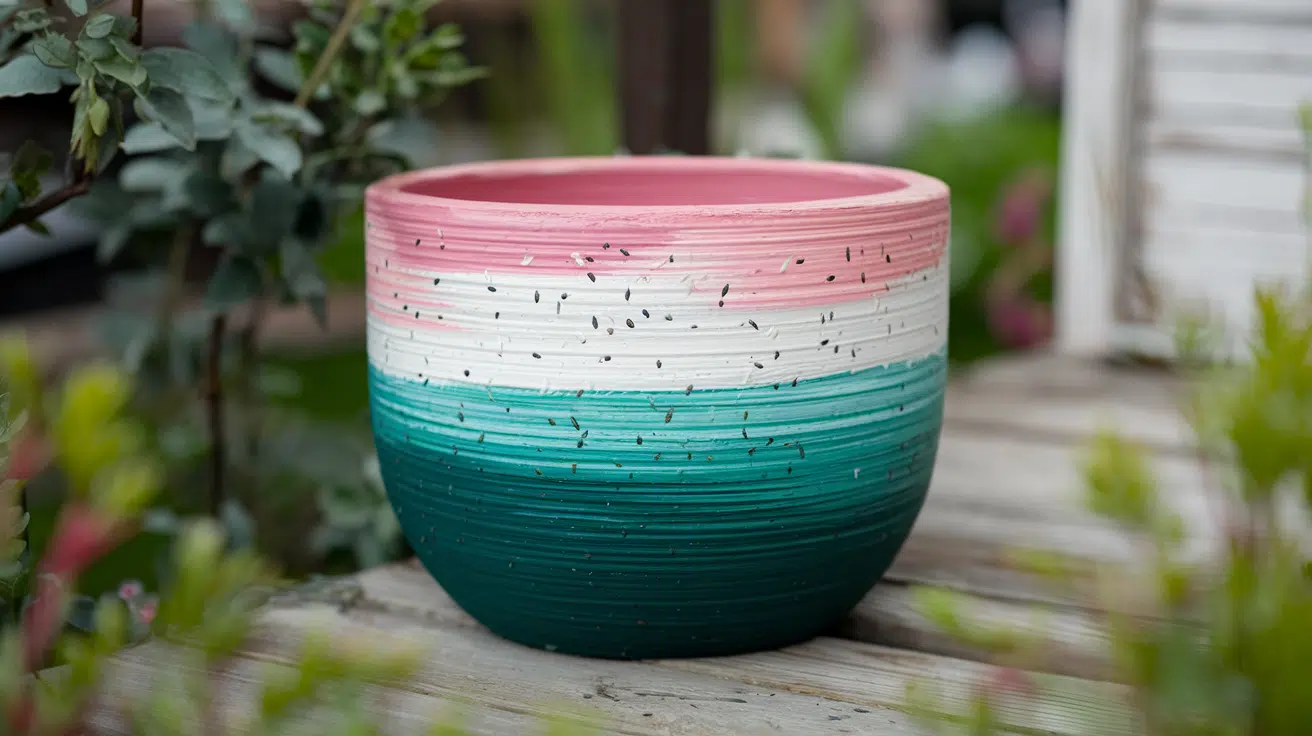
Create a three-layer gradient starting with dark green at the bottom. Blend into white for the middle section, then finish with pink at the top.
Add small black seeds in the pink area for authenticity.
This summery design looks refreshing and brings tropical vibes to your space.
7. Bee Stripe Accent Pots

Paint thin horizontal stripes alternating between yellow and black around your pot.
Add a single small bee illustration on one side with simple wings.
Keep the stripes uniform and evenly spaced for a clean look. This design is cute without being too busy or cartoonish.
8. Emoji Icon Pots
![]()
Choose one bold emoji symbol and paint it large on your pot.
Skip detailed facial features and focus on the basic shape and colors.
Try a heart, peace sign, or lightning bolt for variety. Each pot gets only one symbol to keep it simple and impactful.
9. Cloud Blush Pots
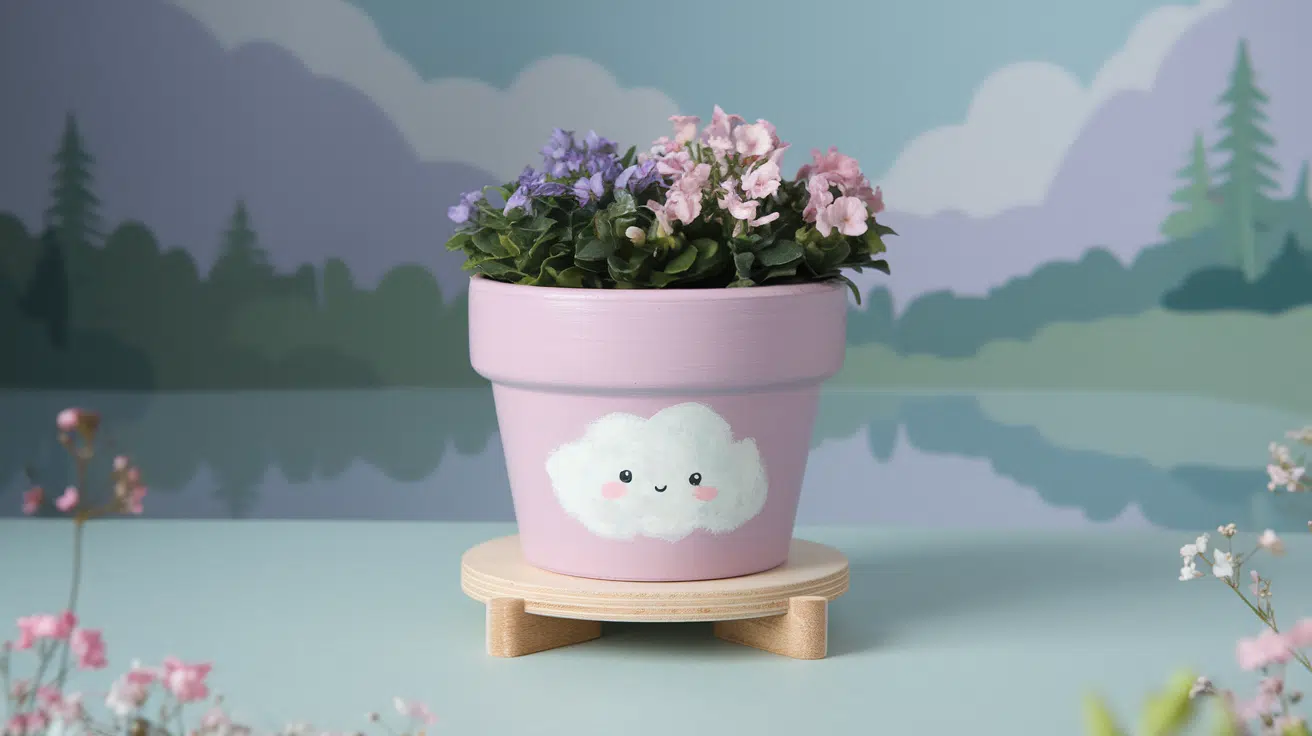
Paint a single fluffy cloud shape on a solid-colored background. Add two small pink circles below the cloud to create rosy cheeks.
Use white or light blue for the cloud against pastel backgrounds. This kawaii-inspired design is sweet and simple.
10. Moon & Star Cute Pots
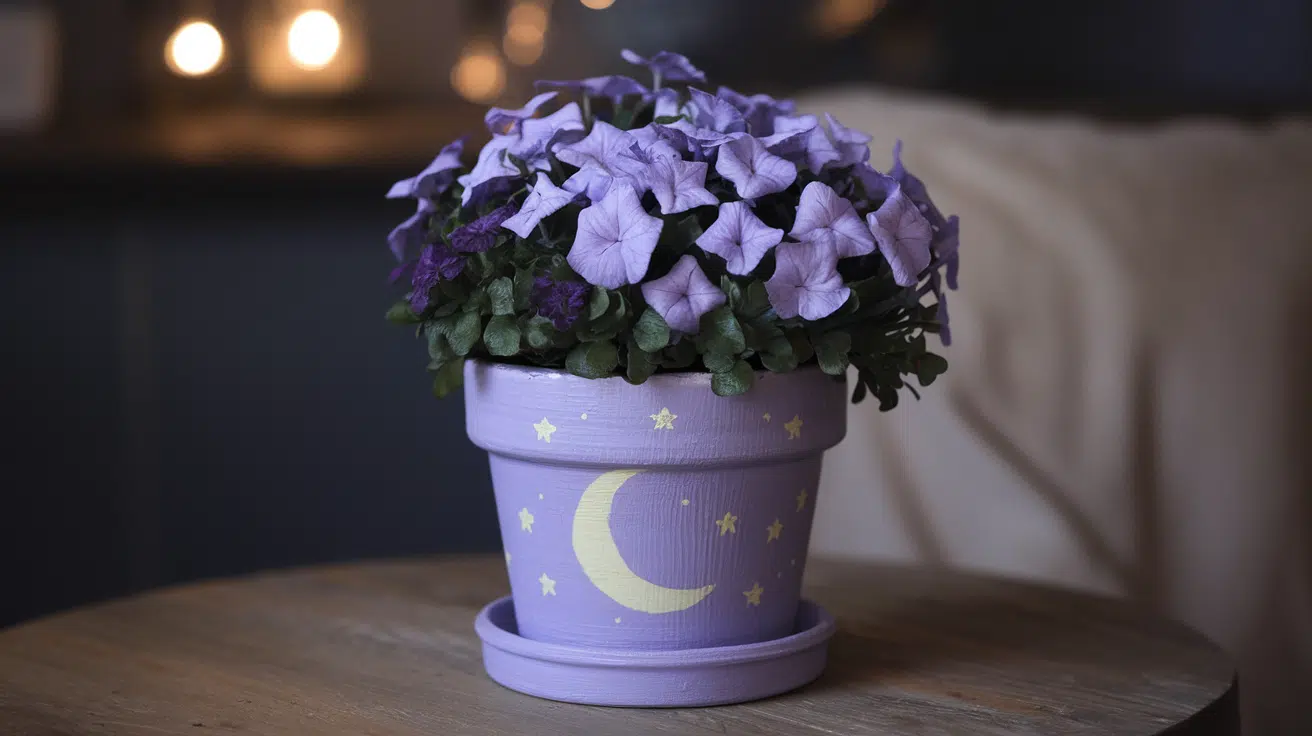
Paint a crescent moon in soft yellow or white on your pot.
Add 3-5 tiny stars scattered around it using the same color.
Choose pastel backgrounds like lavender or dusty blue for a dreamy effect. This celestial design works beautifully for nighttime-themed decor.
11. Micro-Confetti Pots
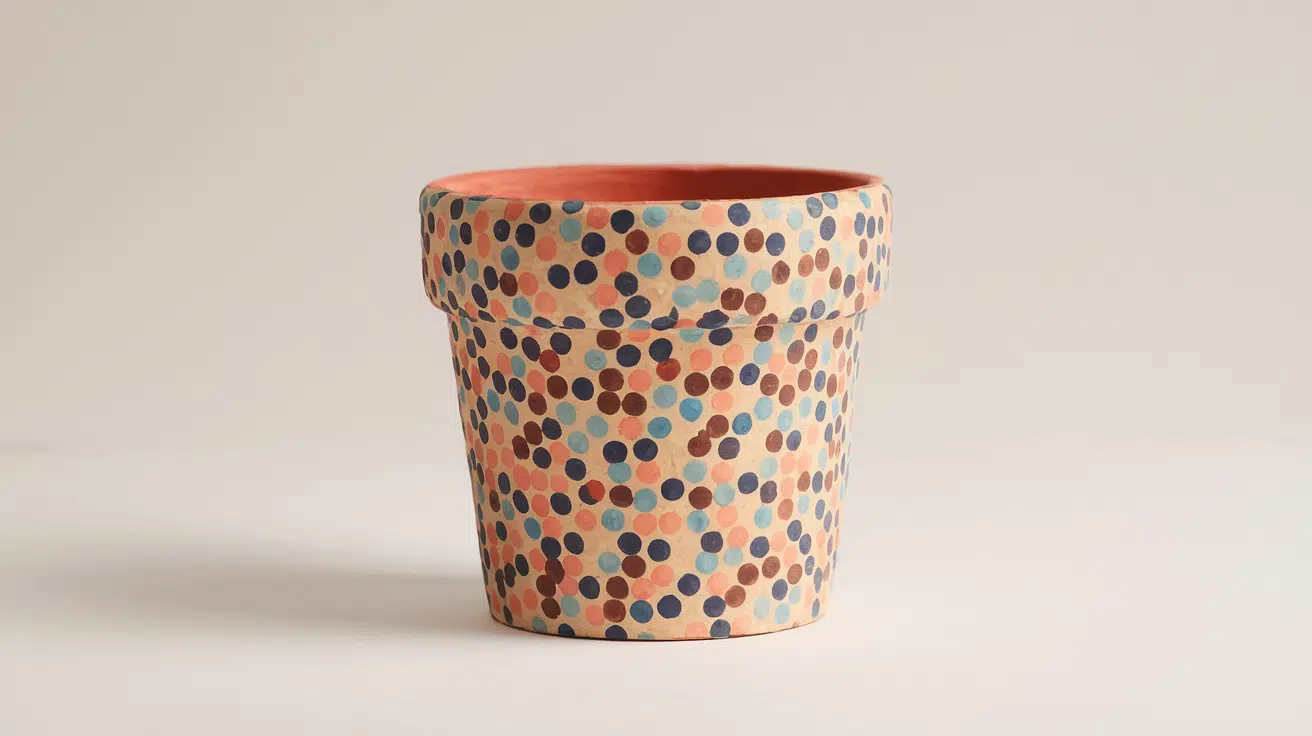
Use a toothpick or small brush to add tiny dots randomly across your pot. Stick to 2-3 colors from the same family for cohesion.
Space the dots far enough apart so the base color shows through. This subtle pattern adds texture without overwhelming the design.
Flower Pot Painting Ideas for Kids
Fun and easy flower pot painting ideas for kids that spark creativity, use bright colors, and turn simple pots into playful works of art.
12. Fingerprint Flower Stems

Let kids press their fingertips in paint to create flower petals in a circular pattern.
Use different colors for each flower to make a garden scene. Add simple green stems with a brush below each fingerprint flower.
This technique is easy for small hands and creates unique results every time.
13. Handprint Ocean Creatures
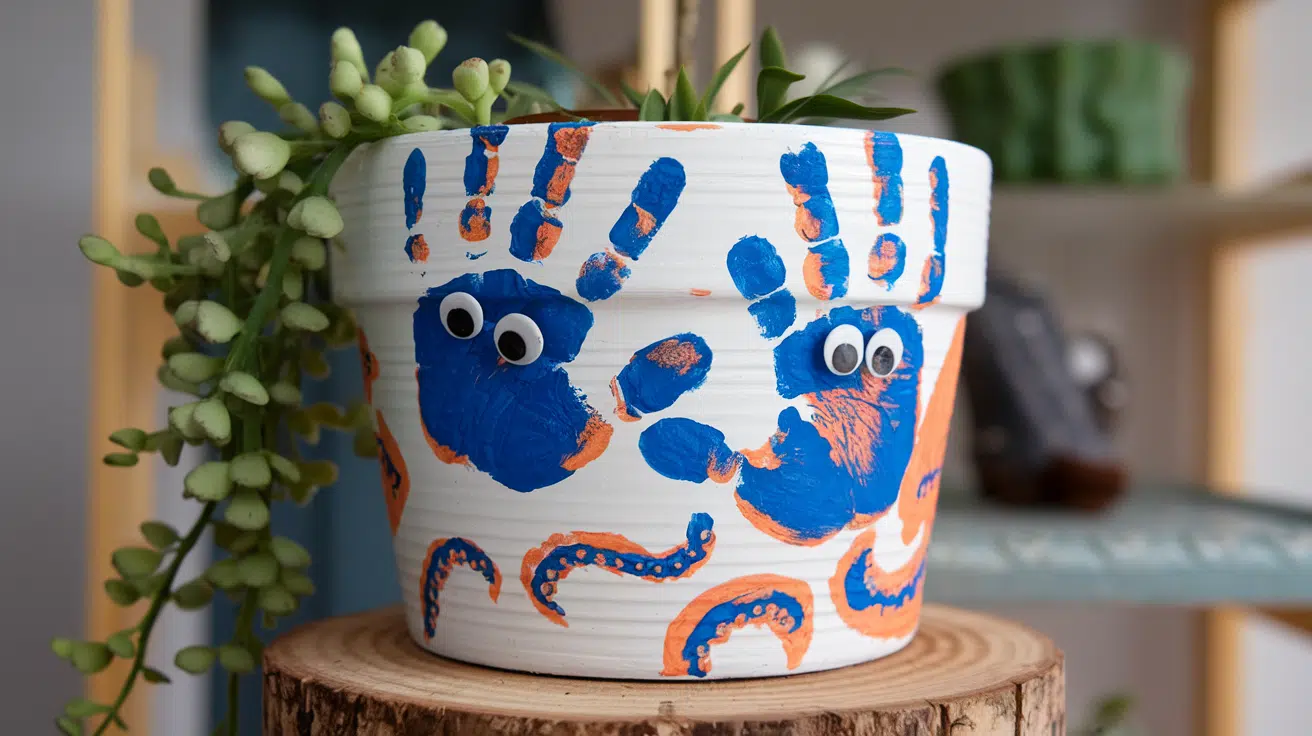
Have kids press their painted hands onto the pot to form sea creatures. Turn handprints sideways for fish or upside down for octopuses.
Add googly eyes or simple dots for faces after the handprints dry.
Each child’s handprint becomes a personalized ocean friend.
14. Rainbow Arch Pots

Paint one large rainbow arch centered on the pot instead of full stripes. Use the classic seven colors in thick bands.
Leave the rest of the pot in a solid sky blue or white.
This simplified rainbow is easier for kids to paint than wrapping stripes around the entire pot.
15. One-Eye Monster Pots

Paint a single oversized eye in the center of the pot with a colorful iris.
Add small horns, teeth, or tentacles around the edges for monster features.
Use bright, fun colors like purple, green, or orange for the base. This friendly monster design is simple enough for young artists.
16. Ladybug Count Pots
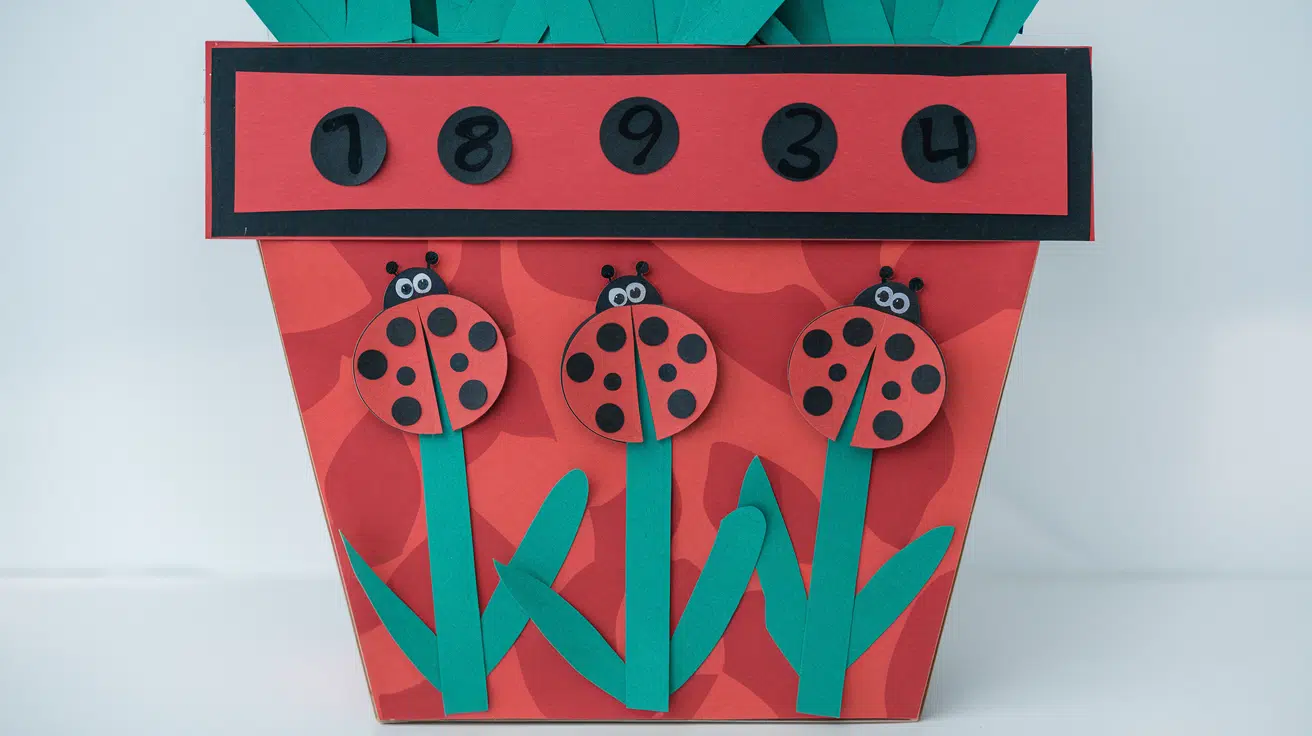
Paint the pot red and add black dots in groups that represent numbers. Label each group with the corresponding number for a learning element. Paint the rim black to represent the ladybug’s head.
This combines art with early math skills in a playful way.
17. Patterned Name Pots

Write the child’s name in large block letters around the pot. Fill each letter with different patterns like stripes, dots, or zigzags.
Use multiple colors to make each letter distinct and eye-catching.
This personalized pot becomes a special keepsake they helped create.
18. Texture Sponge Pots
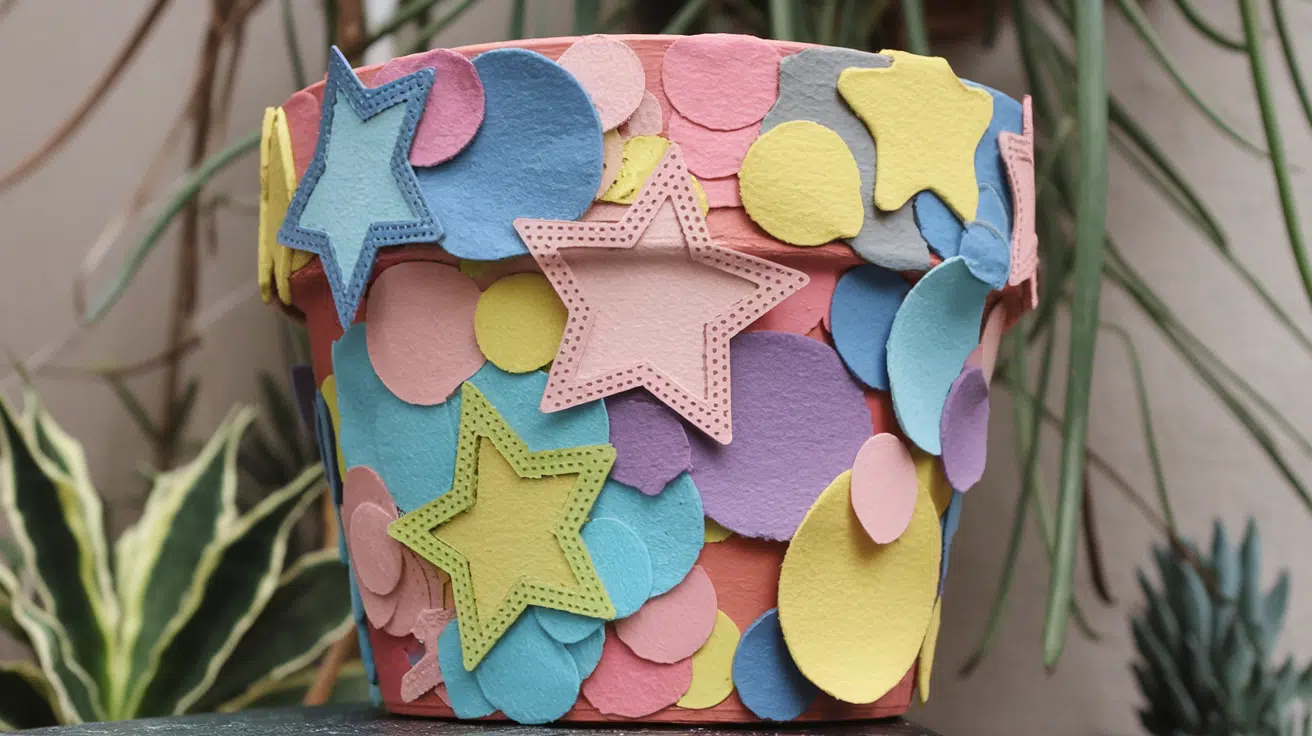
Cut sponges into shapes like stars, hearts, or circles for stamping.
Let kids dip and press the sponges all over the pot in different colors. Layer the stamps to create depth and interesting overlaps.
This mess-free technique gives great results with minimal painting skills needed.
19. Dinosaur Track Pots

Use a stamp or stencil to add dinosaur footprints walking around the pot.
Alternate between different track sizes to suggest various dinosaur species. Paint the background in earthy tones like brown or green.
Kids love the prehistoric theme without needing to paint complex dinosaur shapes.
Aesthetic & Creative Flower Pot Painting Ideas for Adults
Elegant and aesthetic flower pot painting ideas for adults that blend creativity, modern design, and artistic expression to elevate any indoor or outdoor space.
20. Radial Mandala Dot Pots
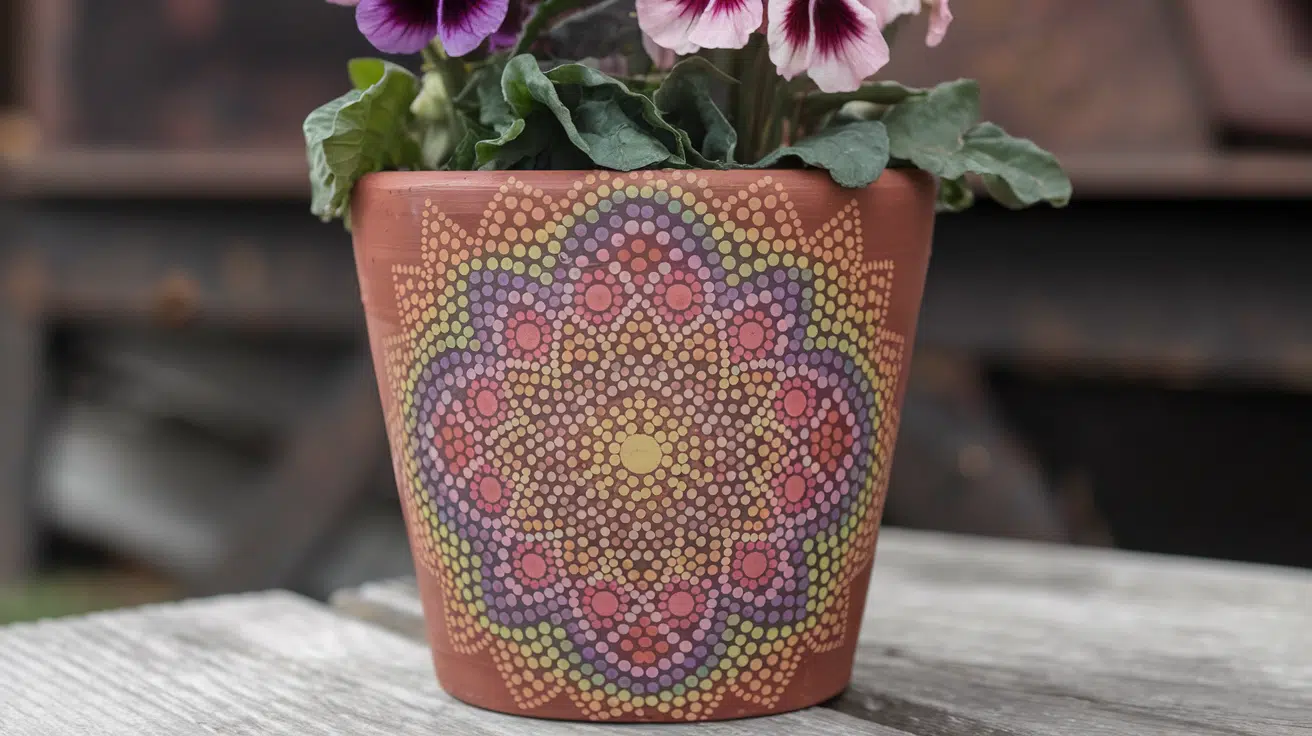
Start at the center bottom of your pot and create symmetrical dot patterns radiating outward. Use a dotting tool or pencil eraser for perfect circles.
Build layers with different colors, keeping the pattern balanced on all sides.
This meditative technique creates intricate designs that look complex but use simple repetition.
21. Continuous Line Portrait Pots
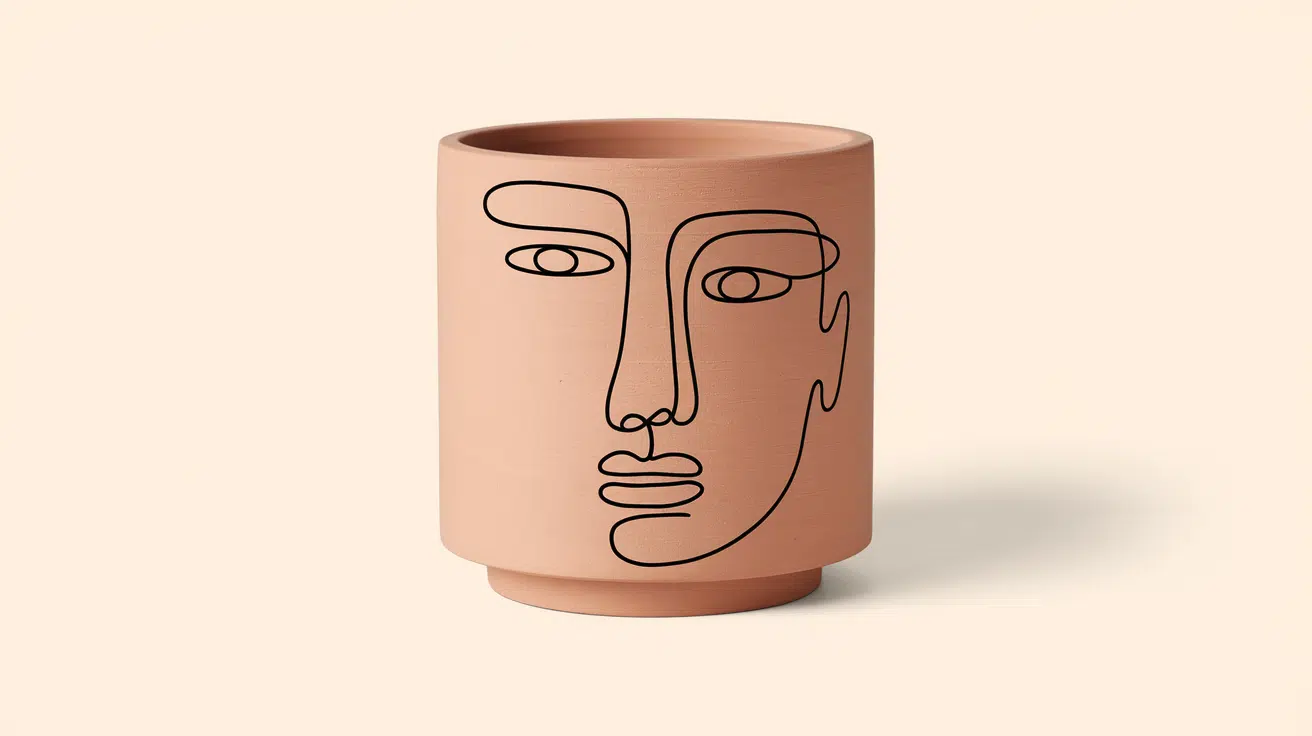
Draw a face or figure using one unbroken line without lifting your brush.
Start at one point and let the line flow naturally to create features. Use black paint on a white or neutral base for maximum contrast.
This modern art technique creates abstract yet recognizable portraits.
22. Earth-Tone Geometric Pots
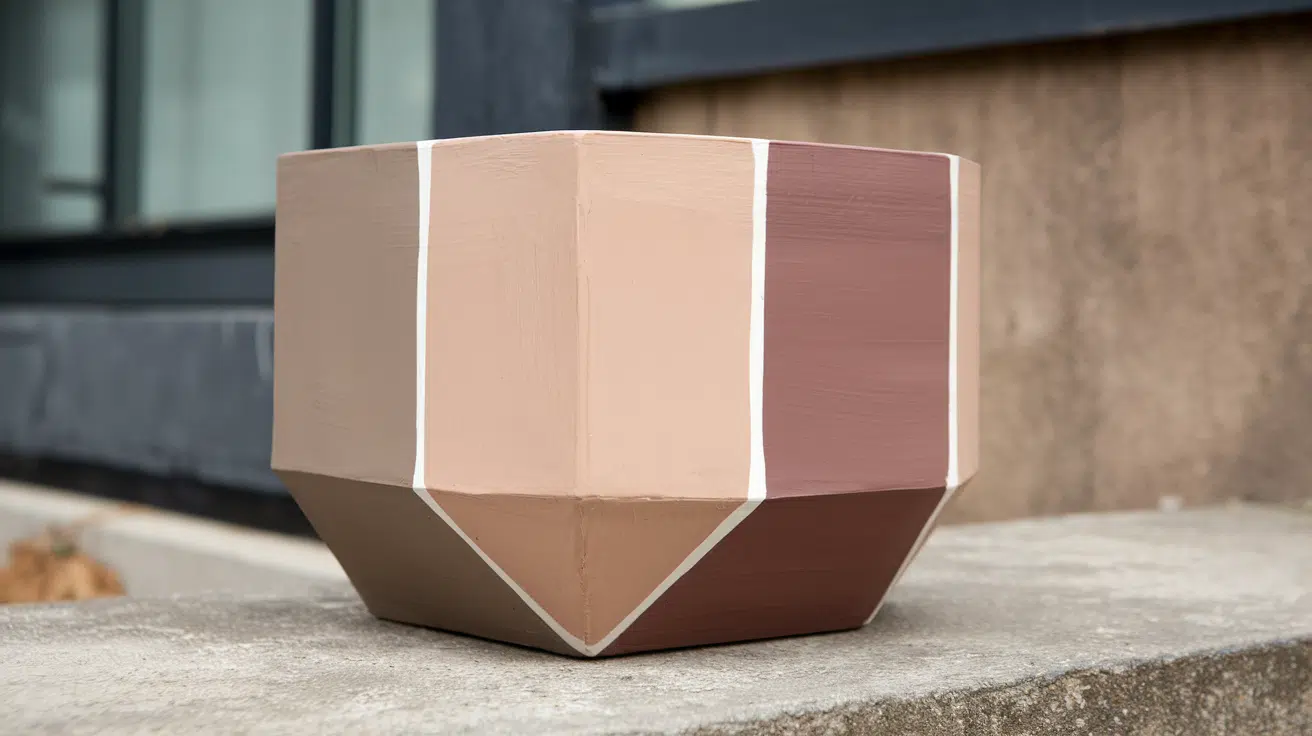
Divide your pot into sections using tape to create sharp geometric shapes. Paint each section in muted colors like terracotta, sage, mustard, and cream.
Remove the tape carefully to reveal clean lines between shapes.
These refined tones work beautifully with natural home decor.
23. Negative Space Abstract Pots
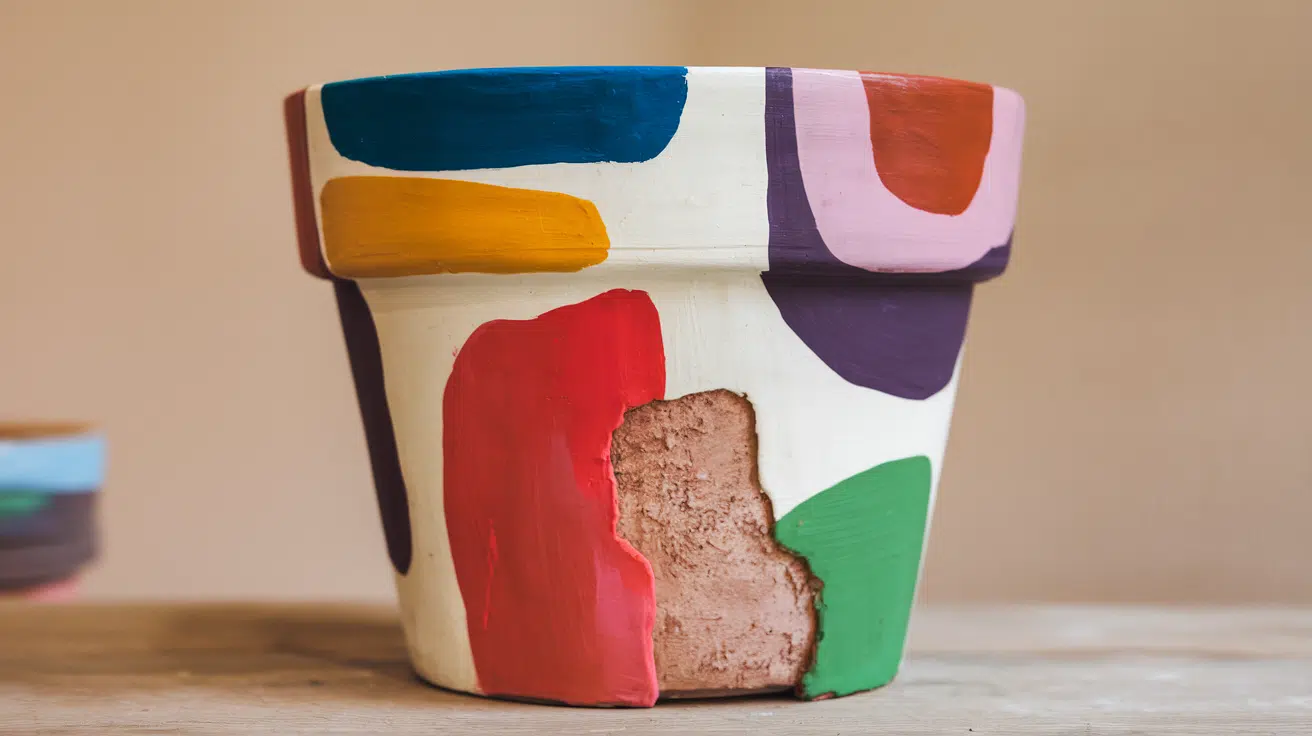
Plan your design so the unpainted clay becomes part of the artwork.
Paint bold shapes or patterns, leaving strategic gaps that form secondary designs. The raw pot color contrasts with the painted areas to create visual interest.
This technique celebrates the natural material while adding artistic flair.
24. Botanical Line Illustration Pots
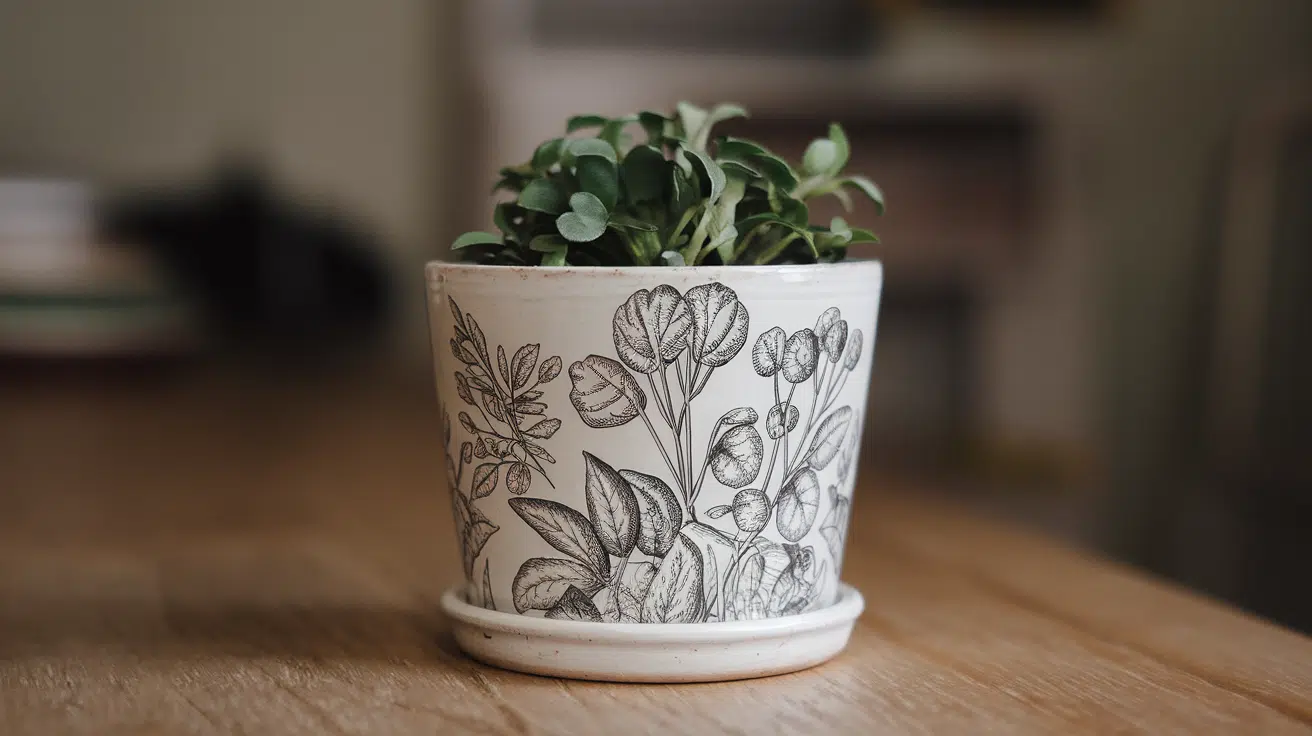
Use a fine brush or paint pen to draw delicate leaves, stems, or branches.
Keep the lines thin and sketch-like without filling in color. Draw directly onto a white or cream base for a fresh, minimalist look. This technique mimics botanical journal illustrations for an educational, artistic vibe.
25. Raw Clay & White Dip Pots

Leave the bottom half of your terracotta pot completely unpainted. Dip or paint only the upper portion in crisp white paint.
Create a clean, straight line where the two sections meet.
This simple two-tone design highlights the natural beauty of clay while adding modern style.
26. Vertical Ombre Fade Pots
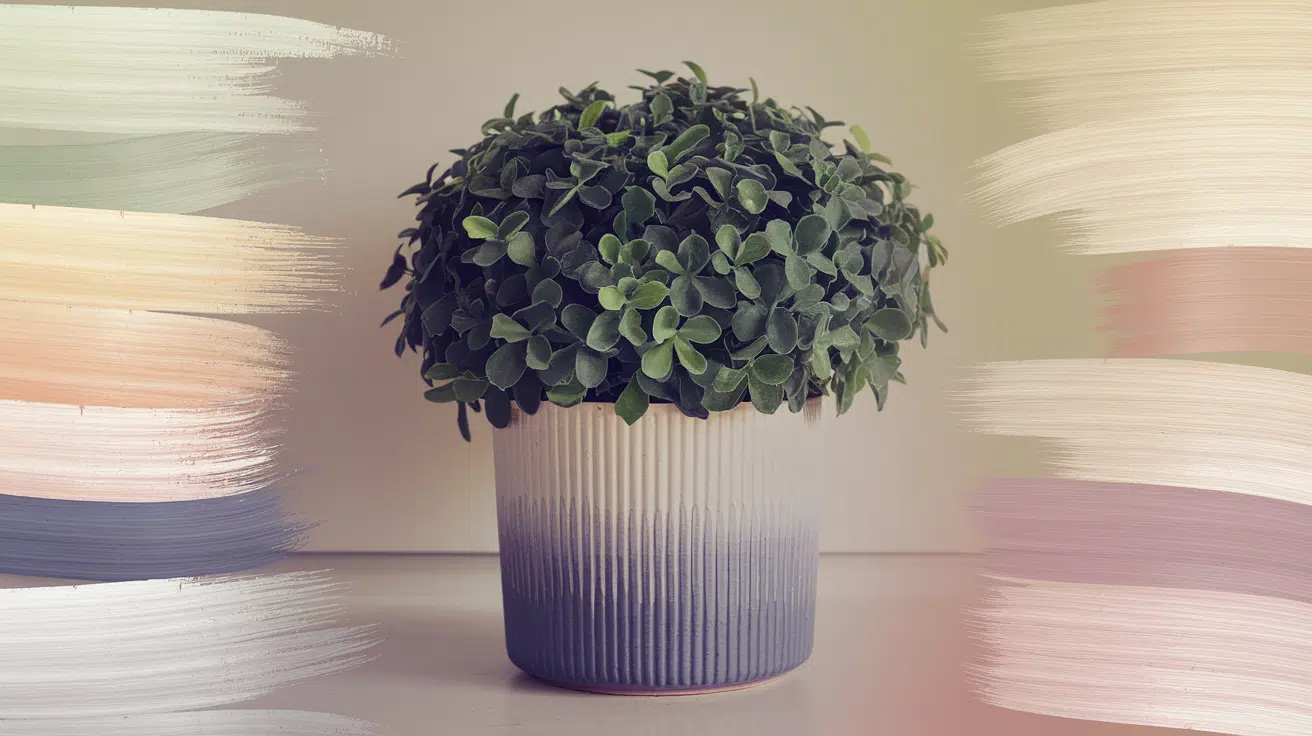
Blend paint from dark at the top to light at the bottom in vertical strokes.
Work quickly while the paint is wet to achieve smooth color transitions.
Use colors from the same family, like navy to sky blue, for cohesive fading. This gradient technique differs from circular ombre by emphasizing height.
27. Matte Charcoal with Gold Foil Pots

Paint your entire pot in matte charcoal or deep gray. After it dries completely, apply gold foil sheets or leafing to random areas. Press gently to adhere, then brush away excess for an organic metallic pattern.
The contrast between matte and metallic creates luxury without paint.
28. Writable Label Band Pots
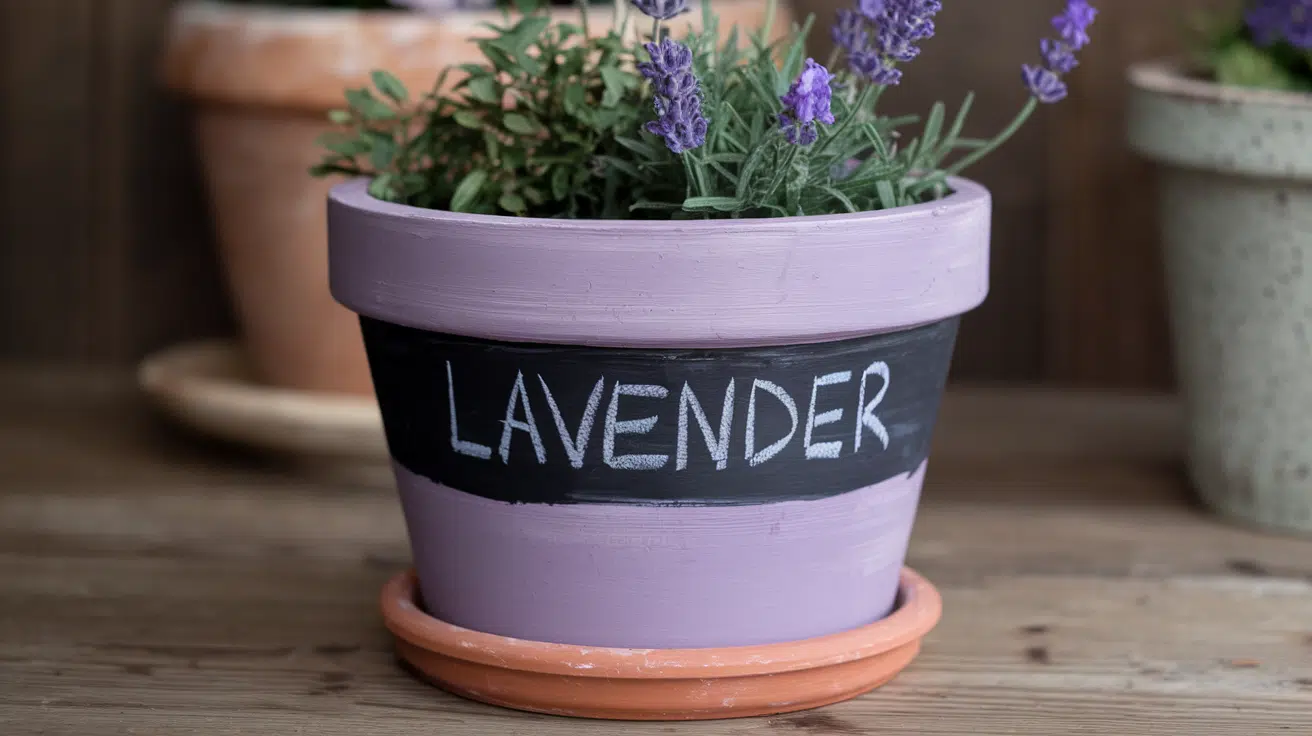
Paint a single horizontal stripe around the middle of your pot with chalkboard paint. Leave the rest in terracotta, white, or any solid color you prefer.
Use chalk to write plant names, dates, or care instructions on the band. This functional design lets you update labels without repainting.
29. Mineral Texture Pots

Mix fine sand, modeling paste, or texture medium into your acrylic paint before applying.
Build up layers for a rough, stone-like surface that mimics natural minerals.
Use earthy colors like gray, tan, or rust for authentic rock texture. Seal with matte varnish to protect the dimensional surface while maintaining the organic look.
Step-by-Step Guide: How to Paint a Flower Pot
Painting a flower pot is simple when you follow the right steps. Here’s everything you need to know.
What You’ll Need
- Gather acrylic paint, brushes in different sizes, white primer, and clear sealer.
- You’ll also need painter’s tape, a pencil, paper towels, and water for rinsing.
- For outdoor pots, use weather-resistant paint or sealer.
Step 1: Clean Your Pot
Wash the pot with soap and warm water. Scrub off any dirt or dust. Dry it completely before moving to the next step. Paint won’t stick to dirty or wet surfaces.
Step 2: Apply Primer
Cover the pot with a thin coat of white primer. This helps colors look brighter and makes paint stick better. Let it dry for 1-2 hours.
Step 3: Paint the Base Coat
Apply your background color in thin, even layers. Let each coat dry completely. Most pots need 2-3 coats for solid coverage.
Step 4: Sketch Your Design
Lightly draw your design with a pencil once the base is dry. Use painter’s tape for straight lines. Keep sketches faint so they won’t show through paint.
Step 5: Paint Your Design
Use smaller brushes to paint your design. Work from large shapes to small details. Let each color dry before adding another next to it.
Step 6: Add Final Details
Add dots, lines, or highlights with a fine brush or toothpick. These small touches make your design look complete and polished.
Step 7: Let It Dry
Leave your pot untouched for 24 hours. Paint needs this time to fully dry, even if it feels dry on top.
Step 8: Seal Your Design
Apply 2-3 thin coats of clear sealer over everything. Let each coat dry between applications. This protects your design from water and fading.
Step 9: Cure Before Use
Wait 3-5 days before adding soil and plants. This lets the paint and sealer fully harden.
Quick Tips
- Work in thin layers for the best results.
- Test your design on paper first.
- Be patient and let each step dry properly before moving forward.
Best Paints & Supplies for Flower Pot Painting
Using the right materials makes your painted pots look better and last longer.
Paint Types
- Acrylic paint works best for most pots. It dries fast and comes in every color. Use outdoor acrylic for pots that sit outside.
- Chalk paint creates a matte, vintage look.
- Spray paint covers large pots quickly with smooth, even coats.
Brushes You Need
- Flat brushes handle base coats and large areas.
- Round brushes work for details and curves.
- Liner brushes create fine lines and lettering.
- Foam brushes give streak-free coverage.
Primers and Sealers
- White primer helps paint stick and makes colors brighter.
- Gesso works well on terracotta pots.
- Matte sealer protects without shine.
- Glossy sealer gives a polished finish and extra water resistance.
- Spray sealer dries fast and won’t smudge details.
Conclusion
Painting flowerpots is an easy way to add personality to your space. You now have the designs, steps, and supply tips to create custom pots.
Pick a design you love, gather your materials, and start painting. Don’t worry about perfection, just have fun making it your own.
Your plants deserve beautiful homes. Grab your brushes and start creating today!