DIY Bathroom Vanity Makeover: Before and After
A tired, worn-out bathroom vanity can make your entire bathroom look old and dated.
I know because I stared at my ugly vanity every morning for years.
Like many homeowners, I worried that fixing it would cost thousands of dollars and require professional help.
But here’s the good news – you can make your vanity look brand new without breaking the bank. I’ve learned simple techniques that can transform even the most basic vanity into something beautiful.
In this post, I’ll show you my favorite tips and methods to give your bathroom vanity a fresh look.
Get ready to roll up your sleeves and create a space you’ll love.
Planning Your Vanity Makeover
Before I started working on my bathroom vanity, I learned that good planning makes all the difference.
First, take a close look at your vanity’s current state.
Check the cabinet doors, drawer fronts, and counter surface. Write down what needs fixing or updating.
Here’s what I consider essential before starting:
- Set a budget for your materials
- Measure your vanity’s size – width, height, and depth
- List the tools you already have and what you’ll need to buy
- Pick your paint colors and finishes
- Plan how long you can have your bathroom out of service
I always take “before” photos of my vanity. These help me track my progress and remind me of spots that need extra attention.
Don’t forget to check under the sink for any water damage or signs of leaks.
My Vanity Before the Transformation
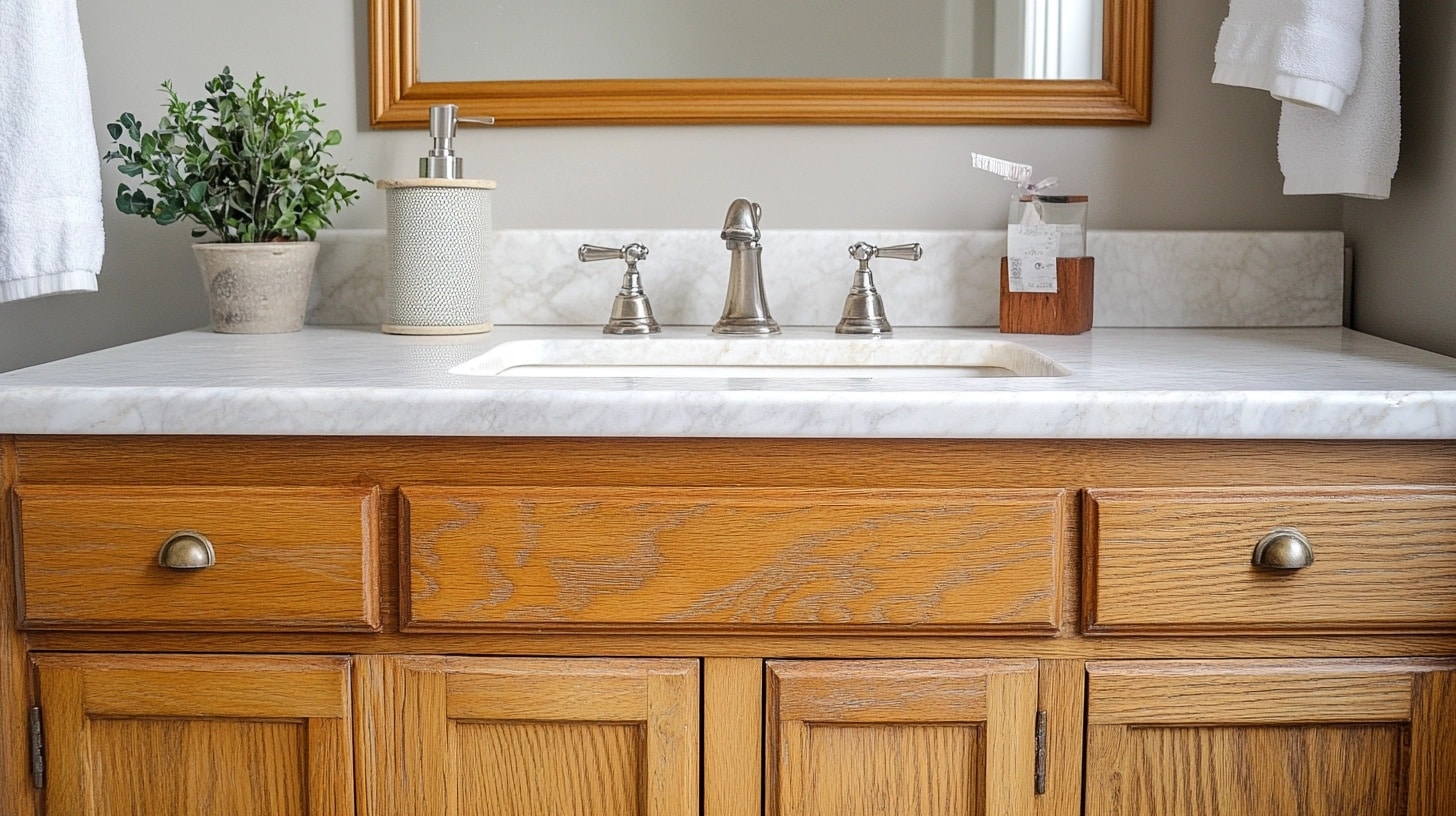
I want to be honest with you about my starting point.
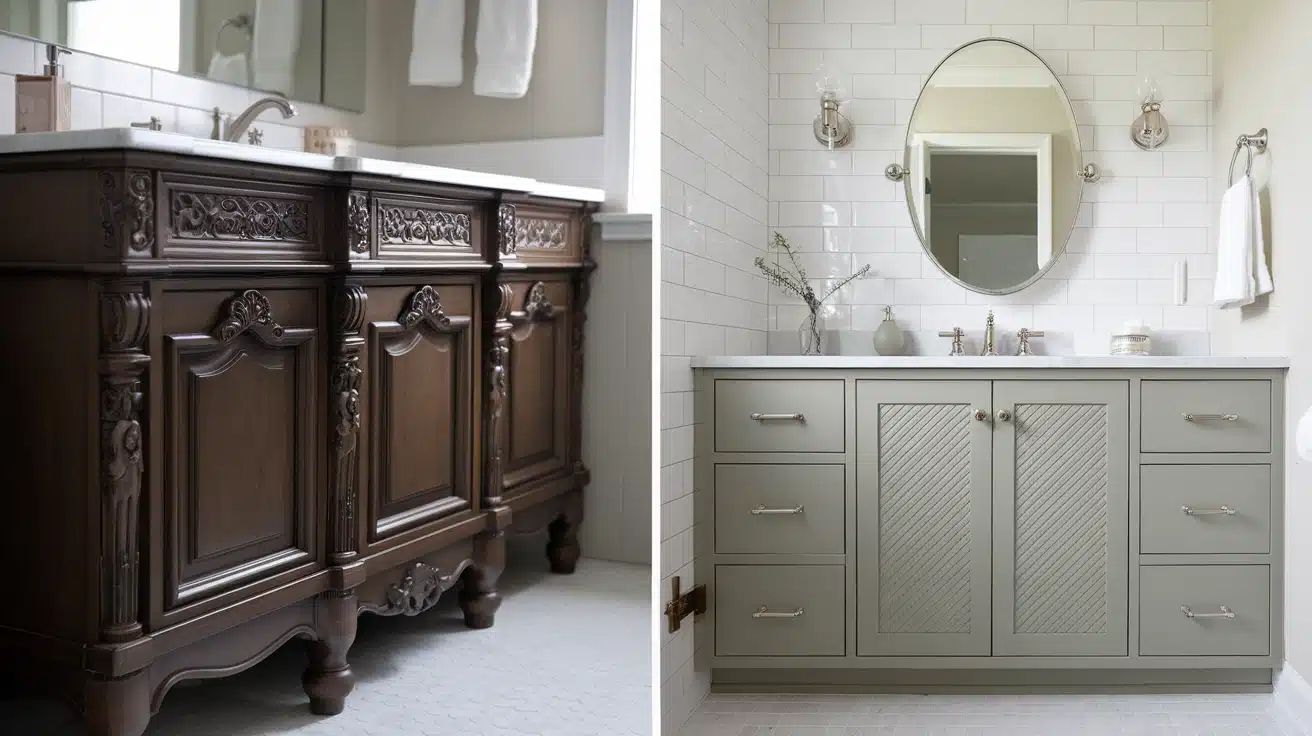
My old vanity had seen better days. The oak cabinet doors from the 1990s had turned yellow, and the finish was peeling off in several spots. Water stains dotted the countertop, making it look dirty even when it was clean.
The handles on my drawers were not only outdated but loose, creating that annoying rattle every time I opened them.
The white caulk around the sink had turned yellow, and small cracks had formed where the backsplash met the wall.
Storage was another issue.
The cabinet space wasn’t working for me – bottles of cleaning supplies would get lost in the back, and I’d find expired items from three years ago hiding in corners.
These problems made my morning routine less pleasant.
But instead of feeling stuck with an outdated vanity, I saw it as a chance to create something better.
Tools and Materials Needed
| Tools | Materials |
|---|---|
| Orbital sander | TSP cleaner |
| Detail sander | Bondo wood filler |
| Paint sprayer/Microfiber roller | Urethane enamel paint |
| Utility knife | Primer |
| Paint brush | Pull wrap |
| Multi-tool | Loctite glue |
| Pin nailer | Cup hooks |
| Speed square | Drawer slides |
| Drill | Cabinet hardware |
| Rubber mallet | Rubber bumpers |
| Counter bit | Soft-close hinges |
| Tape measure | Sandpaper (220 & 400-600 grit) |
Step-by-Step Bathroom Vanity Makeover Process
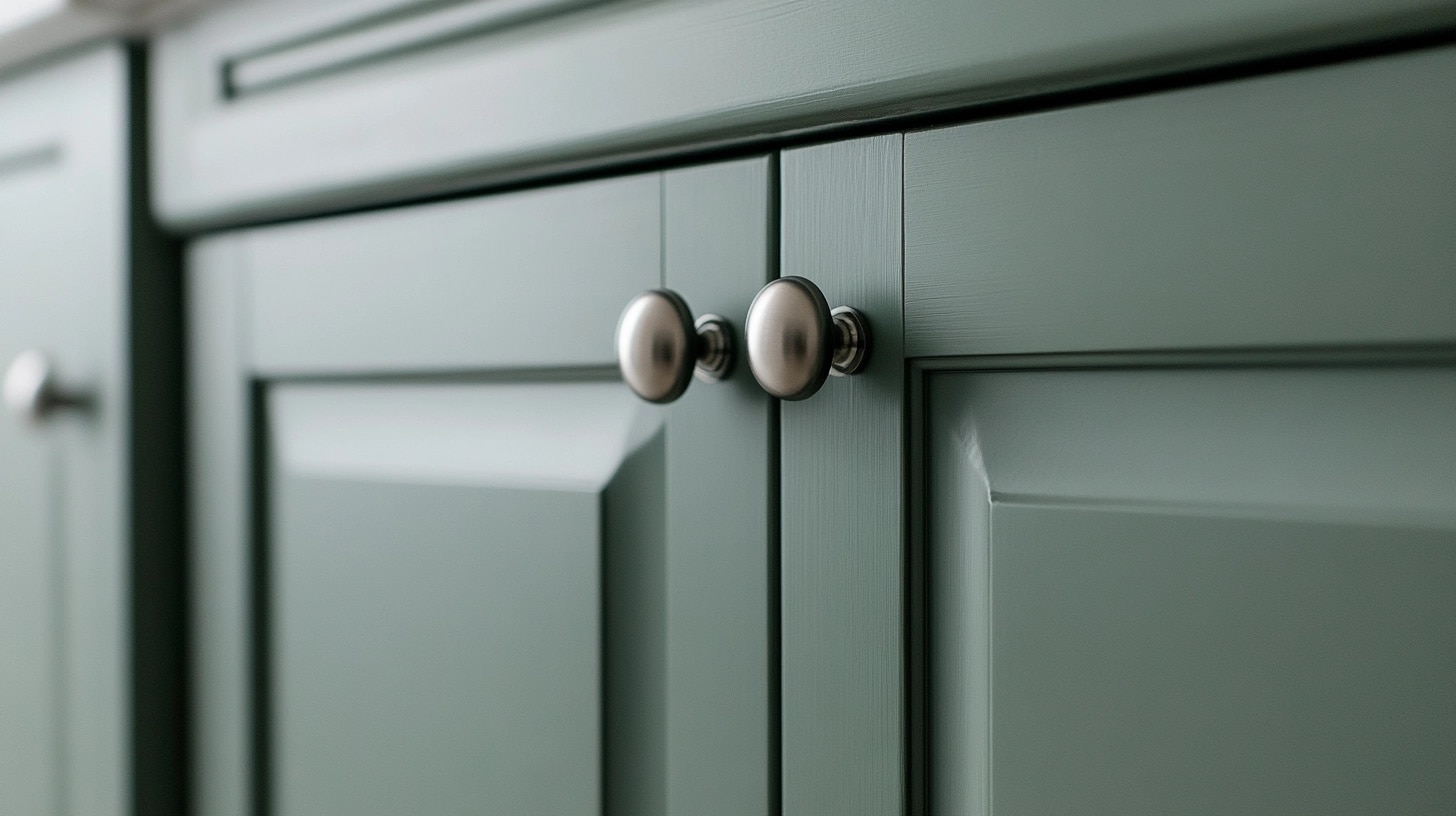
1. Initial Preparation
Before starting any makeover work, proper preparation is essential.
Begin by clearing out all items from your vanity and creating a clean workspace. Documentation is key – take “before” photos from multiple angles to track your progress.
Key steps:
- Remove all hardware parts systematically:
- Door hinges and handles
- Drawer pulls and slides
- Old rubber bumpers
- Store hardware in labeled bags if reusing
TSP cleaning process:
- Mix 2 cups TSP per gallon of warm water
- Wear rubber gloves and protective eyewear
- Wipe down all surfaces thoroughly
- Pay special attention to greasy or grimy areas
- Let dry completely (typically 2-3 hours)
2. Surface Preparation
This stage creates the foundation for a professional finish. Your vanity’s final look depends heavily on proper surface prep.
Start by examining the entire vanity for damages or holes that need filling.
- Fill old hardware holes with Bondo wood filler
- Mix hardener with filler until light blue
- Apply 220-grit sandpaper with orbital sander for main surfaces
- Use contour sander blocks for grooves and detailed areas
- Sand until surface feels smooth and even
- Clean off all dust thoroughly
3. Pull Wrap Installation
Pull wrap adds a modern touch to your vanity’s appearance. This process requires patience and precision for professional results.
Measurement and cutting:
- Measure each surface twice for accuracy
- Add 1/8 inch extra for trimming
- Cut pull wrap using sharp utility knife
- Create test pieces for complex areas
Application process:
- Spread Loctite glue evenly
- Place wood blocks between layers
- Allow 24 hours for complete drying
- For vertical surfaces:
- Use pin nails for security
- Space nails every 8-10 inches
- Counter-sink all nail heads
4. Hardware Preparation
Good hardware preparation ensures smooth operation and professional appearance.
Take time to plan and mark all locations accurately.
Pre-painting preparation:
- Insert cup hooks in bottom edges
- Space hooks 2-3 inches from corners
- Create stable hanging system
- Test weight capacity before painting
Hardware layout:
- Mark all new hardware locations
- Use template for consistent spacing
- Pre-drill pilot holes
- Test-fit hardware before final install
- Adjust positions as needed
5. Painting Process
The painting stage transforms your vanity’s appearance. Proper technique here is crucial for a lasting finish.
Primer application:
- Use quality bonding primer
- Apply thin, even coats
- Let dry between coats
- Sand lightly after primer dries
Paint application:
- Choose urethane enamel paint
- Use microfiber roller for smooth finish
- Apply 2-3 thin coats
- Allow proper drying time
- Wet-sand between coats if needed
6. Hardware Installation
Installing hardware requires attention to detail and precise measurements for proper function.
- Install soft-close hinges (check overlap measurements)
- Mount drawer slides with proper spacing
- Add rubber bumpers to all doors
- Attach new handles and pulls
- Test all moving parts for smooth operation
- Make adjustments as needed
7. Final Touches
The final stage brings everything together and ensures lasting quality.
Finishing steps:
- Install toe kick securely
- Add final paint touch-ups
- Clean all surfaces thoroughly
- Check all alignments
- Test all moving parts
Quality checks:
- Inspect all painted surfaces
- Test drawer operation
- Check door alignment
- Verify hardware tightness
- Clean fingerprints and dust
For a more detailed tutorial on bathroom vanity makeover, check out the below video:
My Bathroom Vanity After
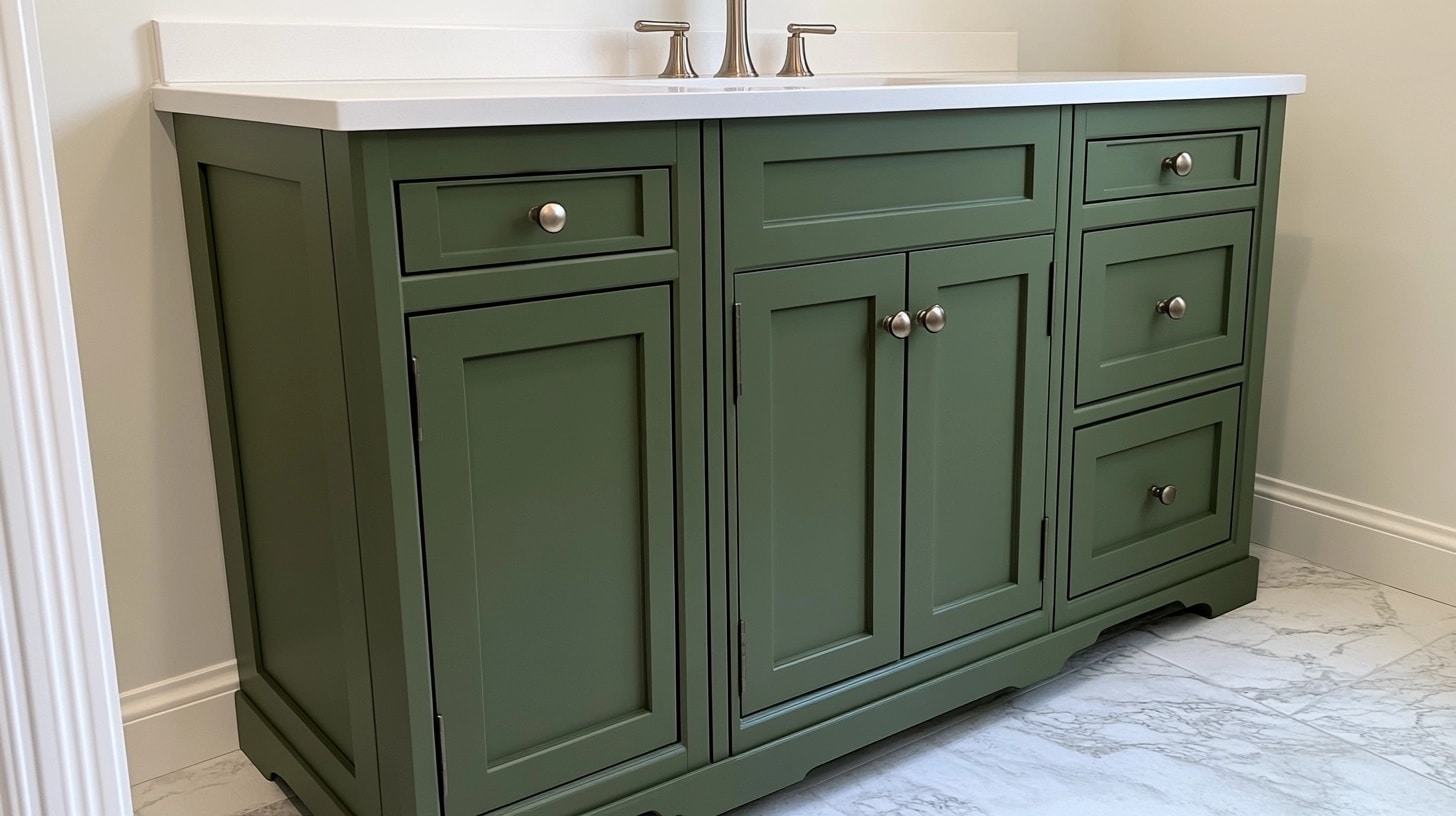
I can hardly believe this is the same vanity I struggled with for years.
The pewter green paint has given it a fresh personality, making it the bathroom’s centerpiece. The door panels, upgraded with pull wrap, add texture and depth that catches light beautifully.
Here’s what made the biggest difference:
- The soft-close hinges give the doors a luxurious feel. No more slamming sounds!
- The new Paris ball knobs and matching bar pulls from Battle Creek Hardware blend modern style with classic charm
- Fresh rubber bumpers keep the doors closing smoothly and protect the paint
- The side panel treatment makes the vanity look like a custom-built piece
What really makes me smile is how the drawer slides work now. They glide smoothly, and everything lines up perfectly.
The microfiber roller gave the paint such a smooth finish – you’d never guess this was a DIY project.
The best part? This transformation saved me thousands compared to buying a new vanity.
Plus, it gave me exactly what I wanted in terms of style and function.
Every morning when I walk into the bathroom, I feel proud of what I accomplished with some basic tools, patience, and attention to detail.
Maintenance and Care Tips Post-Makeover
As someone who used to struggle with cabinet upkeep, I want to share these simple but effective care tips that have helped me maintain my vanity’s new look.
- Clean the cabinet surfaces monthly with a soft, damp cloth and mild soap to prevent buildup
- Avoid using harsh chemicals or abrasive cleaners that could damage the paint finish
- Wipe spills immediately to prevent water damage or staining on the painted surfaces
- Check and tighten hardware every three months as daily use can loosen screws and handles
- Keep drawer tracks clean and free of debris for smooth operation
- Address any chips or scratches promptly with touch-up paint to prevent moisture damage
- Use drawer organizers to prevent items from scratching the interior surfaces
- Inspect under-sink areas regularly for any signs of water leaks or moisture issues
- Clean hinges and drawer slides twice a year with a dry cloth to prevent dust accumulation
- Keep cabinet doors closed when not in use to protect the finish from bathroom moisture
- Apply furniture wax once a year to maintain the paint’s sheen and protect the finish
- Check caulking around the vanity top annually and reseal if needed
- Test drawer slides and door hinges every few months for proper alignment
- Keep a spare container of your paint color for future touch-ups if needed
Summing It Up
A bathroom vanity makeover might seem like a big task, but I hope this guide shows you it’s completely doable.
From the initial prep work to the final hardware installation, each step builds toward creating a custom piece that fits your style and budget.
If you’re looking at your tired vanity right now, wondering if you can do this – yes, you absolutely can.
Start small, follow the steps, and take your time.
The satisfaction of opening those smooth-gliding drawers and touching up that perfect paint finish makes it all worthwhile.

