Create Your Perfect Baking Pan Organizer: DIY Solutions for Every Kitchen
Does the clatter of falling baking pans make you wince? I’ve been there.
Every time I opened my kitchen cabinet, it was like playing a risky game of Jenga with my cookware.
But here’s what changed everything: I created my own pan storage system.
Making your own pan organizer isn’t just about saving money – it’s about building something that fits your exact needs and space. In my small kitchen, every inch matters, and I bet yours does, too.
I’ll show you several simple ways to create storage that works for your pans, your space, and your budget.
You can set up these fixes today using materials you might already have at home.
Step-by-Step DIY Baking Pan Organizer Guide
Tools and Materials Required
| Item | Estimated Cost |
|---|---|
| Cordless saw | $80 (if not already owned) |
| Square (for marking) | $10 |
| Measuring tape | $10 |
| Drill | $50 (if not already owned) |
| Screwdriver/Impact driver | $30 (if not already owned) |
| Pencil | $1 |
| Chalk reel | $5 |
| Ruler | $5 |
| 1/2″ thick plywood sheet | $25 |
| Screws (drywall screws recommended) | $5 |
| 2 sets of 5/8″ wood pieces (dividers) | $10 |
| Wood glue (optional) | $5 |
| Finish (optional) | $10 |
Step 1 Measure and Plan
Start by measuring the inside of your cabinet to ensure the organizer will fit. Plan your cuts accordingly, with a depth of 20 inches for all pieces.
Step 2 Cut the Plywood
Using a cordless saw, cut your plywood into the following pieces:
- Top and Bottom Panels: Cut the plywood to 12 inches wide and 21.5 inches long.
- Side Panels: Two side panels, each 21.5 inches tall.
- Dividers: Cut smaller pieces of plywood into 5/8″ strips for the dividers.
Step 3 Assemble the Bottom and Side Panels
Attach the bottom panel to the left and right side panels. Secure them with screws. Drill pilot holes to prevent splitting and ensure stability.
Step 4 Attach the Top Panel
Position the top panel and screw it into place on the side panels, ensuring everything is flush and secure.
Step 5 Cut Dados for Dividers (Optional)
If you want adjustable dividers, use a saw or router to cut grooves (dados) into the top and bottom panels where the dividers will sit. Align them for easy adjustments.
Step 6 Fit and Secure the Dividers
Insert the dividers into the dados or screw them in place based on your preference. Make sure they fit snugly but are adjustable if needed.
Step 7 Final Installation and Finishing
Slide the organizer into your cabinet and secure it in place. Optionally, apply a finish to the wood for a polished look.
By following these steps, you can efficiently complete the project, saving time and money while creating a functional and affordable organizer.
Other Types of Baking Pan Organizers
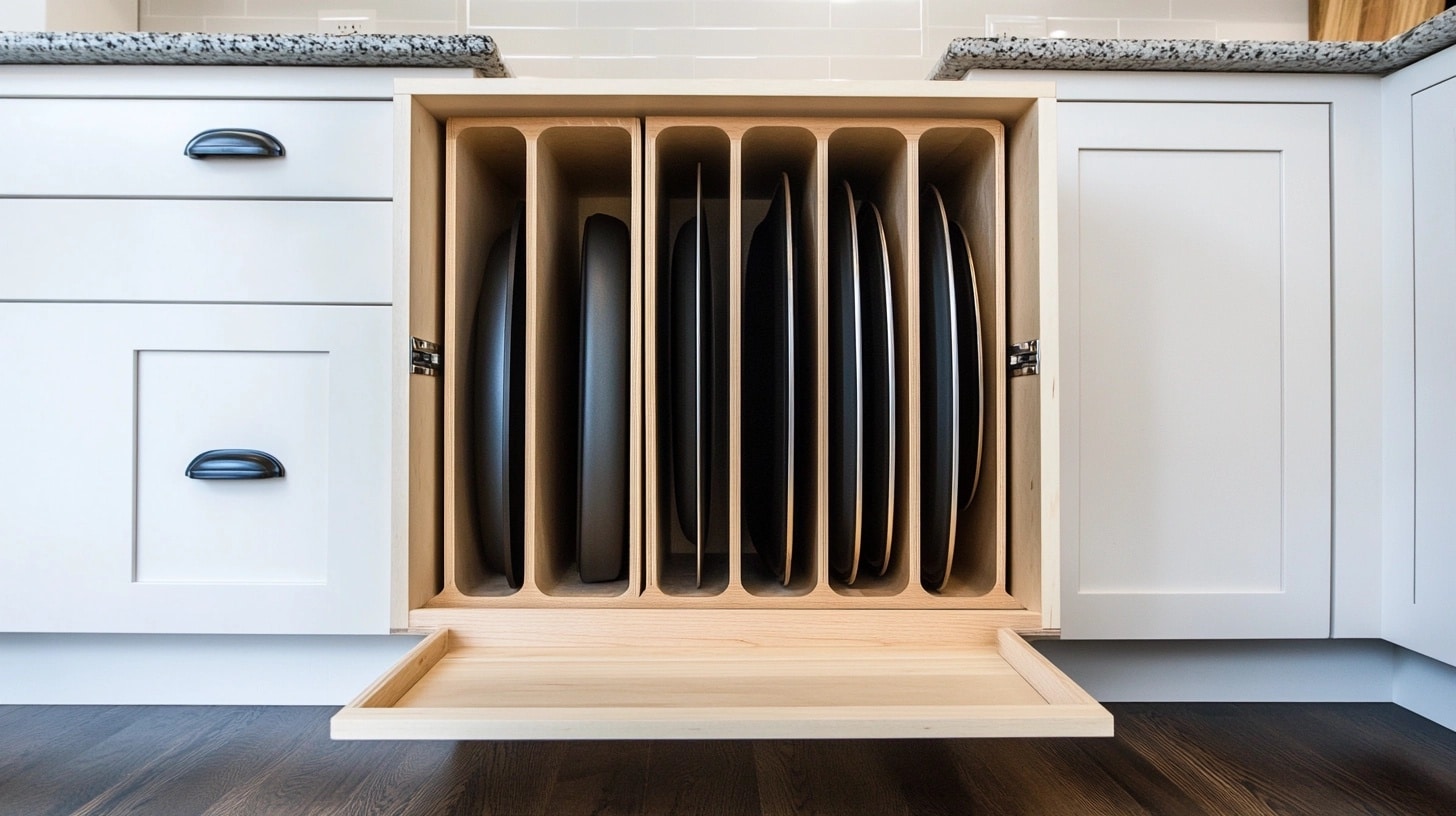
1. Pull-Out Baking Pan Organizer
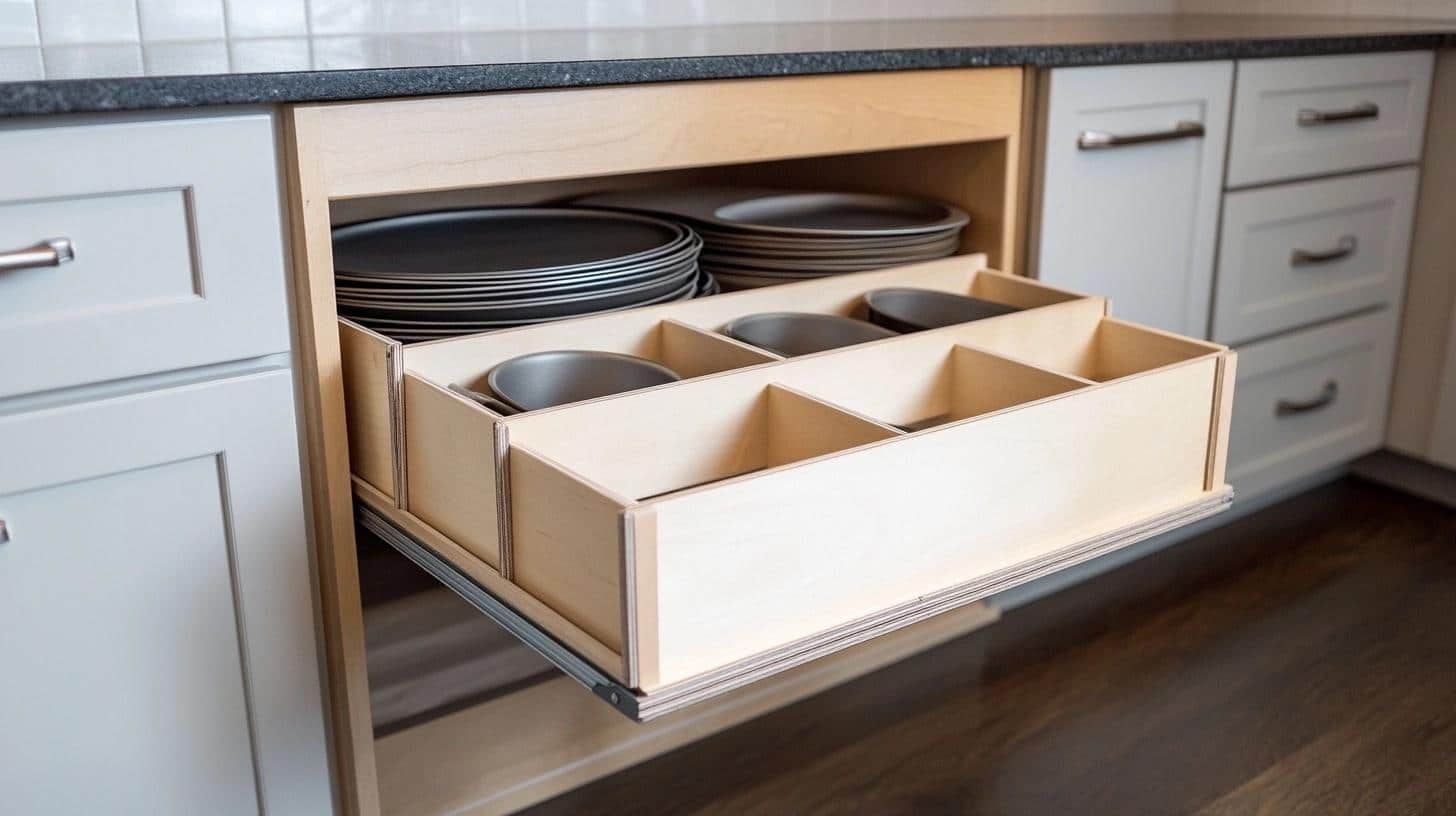
This slide-out system transforms messy cabinets into organized storage. Perfect for standard kitchen cabinets, it holds pans upright for quick access and better space use.
Materials and Tools:
| Materials | Tools |
|---|---|
| 3/4″ Plywood | Measuring Tape |
| 22″ Full-Extension Slides | Power Drill |
| 1×3 Pine Boards | Hand Saw |
| Wood Screws | Level |
| Wood Glue | Safety Gear |
| Non-slip Mat | Square |
| Cabinet Handle |
Steps:
- Base Setup: Cut plywood to cabinet size minus 2 inches total width. Mount slides level on cabinet walls. Attach the base to slides and test smooth movement.
- Frame Building: Create 6-inch high walls with 1×3 boards. Add corner supports. Secure all pieces with glue and screws.
- Final Assembly: Space dividers 2-3 inches apart. Add a front bar at 4-inch height. Line the bottom with a non-slip mat. Attach the handle. Test with pans.
2. Vertical Baking Pan Rack
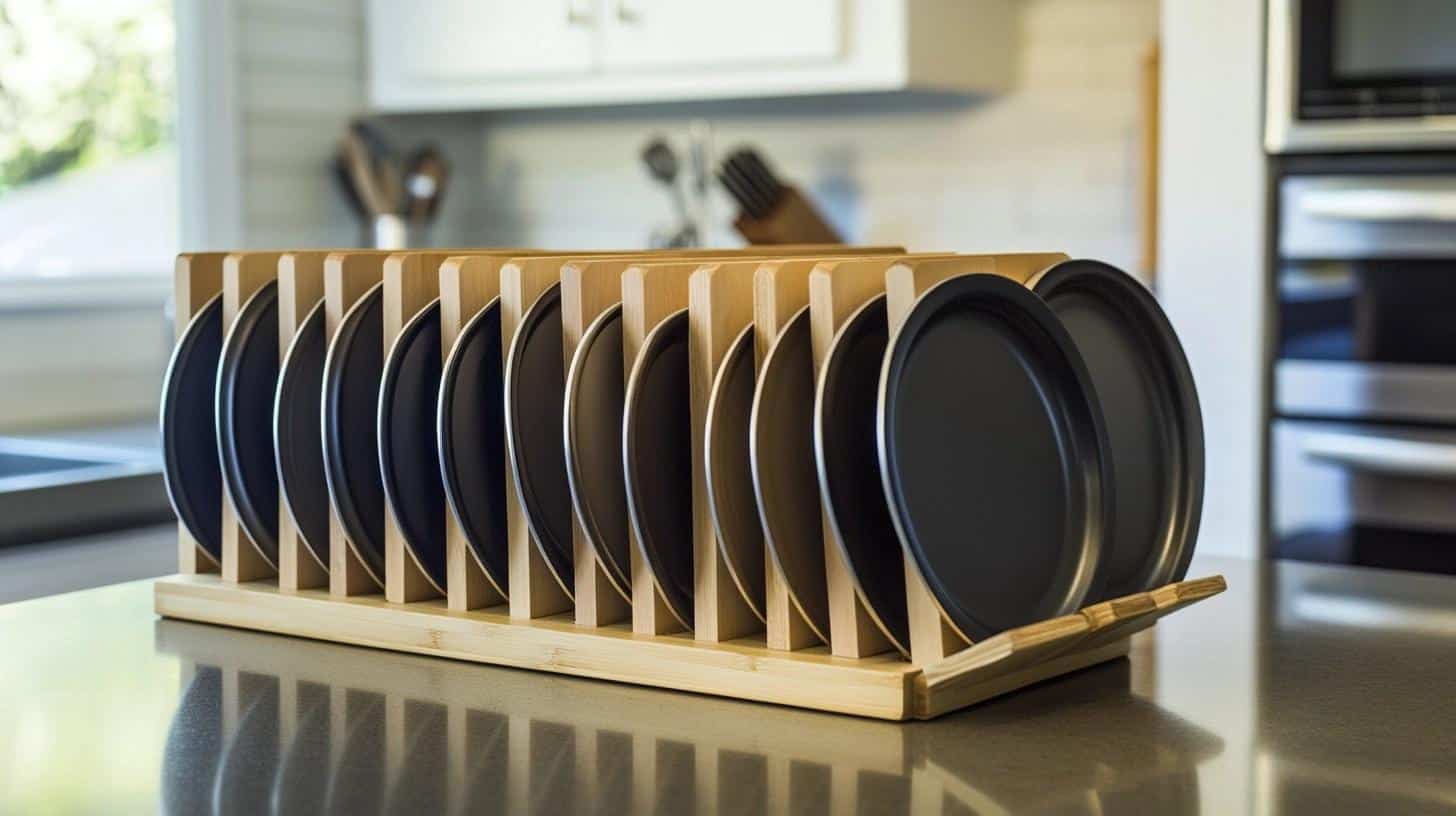
A wall-mounted or counter-standing rack saves floor space and keeps pans sorted. This design holds pans like files, making them easy to spot and grab.
Materials and Tools:
| Materials | Tools |
|---|---|
| 1×2 Pine Boards | Measuring Tape |
| Plywood Base | Drill |
| Wood Screws | Saw |
| Wall Anchors | Level |
| Rubber Feet | Pencil |
| Wood Glue | Safety Gear |
| Sandpaper |
Steps:
- Base Construction: Create a sturdy 12×24-inch plywood base. Attach rubber feet at corners for stability. Add a 1×2 border frame for strength.
- Slot Creation: Cut vertical dividers at 12 inches high. Space them 2 inches apart. Angle the back pieces slightly (5 degrees) so the pans lean back. Secure each divider to the base and back support.
- Finishing Work: Sand all edges smoothly. Add rubber strips where pans rest. Attach strong brackets for wall mounting. Test weight capacity gradually.
3. Over-the-Door Organizer
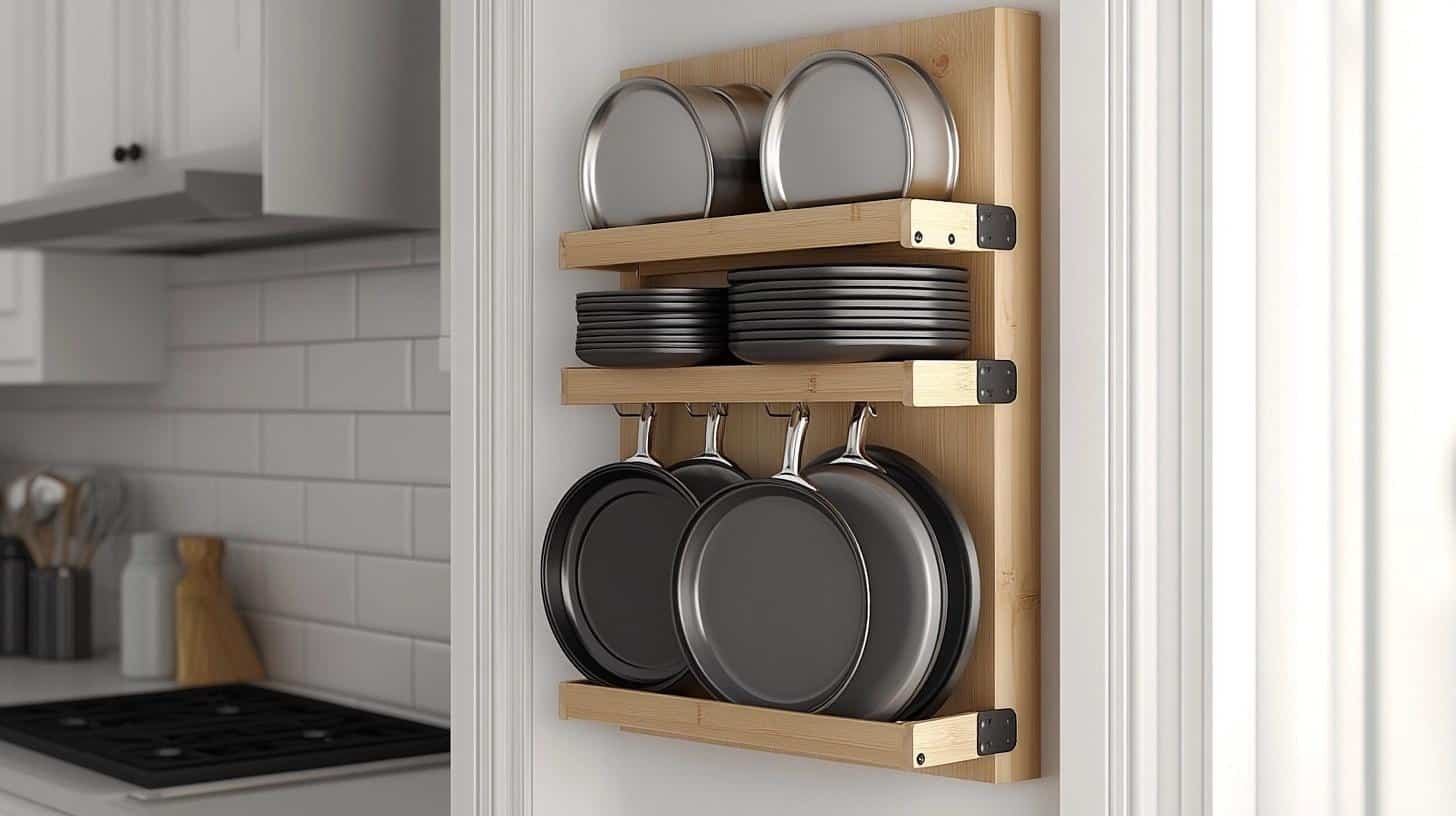
Turn unused door space into perfect pan storage. This design hangs securely and keeps pans at eye level for easy access.
Materials and Tools:
| Materials | Tools |
|---|---|
| 1×3 Pine Boards | Measuring Tape |
| Door Hooks (heavy-duty) | Drill |
| Plywood Backing | Saw |
| Wood Screws | Level |
| Rubber Door Bumpers | Pencil |
| Non-slip Strips | Safety Gear |
| Corner Brackets |
Steps:
- Frame Construction: Build the main frame 4 inches narrower than the door width. Create L-shaped brackets from 1×3 boards for pan support. Add corner braces for strength.
- Mounting System: Attach heavy-duty hooks at the top. Place rubber bumpers where the frame meets the door. Install a safety catch at the bottom to stop swinging. Add non-slip strips on brackets.
- Final Setup: Test door closure carefully. Mark safe weight limits on the frame. Add rubber tips on all pan contact points. Space brackets based on pan sizes.
4. Tiered Shelf Organizer
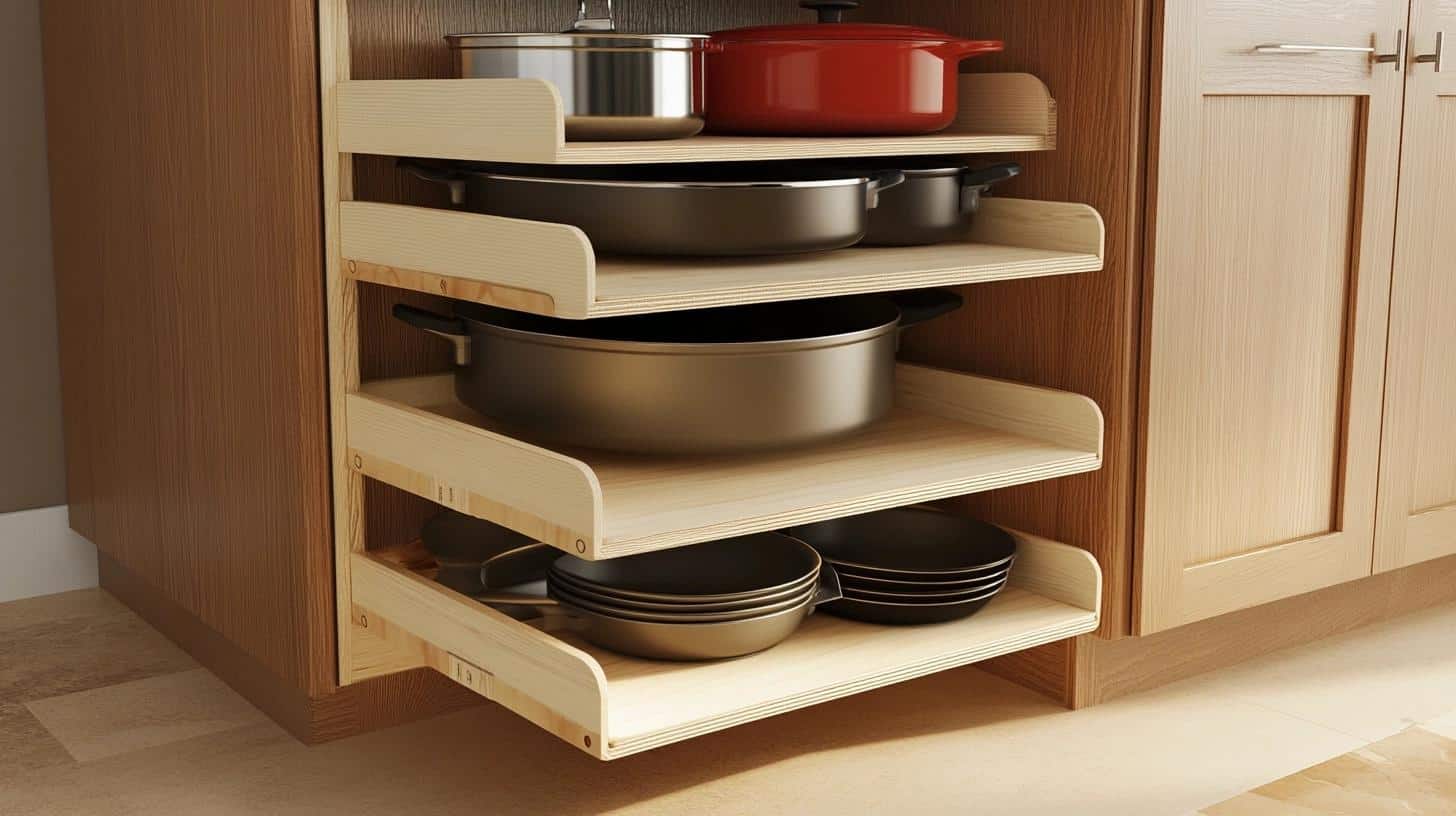
Turn flat cabinet space into multi-level storage. This tiered design shows all your pans at once, like stadium seating for your cookware.
Materials and Tools:
| Materials | Tools |
|---|---|
| 3/4″ Plywood | Measuring Tape |
| 1×4 Pine Boards | Drill/Saw |
| Wood Screws | Level |
| Non-slip Liner | Pencil |
| Corner Brackets | Safety Gear |
| Wood Glue | Square |
| Rubber Feet |
Steps:
- Platform Creation: Cut three plywood pieces in growing heights (3, 6, and 9 inches). Make each tier 2 inches deeper than the last. Add 1×4 supports underneath for strength.
- Assembly Work: Connect platforms with support blocks at corners. Add a back piece to prevent sliding. Secure each level with glue and screws. Install rubber feet for stability.
- Surface Protection: Cover each level with a non-slip liner. Add front lips to stop pans from sliding. Place rubber edge guards at corners. Test weight distribution.
5. Cabinet Mounted Rack
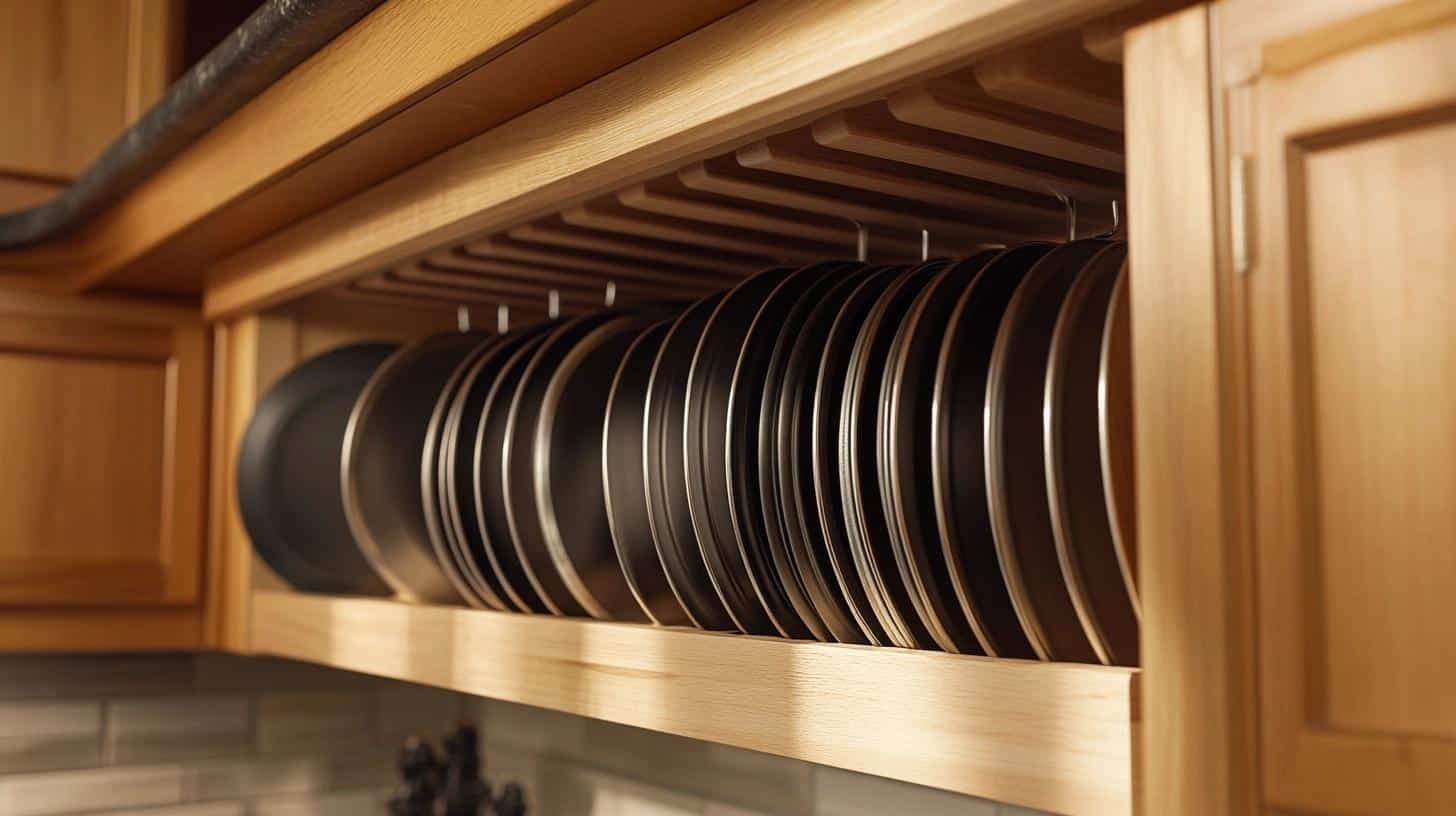
Turn empty cabinet walls into useful pan storage. This mounted rack keeps pans organized against cabinet sides, using space that often goes to waste.
Materials and Tools:
| Materials | Tools |
|---|---|
| 1×2 Pine Strips | Measuring Tape |
| Wall Anchors | Drill |
| Wood Screws | Saw |
| Rubber Strips | Level |
| Corner Braces | Pencil |
| Wood Glue | Safety Gear |
| Clear Finish |
Steps:
- Wall Support: Map out cabinet wall space. Install main support strips vertically using strong anchors. Space them based on pan sizes. Add corner braces for extra strength.
- Pan Rest Creation: Mount horizontal pieces at a 15-degree angle upward. Space them 4 inches apart vertically. Cover the wood edges with rubber strips where the pans rest.
- Safety Checks: Test each mount with lightweight items first. Add stoppers at front to prevent sliding. Ensure the cabinet door closes fully. Mark weight limits clearly.
6. Wire Rack Baking Pan Organizer
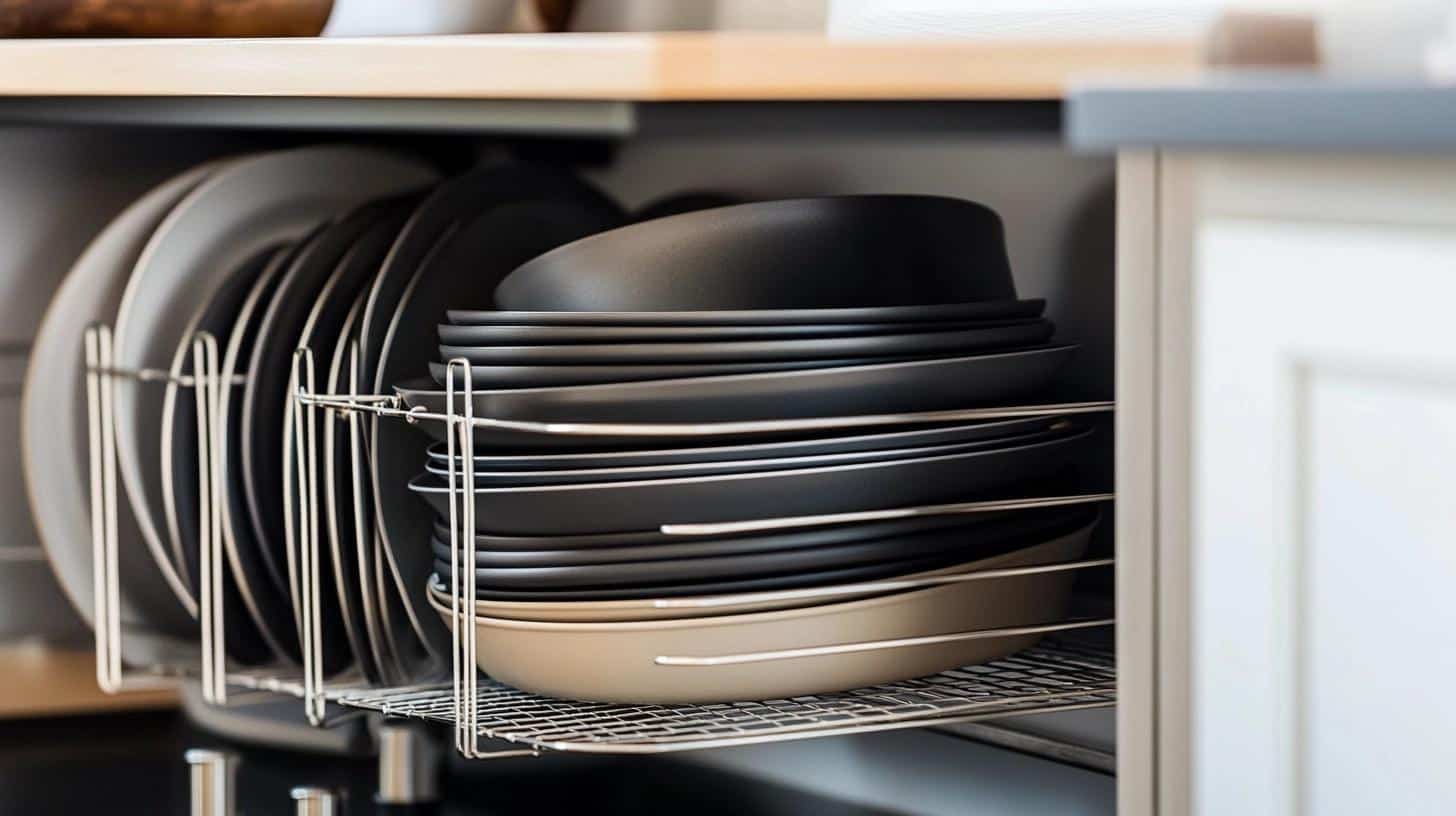
Make a strong wire system that holds pans like books on a shelf. Perfect for small spaces, this rack keeps pans sorted and easy to grab.
Materials and Tools:
| Materials | Tools |
|---|---|
| Metal Wire Grid | Wire Cutters |
| Metal Brackets | Pliers |
| Wall Anchors | Drill |
| Rubber Coating | Level |
| Cable Ties | Gloves |
| Corner Clips | Safety Gear |
| Rubber Tips |
Steps:
- Grid Preparation: Cut the wire grid to the needed size. Bend the edges for strength. Add a rubber coating on all pan contact points. Shape divider sections every 3 inches.
- Mounting Work: Attach brackets to a wall or cabinet. Secure the grid to the brackets. Add support points at the center. Test stability before loading pans.
7. Lazy Susan Baking Pan Organizer
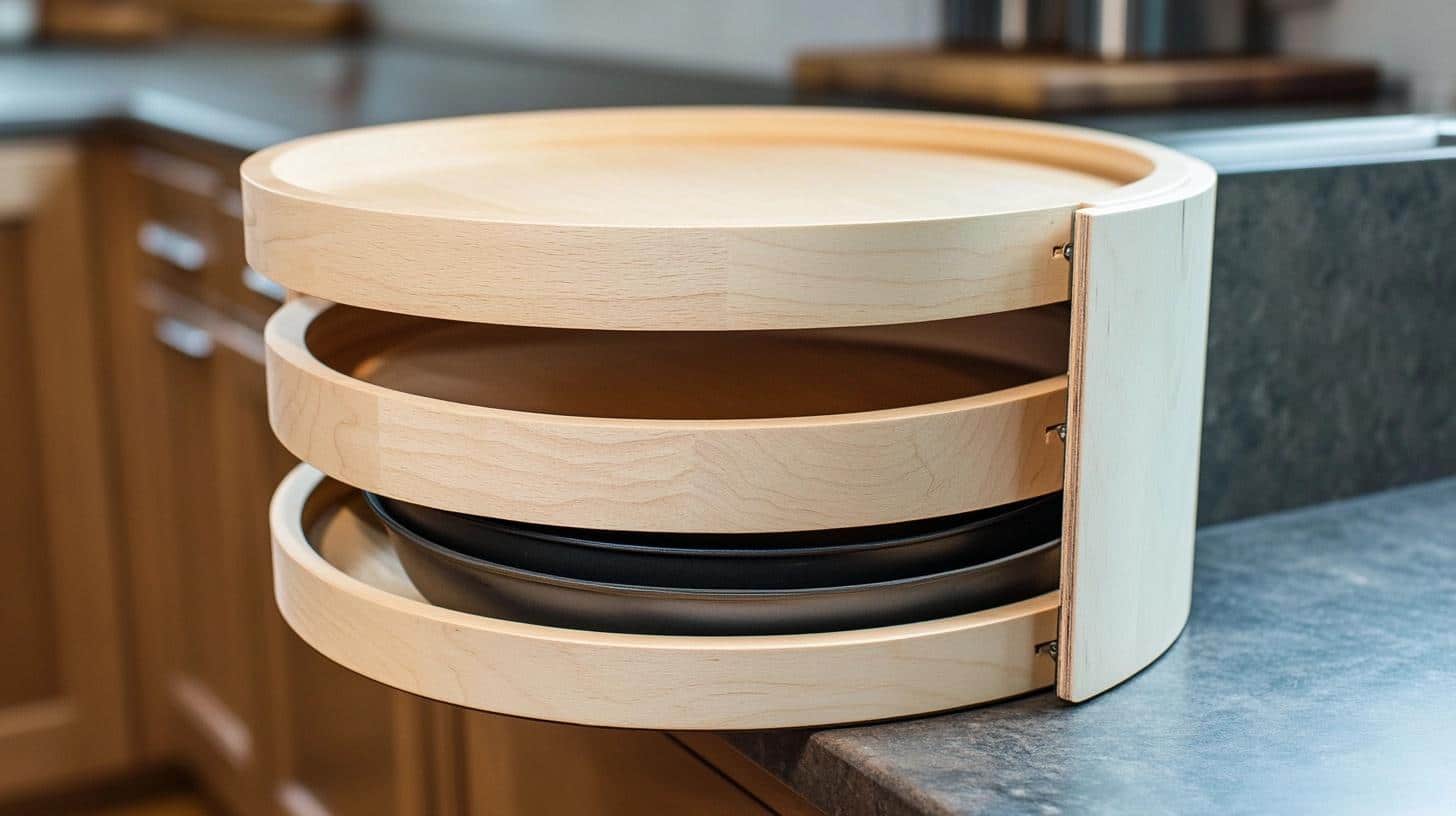
A turning shelf makes corner spaces useful. This round organizer spins smoothly, bringing any pan right to you.
Materials and Tools:
| Materials | Tools |
|---|---|
| Round Plywood | Drill |
| Lazy Susan Bearing | Saw |
| Wood Screws | Level |
| Divider Boards | Pencil |
| Non-slip Mat | Safety Gear |
| Wood Glue | Square |
| Edge Banding |
Steps:
- Base Build: Cut two circles from plywood. Mount bearing between them. Test spin before adding weight. Add rubber feet for stability.
- Divider Setup: Create pie-shaped sections. Space dividers based on pan sizes. Secure each piece with glue and screws. Add front lips to hold pans.
Smart Storage: Making Your Baking Pans Work for You
- Size Organization: Grouping pans by size creates a stable storage system. Large pans form a solid base at the bottom, while smaller ones fit neatly on top. This setup keeps everything visible and easy to access.
- Protection Systems: Good protection extends pan life. Cloth separators between non-stick pans prevent scratches, rubber corners on shelves stop dents, and paper towels between stacked pans offer basic protection.
- Quick Access Setup: Keeping daily-use pans in front makes cooking easier. Special occasion pans can stay in backspaces. Clear labels and designated spots for each pan type speed up meal preparation time.
- Space Management: Limited space needs vertical thinking. Standing pans on their sides save more room than flat storage. Empty walls become useful spots with the right mounting tools. Strong magnetic strips work well for metal pans when properly secured.
- Safety Considerations: Proper setup protects both people and pans. Shelves must support full pan weight. Heavy items belong at easy-to-reach heights. Vertical storage needs stability checks. Leave enough space for easy pan removal.
Keep Your DIY Pan Organizer Running Smooth: Simple Care Tips
- Weekly Check-ups: A quick weekly look at screws, joints, and hooks prevents future problems. Tighten any loose parts right away. Wipe surfaces with a dry cloth to remove dust and spills.
- Handle With Care: Pull out pans gently to protect both the organizer and cookware. Avoid yanking or forcing pans into tight spaces. Don’t overload sections. Keep heavier items in stronger areas of the structure.
- Surface Protection: Put small rubber pads where the pans rest to stop scratches. Replace worn-out liners when they start looking thin. Keep wood dry and touched up to prevent damage.
- Quick Fixes: Fix small issues before they grow. Replace bent hooks or dividers. Sand rough spots on wooden parts. Touch up paint chips to stop moisture damage. Keep spare parts handy for quick repairs.
- Long-term Tips: Check the whole system each season. Look for signs of stress in high-use areas. Update sections that don’t work well. Remove rust spots as soon as they appear. Test stability monthly by gently pushing different sections.
- Cleaning Schedule: Dust weekly with a soft brush. Clean spills right away to prevent stains. Wash removable parts every few months. Keep the area around the organizer dry and clean.
Conclusion
Making your own pan storage changed my kitchen routine completely – and I bet it’ll change yours, too.
These DIY options work for any space, from tiny apartments to big kitchens. You can start small with tension rods or build a full cabinet system when you’re ready.
I’ve shared my tested methods, but the best part about DIY is making it work for your needs.
Maybe you’ll combine ideas or come up with something new. That’s what makes personal projects special.
Why not start today? Pick the design that matches your space and skill level. Once you see your pans neatly stored and easy to reach, you’ll wonder why you waited so long.
Have you tried any of these ideas? Share your storage solutions in the comments below.
Frequently Asked Questions
What is the Most Budget-Friendly Way to Organize Baking Pans?
Use file holders or tension rods in cabinets. Look for items you already have at home, like bookends or desk organizers.
How Can I Organize Pans without Making Permanent Changes?
Buy tension rods for cabinets, use over-door hangers, or get standalone racks. These options need no drilling and move easily.
What if I Have a Small Kitchen with Limited Space?
Use walls and doors for storage. Install vertical racks or door-mounted systems. Stack pans upright instead of flat to save space.
Can I Store Heavy Cast Iron Pans Using These Methods?
Choose wooden or metal racks with strong supports. Mount directly into wall studs. Keep heavy pans on the bottom shelves.

