Can You Paint a Bathtub Before Replacing It?
Most people face a common problem: the bathtub looks old and worn, but replacing it costs thousands, deterring many people from putting off bathroom updates for years.
But here’s the bright spot: painting a bathtub can give it a fresh look for a fraction of the cost. It’s a practical solution that works for many people.
This blog will answer the question, “Can you paint a bathtub?” You will learn about the painting process, how long it lasts, what materials work best, and whether it’s worth doing before considering a full replacement.
When Painting a Bathtub Makes Sense (and When It Does Not)
Painting a bathtub works best for surface-level cosmetic issues like discoloration, minor stains, or outdated colors. If the tub is structurally sound but looks tired, painting offers a quick fix.
It makes sense for renters wanting temporary improvements or people on tight budgets who need a fast refresh before selling.
However, painting doesn’t solve serious problems. Deep cracks, chips exposing the underlayer, rust damage, or persistent mold growth need professional repair or replacement.
If the tub’s surface is already peeling from a previous paint job, adding more paint won’t help.
Paint covers cosmetic flaws on stable surfaces. For structural damage or safety concerns, skip the paint and call a professional.
Trying to paint over serious damage wastes time and money without fixing the real problem.
Tools and Materials Required for Painting a Bathtub
Having the right supplies on hand makes the painting process smoother and helps avoid mid-project trips to the hardware store. Here’s everything needed to paint a bathtub correctly.
| Tools | Materials |
|---|---|
| Rubber gloves | Bathroom cleaner or TSP (trisodium phosphate) |
| Safety goggles | Acetone or denatured alcohol |
| Respirator mask | Fine-grit sandpaper (400-600 grit) |
| Paint roller (foam) | Bonding primer for bathrooms |
| Small paintbrush | Epoxy-based bathtub paint or acrylic urethane |
| Painter’s tape | Drop cloths or plastic sheeting |
| Bucket and sponge | Clean rags or microfiber cloths |
| Scraper or putty knife | Ventilation fan (if available) |
| Mixing stick | Paint thinner (for cleanup) |
How to Paint a Bathtub: Step-by-Step Instructions

Painting a bathtub changes an old fixture into something fresh and clean. With the proper preparation and patience, people can achieve professional-looking results that last for years.
Step 1: Prepare the Bathroom Space
Open windows and turn on the exhaust fan for proper ventilation. Remove all toiletries, bath mats, and shower curtains.
Cover the floor, toilet, and nearby surfaces with drop cloths or plastic sheeting.
Use painter’s tape to protect faucets, drains, and tile edges. Good preparation now prevents messy cleanup later and protects everything around the tub.
Step 2: Clean the Bathtub Thoroughly
Mix bathroom cleaner or TSP with warm water and scrub every inch of the tub, focusing on soap scum and buildup. Rinse well with clean water and let dry.
Wipe the entire surface with acetone or denatured alcohol to remove oils and residue. Let the tub air dry for at least an hour.
Paint won’t stick to dirty or greasy surfaces, so this step matters.
Step 3: Sand and Repair the Surface
Put on safety goggles and a respirator mask. Gently sand the entire tub with 400-600 grit sandpaper using circular motions.
This creates texture for better paint adhesion. Wipe away all dust with a damp cloth, then dry thoroughly. Fill any chips or scratches with bathtub repair putty and let it cure. A smooth, prepped surface ensures a professional finish.
Step 4: Apply the Bonding Primer
Pour bonding primer into a paint tray. Use a foam roller to apply a thin, even coat from top to bottom. Use a small brush for corners and around fixtures.
Avoid thick coats that can drip or run. Let dry for 2-4 hours as directed on the label. Apply a second primer coat for better durability and coverage.
Step 5: Paint the Bathtub
Stir the epoxy or acrylic urethane paint thoroughly. Apply the first coat with a foam roller using long, smooth strokes. Keep coats thin and even.
Use a small brush for tight spots around drains and fixtures. Wait 4-6 hours between coats and apply at least two full coats for proper coverage.
Three thin coats often work better than two thick ones.
Step 6: Let It Cure and Care for Your New Finish
Allow the paint to cure completely before using the tub. Most paints need 24-48 hours before getting wet and 3-7 days before a full bath.
Keep the bathroom well-ventilated during curing. Once cured, clean with gentle, non-abrasive cleaners and soft cloths. Proper curing and care help the painted finish last for years.
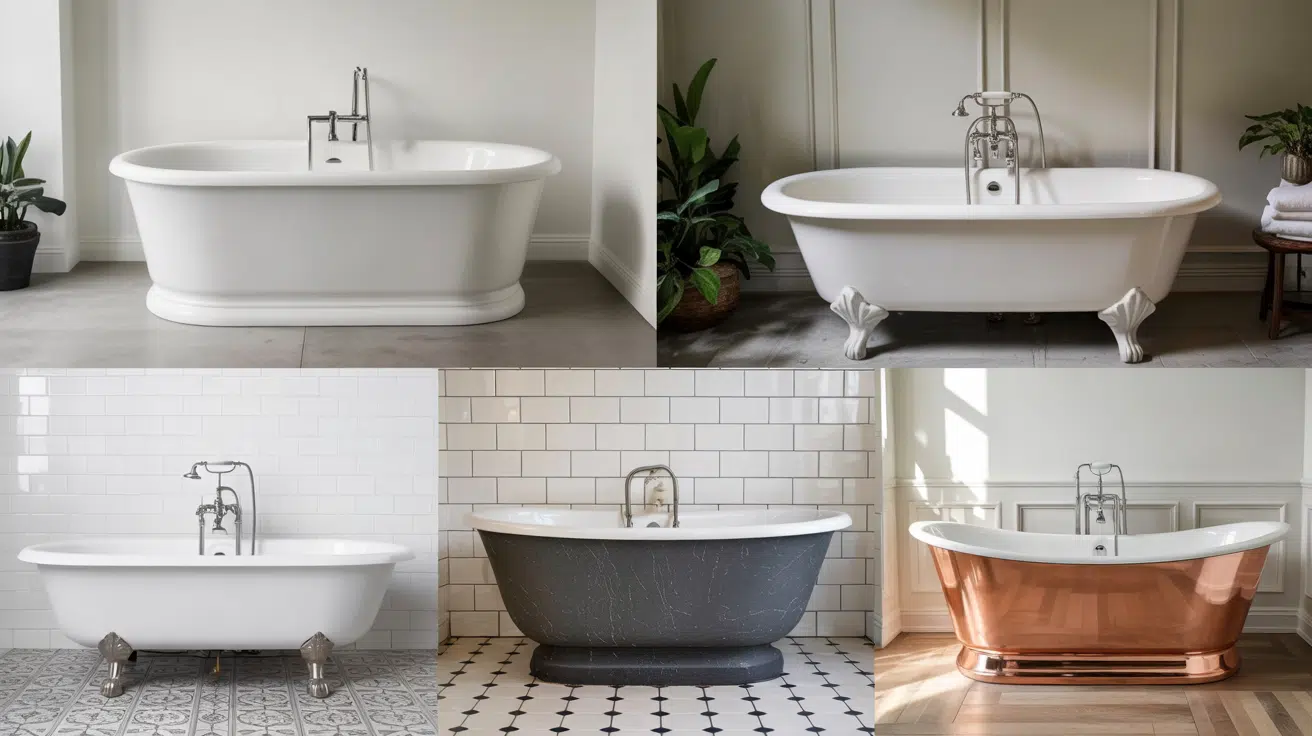
What Types of Bathtubs Can Be Painted?
Not all bathtubs respond equally well to paint, so knowing the material helps determine if painting is a good option. Some materials take paint beautifully while others fight it every step of the way.
| Bathtub Material | Can Be Painted? | Key Points |
|---|---|---|
| Porcelain-Enameled Steel | Yes (High Success) | Most common type. Takes paint very well with proper prep. |
| Porcelain-Enameled Cast Iron | Yes (High Success) | Heavy and sturdy. Excellent for painting with lasting results. |
| Fiberglass | Yes (Medium-High Success) | Needs careful prep and specialized primer. Good results are possible. |
| Acrylic | Yes (Medium Success) | Flexible surface requires specific paint products. |
| Cultured Marble | Yes (Medium Success) | Needs aggressive prep. Results vary by surface condition. |
| Stone Resin | Yes (Low Success) | Challenging. Professional refinishing works better. |
| Natural Stone | No | Marble and granite don’t hold paint. Needs professional resurfacing. |
| Copper | No | Paint doesn’t adhere. Natural patina is the appeal. |
| Wood | No | Rare material. Paint is impractical due to water exposure. |
Best Paint and Kits for Bathtubs

Choosing the right paint or kit makes a big difference in how long the finish lasts and how good it looks. The market offers several options at different price points, each with its own strengths.
Types of Bathtub Paint
- Epoxy paint: Two-part formula that mixes before use. Offers the most durable finish and resists water damage best.
- Acrylic Urethane: Single-component paint that’s easier to apply. Good durability, but not as strong as epoxy.
- Waterborne Epoxy: Lower odor than traditional epoxy. Suitable for bathrooms with poor ventilation.
- Oil-Based Paints: Not recommended for tubs. Doesn’t hold up well to constant water exposure.
Top Bathtub Painting Kits
- Rust-Oleum Tub & Tile Refinishing Kit: Most popular choice. Includes everything needed, costs around $25-$35.
- Homax Tough as Tile Kit: Budget-friendly option at $20-$30. Works well on porcelain and fiberglass.
- EKOPEL 2K Bathtub Refinishing Kit: Premium choice at $200-$250. Professional-grade results with longer-lasting finish.
- Giani Marble Countertop Paint Kit: Can be used on tubs. Creates faux marble effect for $70-$90.
Painting a Bathtub Vs Refinishing Vs Reglazing
Understanding the difference between these three options helps people make the right choice for their bathroom and budget.
| Aspect | Painting (DIY) | Refinishing | Reglazing |
|---|---|---|---|
| Cost | $50-$150 | $300-$600 | $400-$700 |
| Duration | 1-2 days | 3-6 hours | 4-8 hours |
| Longevity | 1-3 years | 3-5 years | 5-10 years |
| Skill Level | Beginner-friendly | Professional recommended | Professional required |
| Surface Prep | Basic cleaning and sanding | Deep cleaning, acid etching | Industrial-grade prep |
| Coating Type | Epoxy or acrylic paint | Polyurethane or epoxy | High-grade polymer coating |
| Drying Time | 24-48 hours | 24-48 hours | 24-72 hours |
| Odor Level | Moderate | Strong | Very strong |
| Finish Quality | Good | Better | Best |
| Best For | Quick refresh on good condition tubs | Moderate wear and damage | Severely damaged tubs |
| Warranty | None (DIY) | 1-3 years | 3-5 years |
What People Say About Painting Bathtubs

People discussing bathtub painting often share mixed but practical experiences. On Reddit, users emphasize that painting a bathtub can work, but only with intense preparation.
Many note that skipping sanding, cleaning residue, or curing time leads to peeling within months. Strong fumes and the need for proper ventilation are also repeatedly mentioned.
Meanwhile, answers on Quora caution against spray painting bathtubs with regular paint, stressing that only tub-specific coatings can withstand water, heat, and daily use without failing quickly.
Common Bathtub Painting Mistakes and How to Avoid Them
Even experienced people can mess up a bathtub paint job if they skip essential steps or rush the process. Avoiding these common errors helps ensure a smooth, long-lasting finish that looks professional.
- Skipping Thorough Cleaning: Always scrub with TSP and wipe with acetone. Paint won’t stick to soap scum or oils.
- Not Sanding the Surface: Light sanding with 400-600 grit paper creates texture for better adhesion. Don’t skip this step.
- Poor Ventilation During Painting: Open windows and run fans. Fumes can be dangerous, and proper airflow helps paint cure correctly.
- Applying Paint Too Thick: Thin coats prevent drips and dry evenly. Two or three thin coats beat one thick coat every time.
- Rushing Between Coats: Wait the full recommended time. Painting over tacky paint causes peeling and bubbling later.
- Using the Tub Too Soon: Let paint cure for at least 3-7 days before bathing. Touching wet paint ruins all your hard work.
- Painting Over Damaged Areas: Fix cracks and chips first with repair putty. Paint can’t hide structural problems.
- Using Regular Paint Instead of Epoxy: Standard wall paint peels quickly in wet conditions. Always use bathtub-specific products.
- Ignoring Humidity Levels: Paint in moderate humidity (40-70%). Too humid or too dry conditions affect how paint dries and adheres.
Wrapping It Up
So, can you paint a bathtub? Absolutely. This simple weekend project can save thousands of dollars compared to replacement and give an old bathroom a fresh look.
The key is honest assessment of the tub’s condition, proper surface preparation, and using the right materials for the job.
But for people dealing with minor cosmetic issues on a structurally sound tub, painting offers a practical solution that works.
Ready to get started? Take a close look at your bathtub today. Check for damage, choose quality paint or a kit, and set aside a weekend. With patience and careful work, that tired old tub can look brand new again.