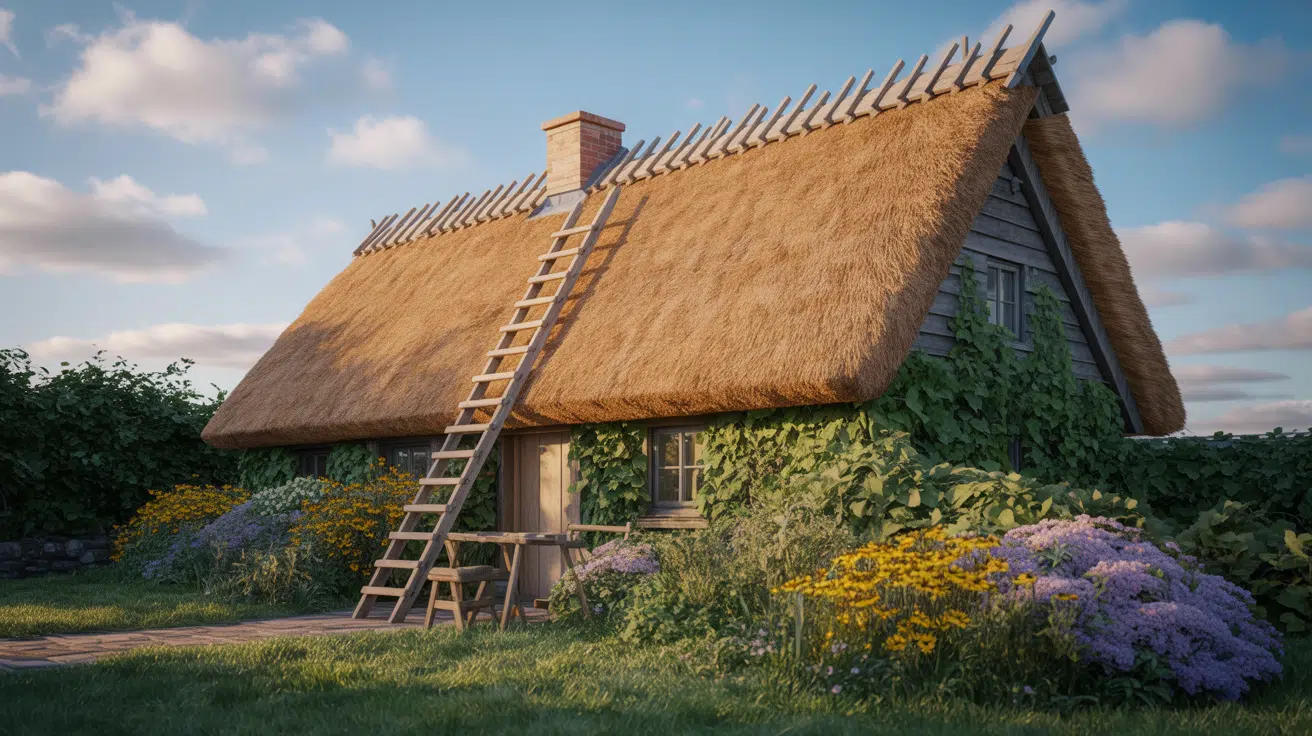
Thatched Roofs: History, Installation and Maintenance
Have you ever wondered why some traditional roofing techniques have stood the test of time? Thatched roofs are one such method. Used for centuries, they provide both shelter and beauty.
Surprisingly, this age-old technique is making a comeback, gaining popularity in eco-conscious designs today.
In this blog, I’ll take you through the history of thatched roofs, explain how they work, and discuss their place in modern design.
Keep reading to see how a thatched roof could be a perfect choice for your project.
The History of Thatched Roof
Over time, the practice of thatched roofs spread across Europe, particularly among the Celts and Germanic tribes, who utilized materials such as reeds and straw.Entire villages would gather for “thatching bees,” where everyone worked together to build roofs for new houses.
The Industrial Revolution in the 18th and 19th centuries led to a decline in thatching as materials like slate and metal became more widely used.
However, by the 20th century, interest in thatching had revived as more people began to prioritize sustainability and eco-friendly building methods.
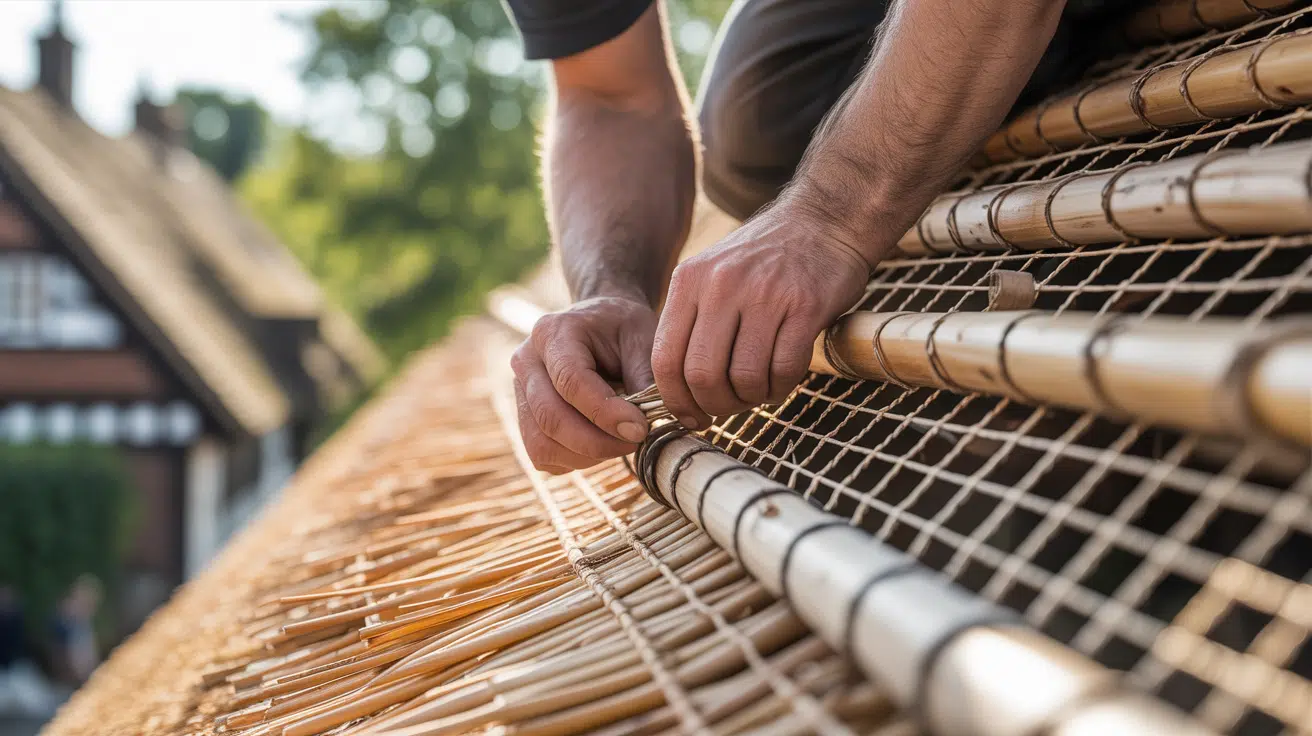
Building a Thatched Roof: Step-by-Step Guide
Thatched roofs require careful layering of natural materials and precise installation techniques to ensure durability, waterproofing, and proper insulation.
Tools and Materials Needed
Before you begin thatching, gather all necessary tools and materials to avoid delays and ensure a safe and efficient installation.
- Water reed, combed wheat reed, or long straw
- Wooden or metal spars
- Twine or wire
- Eave wads and hazel/willow rods
- Ridge rolls and netting
- Thatching needles and leggett (wooden bat)
- Ladder and scaffolding
- Protective gear (gloves, mask, eye protection)
Step 1: Prepare the Roof Frame

Start by ensuring the roof structure is in excellent condition. The timber frame should be sturdy, dry, and free of rot or damage.
Rafters must be evenly spaced to support uniform layering, and battens should be securely nailed or tied into place.
A solid framework is essential for long-term support, proper water drainage, and an even distribution of thatch weight across the surface.
Step 2: Apply the Base Layer of Thatch

Attach the first bundles of thatch, known as eave wads, to the lowest edge of the roof. These are crucial for establishing the roof’s pitch and the drip edge.
Secure the bundles tightly using twine or wire and thatching spars. This base layer not only provides a visual starting point but also sets the foundation for layering upward while preventing water from seeping behind the roof.
Step 3: Layer Additional Thatch Upward

Continue adding bundles above the base layer, working row by row toward the ridge. Each layer overlaps the one beneath it, creating a tightly compacted, shingle-like surface.
Consistency in overlap and bundle thickness ensures adequate rainwater runoff and thermal insulation. The materials must be pressed firmly and evenly for durability.
Periodically step back to assess symmetry and thickness before proceeding with the next layer.
Step 4: Fix and Secure the Thatch
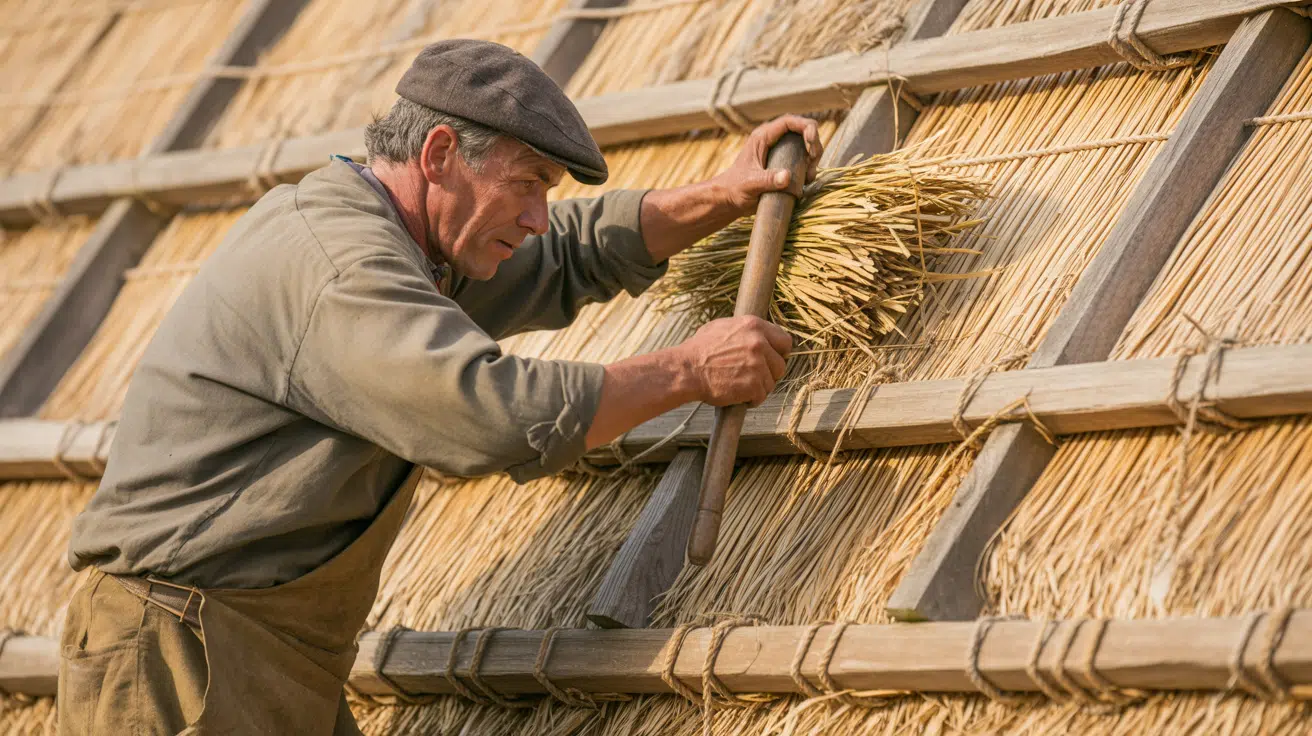
After laying each bundle, secure it with wooden or metal thatching spars driven into the battens. Wire may also be used for extra reinforcement.
Use a leggett, a wooden bat, to tap and dress the bundles, evening out the surface and compacting the material.
Properly fixed thatch reduces the risk of wind damage and helps maintain a watertight seal throughout the roofing structure.
Step 5: Shape and Cap the Ridge
Construct the ridge using either block or flush methods, depending on the desired aesthetic and local tradition. Lay specially prepared bundles horizontally across the roof peak.
Secure these using netting and hazel or willow rods. The ridge not only completes the roof but also protects the uppermost joints from weather exposure. Shaping it carefully adds both durability and a decorative finish to the thatched roof.
Step 6: Final Checks and Finishing Touches
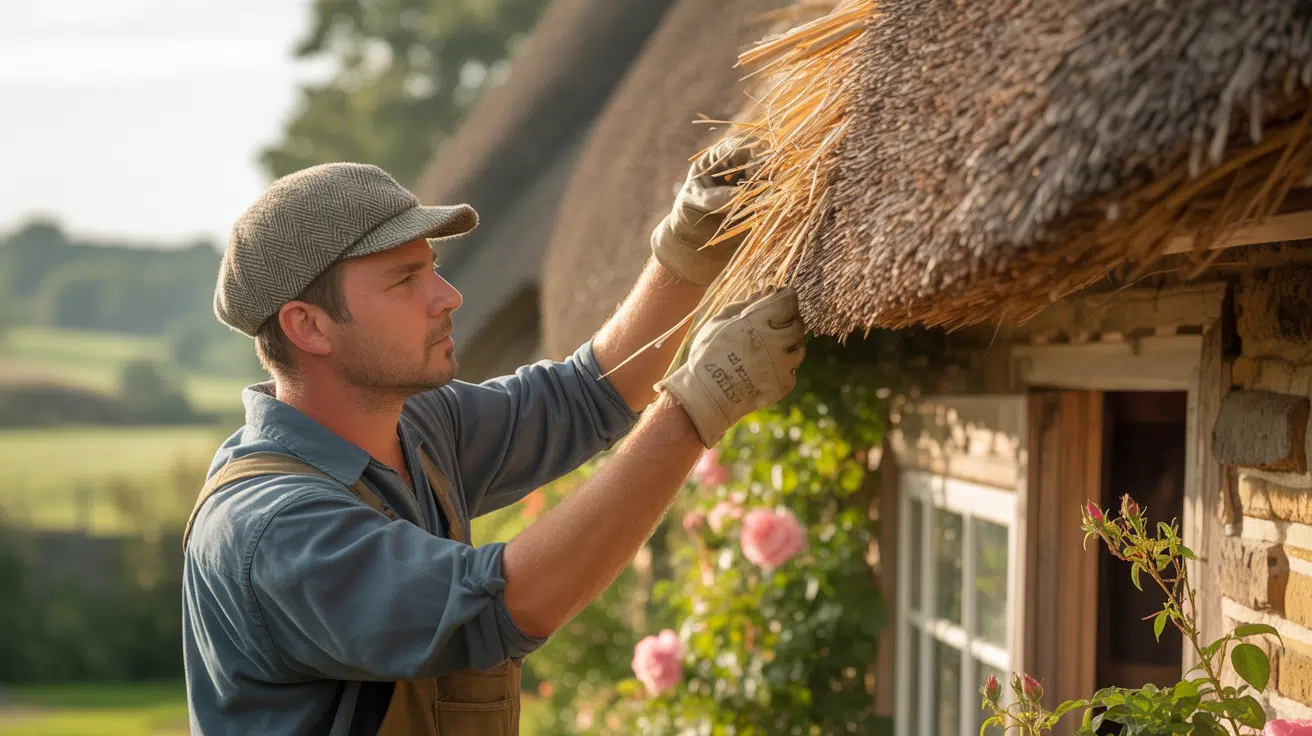
Once thatching is complete, inspect the roof thoroughly. Look for loose bundles, uneven thickness, or exposed gaps. Use shears to trim stray ends and tidy up the edges.
Check for proper overhang and ensure that water flows off efficiently. A well-executed inspection at this stage can extend the roof’s lifespan and reduce the need for premature maintenance or repairs.
DIY vs. Professional Installation
Deciding whether to thatch your roof yourself or hire a professional depends on your experience, tools, and long-term expectations.
| Criteria | DIY Installation | Professional Installation |
|---|---|---|
| Skill Level Required | High: Requires advanced roofing and hand-tool skills | Moderate: Handled by trained thatchers |
| Cost and Time Investment | Lower cost, longer time (several weeks to months) | Higher cost, quicker (a few days to weeks) |
How Long Does a Thatched Roof Last?
The lifespan of a thatched roof varies depending on the materials used and the level of maintenance it receives. On average, a well-maintained thatched roof can last between 25 to 40 years.
Here’s a quick look at the most common materials:
- Water Reed: Known for its durability, water reed can last up to 40 years or more when properly maintained. It is resistant to wear and provides excellent insulation.
- Straw: Typically lasts around 25-35 years. It requires more frequent maintenance compared to water reed, but is a cost-effective option.
- Palm: Often used in warmer climates, palm thatch has a shorter lifespan, usually around 20-30 years, depending on exposure to weather conditions.
Regular maintenance, including annual inspections and prompt repairs, can extend the life of a thatched roof, while neglect can lead to faster deterioration, especially in areas most exposed to the elements, like the ridge and eaves.
Pros and Cons of Thatched Roof
Thatched roofs provide insulation, sustainability, and beauty but require regular maintenance due to leaks, pests, and weather-related wear.
| Feature | Pros | Cons |
|---|---|---|
| Superior Insulation Properties | Provides excellent thermal performance, keeping homes cool in summer and warm in winter. | Requires regular maintenance, especially at the ridge. |
| Reduces energy costs by stabilizing indoor temperatures. | Frequent inspections are needed. | |
| Environmental Benefits | Made from renewable, biodegradable materials. | Leaks may develop over time. |
| Minimal processing reduces the carbon footprint. | Leaks can cause significant structural damage if left unattended. | |
| Supports local economies. | ||
| Appeal and Property Value | Adds visual interest to buildings. | Attracts birds, rodents, and insects. |
| Increases property value due to its uniqueness. | Requires pest control to maintain appearance. | |
| Cultural Heritage and Customization | Preserve traditional building methods. | Neglected roofs can lead to costly repairs. |
| Customization options for unique designs. | Deferred maintenance shortens roof lifespan. |
How to Maintain a Thatched Roof
Proper maintenance is key to extending the lifespan of a thatched roof and ensuring it continues to perform well. Here are some practical tips for maintaining a thatched roof:
- Regular Inspections: Conduct annual inspections to check for damage, leaks, or wear, especially at the ridge, eaves, and underside.
- Re-thatching: Add a new layer of thatch when it becomes thin or worn to restore insulation and weatherproofing.
- Repairing Leaks: Fix leaks promptly to prevent structural damage.
- Cleaning and Clearing Gutters: Regularly clear gutters and downpipes to avoid water accumulation that can damage the thatch.
- Pest Control: Use netting or natural repellents to prevent pests from nesting in the thatch.
- Protective Treatments: Apply fire-retardant and water-repellent treatments as needed to enhance durability.
Common Mistakes to Avoid
Installing a thatched roof requires precision. Avoid these frequent mistakes to extend its lifespan, improve performance, and reduce long-term maintenance costs.
- Incorrect Roof Pitch: Maintain a 45–55° pitch to ensure proper water runoff. Shallower slopes cause pooling and increase leak risk.
- Using Subpar Materials: Use high-quality, dry straw or reed. Poor materials degrade quickly and lead to premature roof failure.
- Neglecting Regular Inspections: Schedule yearly checks and inspect after storms. Prompt repairs prevent significant damage and extend roof life.
- Improper Installation: Poor layering or securing weakens the roof. Use experienced thatchers who apply traditional, proven techniques.
- Ignoring the Ridge: The ridge is the roof’s most exposed area. Regular maintenance and re-thatching are vital for weatherproofing.
- Insufficient Fire Protection: Apply fire-retardant treatments and meet safety codes. Thatched roofs are vulnerable without proper fire prevention.
Conclusion
Thatching is a sustainable, time-tested roofing method that combines beauty and usefulness. If you’re restoring an old building, designing an eco-friendly home, or just considering alternative roofing options, thatching is an excellent choice.
Although it may cost more upfront and require regular maintenance, the long-term benefits make it a wise investment for many. So, consider the practicality of thatched roofs in your next project.
If you’re interested in learning more about sustainable architecture or unique design ideas, read my other blogs for additional tips on eco-friendly living and building.
Frequently Asked Questions
How do I find a qualified thatcher?
Look for certified professionals through local roofing organizations or find specialists with experience in traditional roofing methods.
Can thatching be combined with modern materials?
Yes, modern homes are combining thatched roofs with materials like metal or slate to improve durability and fire resistance.
How long does it take to install a thatched roof?
It typically takes a few weeks to a couple of months for a full thatching project to be completed, including preparation, material gathering, and installation.