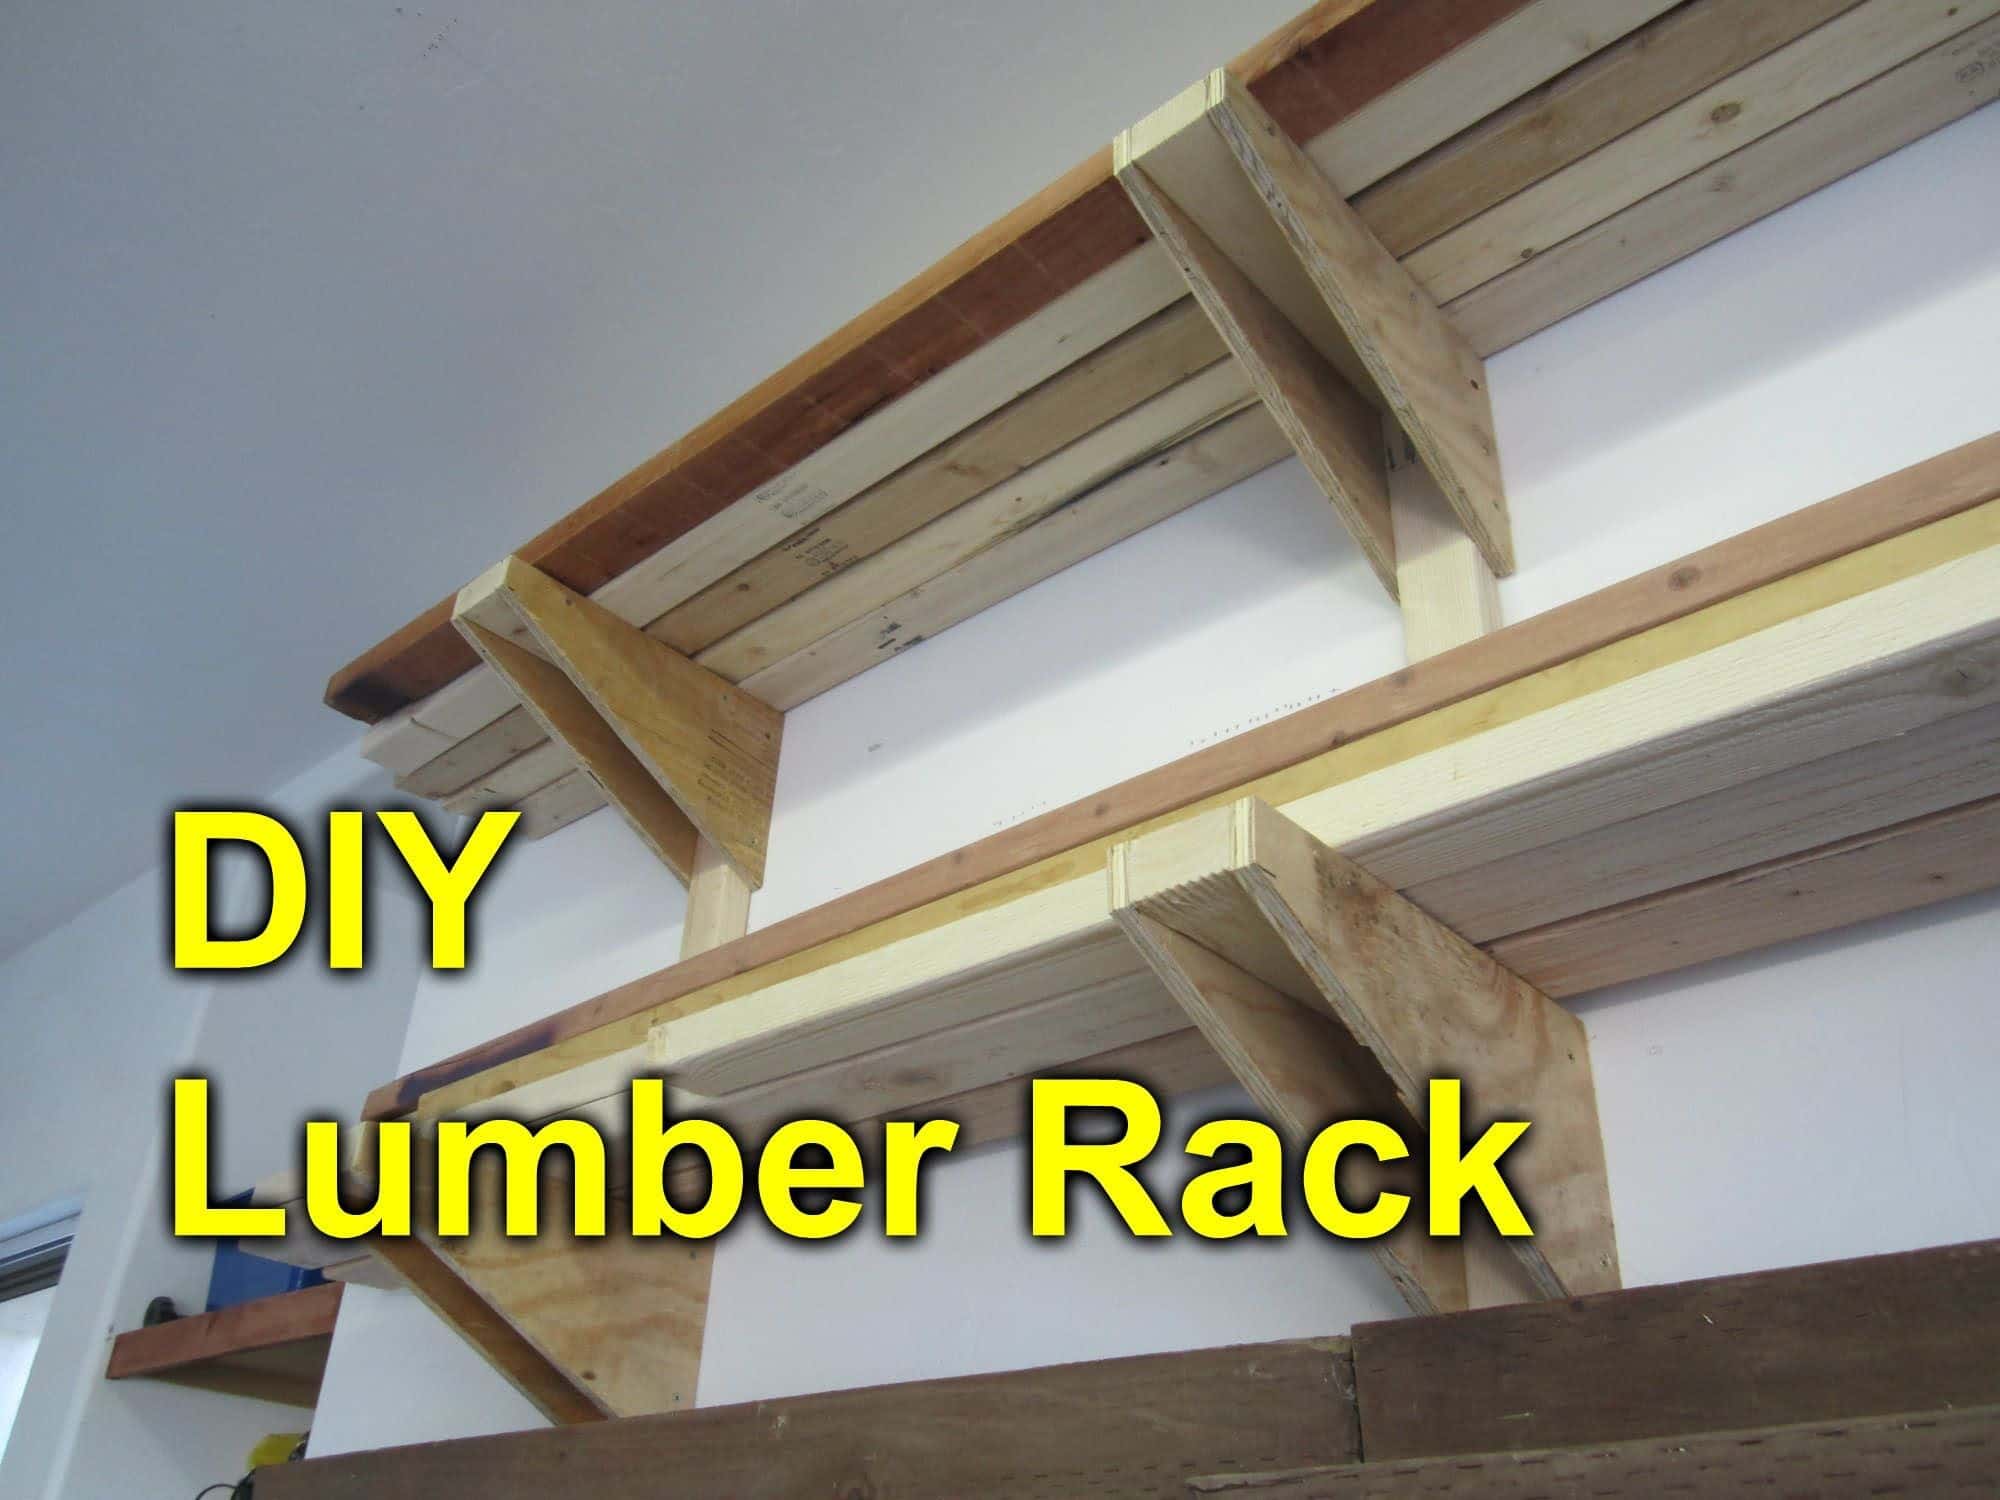
7 Easy Steps to Make DIY Lumber Rack
Here’s my storage struggle: my workshop was a mess, with wood piling up everywhere. I kept tripping over boards and wasting time searching for the right pieces.
If you’re dealing with scattered lumber, too, I know exactly how you feel.
But here’s the good thing – I found a simple fix. Building my own lumber rack helped me sort out this mess. The materials were cheap, and the project took just a few hours.
In this guide, I’ll show you the exact steps I used to build a solid lumber rack. You’ll get a materials list, clear instructions, and tips from my own experience.
Understanding Lumber Storage Needs
Wood needs to stay flat and dry to remain usable. Stacking boards on the floor or against walls can make them warp or bend. That’s a costly mistake I’ve made before.
Think about the wood you use most often. I noticed I work with 2x4s and plywood sheets regularly. Each type needs its own space and support to prevent damage.
Your available space matters, too. My workshop is 12 feet wide, so I made sure my rack fit without blocking walkways. I left enough room to move long boards easily.
Getting these storage basics right helped me design a rack that really works. Let’s look at what you’ll need to build one that fits your space.
How to Make DIY Lumber Rack Easily
Tools & Materials Required
| Category | Item | Description/Details |
|---|---|---|
| Tools | Table saw | For cutting wood boards |
| Pin nailer | For nailing small nails | |
| Jigsaw | For precise cuts | |
| Drill with pre-drill bits | For making pilot holes | |
| Measuring tape | For measuring | |
| Chalk line | For marking straight lines | |
| Level | For ensuring straightness | |
| Screwdriver | For driving screws | |
| 2½-inch lag bolts (½-inch diameter) | For strong joints | |
| Materials | 1×6 lumber boards (8-foot length) | Primary wood boards |
| Cedar timbers for uprights | For structural support | |
| Wood screws | For joining materials | |
| Ground stakes | For securing the structure | |
| Waterproofing sealant | To protect wood from moisture | |
| Half-inch plywood | For wall support |
Step-by-Step Process
1. Building the Base Frame
- Cut 8-foot 1×6 boards in half
- Create a box frame with 24-inch center spacing
- Set the width at 22 inches to match the overhang
- Level the frame using ground stakes
- Fix the frame to stakes with screws
2. Creating the Wall Support
- Measure box depth
- Transfer measurements to cedar uprights
- Use two 8-foot 1×6 boards to space cedar pieces evenly
- Create back wall support by screwing uprights to boards
- Install three lag bolts into wall studs for support
3. Building the Platform
- Install 1×6 deck boards across the base frame
- Leave small gaps between boards for water drainage
- Mark cedar upright positions on the final deck board
- Cut openings with a jigsaw for proper fit
4. Making Support Brackets
- Cut 1×6 boards to 22-inch lengths
- Split each piece diagonally from corner to corner
- Attach to cedar uprights
- Add top support plate over brackets
5. Setting Up Storage Levels
- Measure the total height from base to top
- Divide height by four for even shelf spacing
- Mark positions with chalk lines
- Create 15 support brackets at 17-inch intervals
6. Constructing Shelf Brackets
- Cut 30 pieces at 18 inches long
- Rip pieces to 2¼ inch width
- Cut 45-degree angles on edges
- Use a pin nailer to hold pieces while drilling
- Add front center uprights for extra support
7. Finishing
- Apply waterproofing sealant to all surfaces
- Let dry completely before use
- Test shelf stability before loading
When properly constructed and supported, each shelf can hold about 250-300 pounds.
Approximate Cost Required to Create DIY Lumbar Rack
| Category | Item | Quantity | Cost Range ($) |
|---|---|---|---|
| Basic Materials | 1×6 lumber boards (8-foot length) | 8 pieces | $80-100 |
| Cedar timbers for uprights | 4 pieces | $40-50 | |
| Wood screws (box of 100) | 1 box | $8-10 | |
| Ground stakes | 4 pieces | $12-15 | |
| Lag bolts (2½-inch) | 6 pieces | $6-8 | |
| Waterproofing sealant | 1 container | $15-20 | |
| Tools | Pin nailer | 1 | $30-40 |
| Chalk line | 1 | $5-8 | |
| Level | 1 | $10-15 | |
| Basic drill bits | Set | $15-20 | |
| Total Cost Range | With all tools | – | $220-285 |
| With basic materials only | – | $160-200 |
A money-saving tip: I got my lumber from local sellers. This saved me about 40% off store prices. Check online marketplaces – you might find good deals too!
Remember, prices may change based on your location and material quality.
Best Lumbar Rack Designs to Choose From
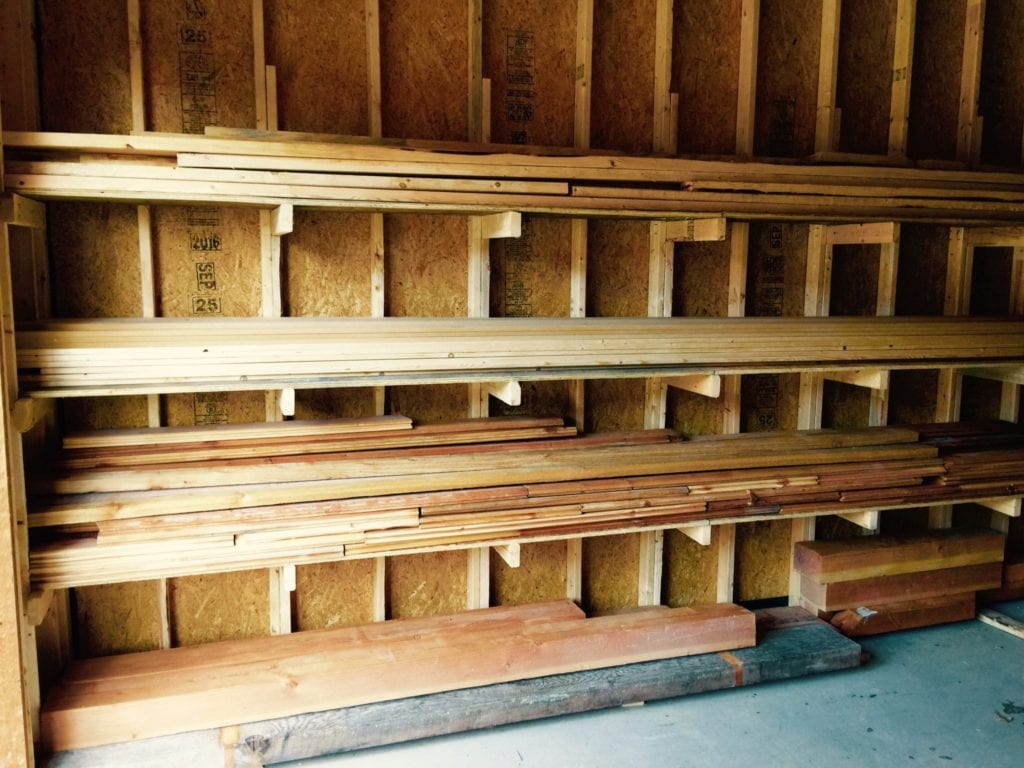
1. Wall-Mounted Cantilever Design
This design features strong support arms that extend from your wall at set heights. The arms are braced against the wall with sturdy brackets, creating multiple levels for lumber storage.
I chose metal supports rated for heavy loads, making this perfect for both long boards and sheet goods. The arms stick out about 2 feet from the wall, giving enough space for most lumber sizes.
Benefits
- It frees up your floor space
- It makes wood easy to sort through
- Keeps lumber raised off the ground
- Works great in small workshops
- Quick loading and unloading
2. Mobile Cart Style
I built this rack with heavy-duty wheels and a solid push handle. It includes divided slots for sorting different wood sizes and types.
The cart allows access from both sides, making it simple to find what you need. The height matches most workbenches, so it slides underneath when not in use.
Benefits
- It rolls to where you need it
- Stores under work areas
- Perfect for smaller wood pieces
- Makes organizing simple
- Saves space when not in use
3. A-Frame Standing Rack
This design stands alone with slanted sides that meet at the top. The wide base and center beam provide extra support for heavy loads.
I made mine four feet wide, which holds full sheets of plywood on one side and lumber on the other. The angled sides prevent the wood from falling forward.
Benefits
- Needs no wall attachment
- Supports heavy materials
- Fits sheet goods well
- Works anywhere in your shop
- Easy to build and modify
4. Ceiling-Mounted System
This system attaches to your roof joists with strong brackets. You can add a pulley system to lift heavier pieces. The height adjusts based on your needs, and it uses metal brackets rated for serious weight.
I installed mine with enough clearance to walk under.
Benefits
- Uses empty ceiling space
- Keeps wood out of the way
- Great for storage
- Leaves walls clear
- Handles long-term storage
5. Modular Pipe Design
Built with metal pipes and wooden shelves, this rack comes together like building blocks. Each section bolts to the next, letting you make it bigger or smaller.
The pipes provide strong support, while the wood shelves protect your lumber. I started with two sections and added more as needed.
Benefits
- Grows with your needs
- Holds heavy loads safely
- Changes size easily
- Simple to repair
- Looks neat in your shop
How to Customize Your Lumbar Rack In Style
Let me share some smart ways to make your lumber rack both useful and good-looking. I’ll focus on practical changes that add real value.
- Color and Finish Touches: I started with a clear wood sealer to protect the rack, then added a touch of style. Using exterior-grade paint in neutral tones helps the rack blend with the shop walls. For my outdoor rack, I picked a soft gray that matches my shop’s trim. The paint not only looks good but adds a layer of protection against moisture and wear.
- Smart Storage Add-ons: To make my rack more useful, I added small bins between the support arms. These hold shorter wood pieces and trim that would otherwise get lost. I also installed hooks on the sides to hang my measuring tools and saw guides. This keeps everything I need for cutting lumber right where I use it.
- Adjustable Features: By using movable brackets instead of fixed ones, I made my rack more flexible. The brackets slide along the support beams, letting me change spaces between shelves. This helps when I need to store different sizes of wood. Each bracket locks firmly in place with strong bolts.
- Label System: Creating clear labels made finding wood much easier. I use plastic tags that show wood types and sizes. These tags clip onto the front of each shelf. When I move wood around, the tags move, too. This simple system saves time when looking for specific pieces.
- Safety Additions: I added rubber padding on the support arms to keep the wood from sliding. Small ledges at the ends of each arm stop longboards from falling off. For sheet goods storage, I installed wider supports with anti-slip surfaces. These changes make the rack safer without making it harder to use.
- Built-in Lighting: Installing LED strip lights under each shelf level brightens dark corners. The lights run on batteries and turn on with a touch. This helps me see wood grain and marks clearly, even in low light. The battery packs hide behind the support beams, keeping the look clean.
- Extra Support Features: To handle heavier loads, I put in extra bracing where needed. Cross supports between vertical posts make the whole rack stronger. Adding diagonal braces at corners keeps everything square and steady. These supports look like part of the design while doing important work.
- Material Protection: For storing fine wood, I lined shelf surfaces with soft material. This prevents scratches on expensive boards. The liner material lets air flow through but keeps dust off. It also helps spread weight evenly across support points, protecting both the wood and the rack.

5 Tips Tips for Keeping Lumber Well-Organized
- Sort by Wood Type: I keep hardwoods separate from softwoods. Each type gets its own shelf level. This stops me from having to dig through piles to find the right wood. It also helps me track what I have in stock.
- Size-Based Storage: Longboards go on top shelves, medium lengths in the middle, and short pieces at the bottom. Sheet goods stand at one end. For small offcuts, I use bins below the main shelves. This makes finding the right size quick.
- First-In, First-Out Method: New wood goes at the back of each shelf. I use older pieces first, pulling from the front. This keeps wood moving and prevents any pieces from sitting too long.
- Simple Label System: Every shelf has a small tag showing:
- Wood type
- Board thickness
- Common lengths
- Date stored
- Scrap Management: I keep a “use first” box for good scraps. When it fills up, I sort through it. Small pieces work great for shop projects. Anything too small gets marked for firewood.
Conclusion
Building your own lumber rack is simpler than you might think. I built mine over the weekend, and it’s still holding strong after months of use.
The right design and proper organization can save you both time and money.
Remember, a good lumber rack is about more than just storage—it’s about improving your workspace. Your wood stays dry, straight, and ready to use, and you’ll stop wasting time searching for the right pieces.
Ready to start? Pick a design that fits your space and gather your materials. If you found this guide helpful, check out my other workshop organization tips.
Share your own lumber rack photos in the comments – I’d love to see what you create!

