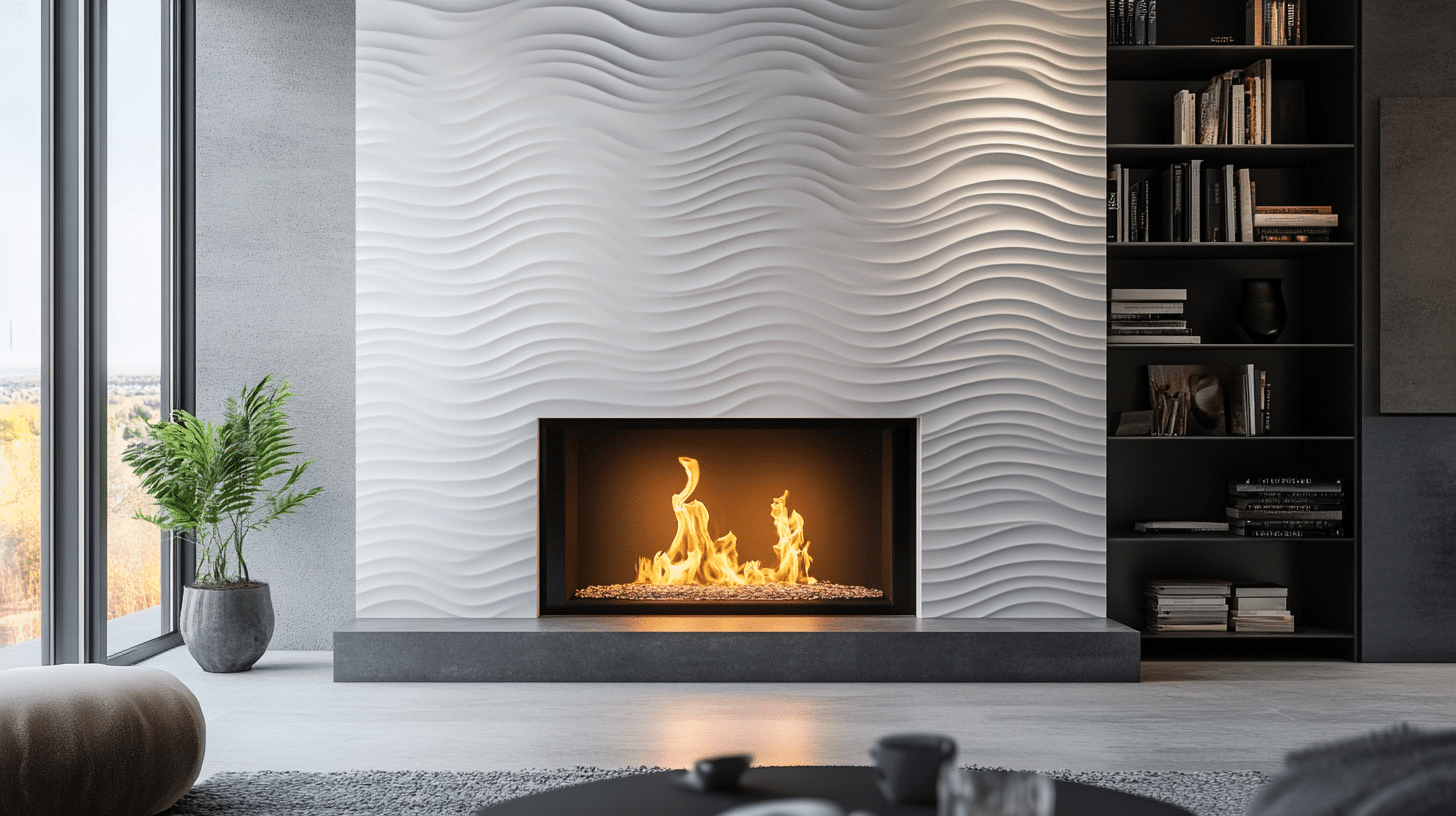
How to Build a DIY Fireplace Surround
Building a fireplace surround might seem like a big task. I know because I felt the same way before I made my first one.
After spending hundreds on quotes from contractors, I learned to build one myself for a third of the cost. I want to share my step-by-step method with you today.
In this guide, I’ll walk you through making a custom fireplace surround. You’ll learn how to measure, cut, and assemble a beautiful fireplace frame that fits your home perfectly.
I’ve broken down each step to make it simple and clear, even if you’re new to DIY projects.
How to Plan Your DIY Fireplace Surround?
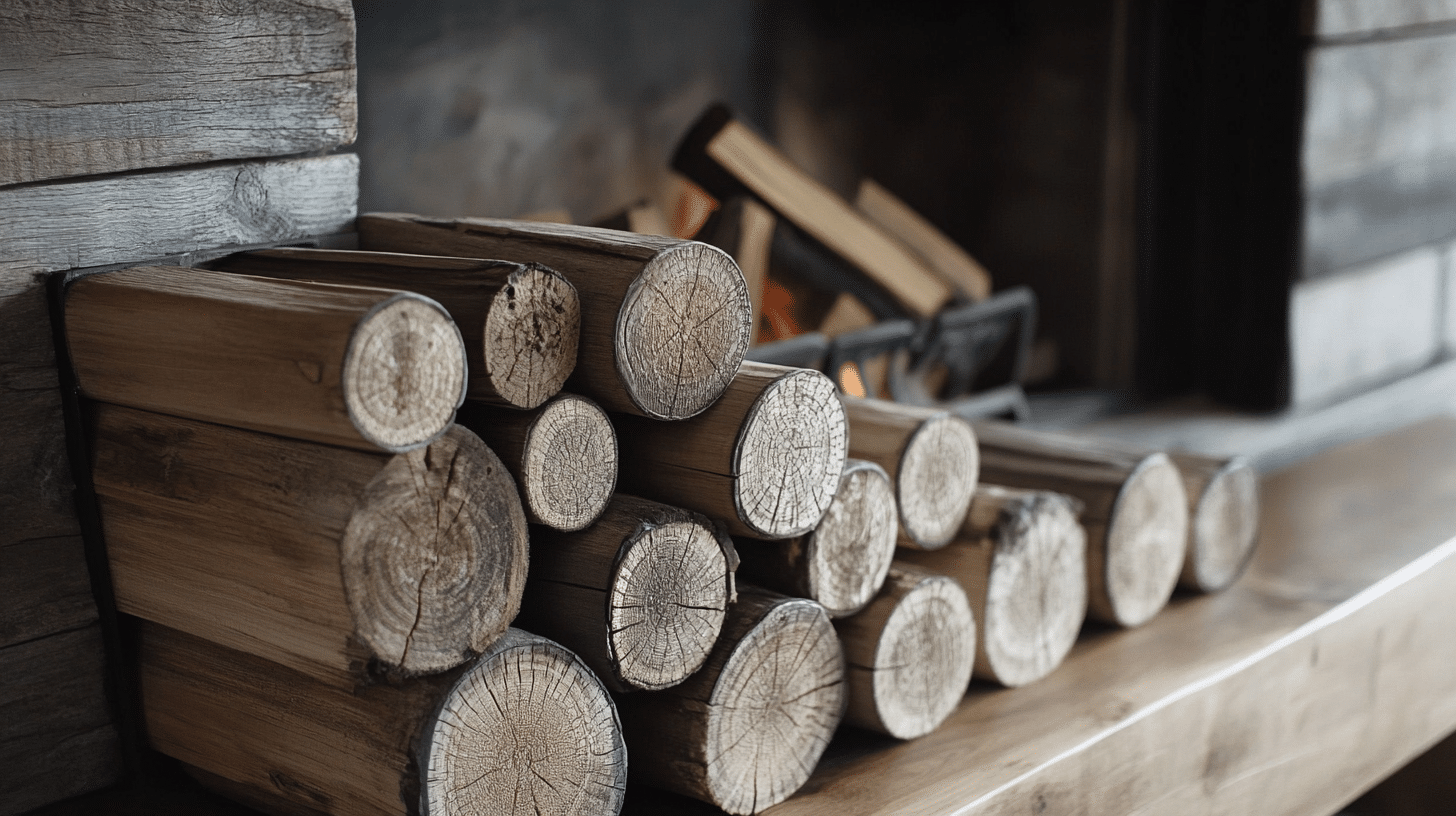
Planning is the first big step in making your fireplace surround. I learned this lesson when I built mine, and now I want to share my complete planning process with you.
1. Measure Your Space
Getting the right measurements makes all the difference. I spent a full hour on this step, and it saved me from costly mistakes. Here’s what you need to measure:
- Height from floor to desired top point (take this measurement three times to be sure)
- Width of the existing fireplace opening at top and bottom
- Depth from the wall to the front of your existing fireplace
- Distance between the fireplace and nearby walls/furniture
- Hearth measurements if you have one
2. Pick Your Materials
The right materials matter for both safety and looks. From my testing, these work best:
- MDF boards for the main frame (they’re stable and take paint well)
- Wood trim pieces for decorative elements
- Heat-resistant primer and paint
- Basic tools: circular saw, level, drill, screwdriver set
- Safety gear: goggles, dust mask, work gloves
- Measuring tools: tape measure, pencil, straight edge
3. Check Local Rules
Safety comes first with fireplaces. Here’s what I did before starting:
- I called the local building office for codes
- Asked about specific fire safety requirements
- I got information about needed permits
- Checked how far wood materials must be from the firebox
- Asked about required fire-resistant backing materials
- Got written copies of all requirements
4. Set Your Budget
Money matters need careful planning. Here’s my budgeting method:
- List every material needed, down to the smallest screw
- Add 20% extra for mistakes or changes
- Compare prices at big stores and local lumber yards
- Include the cost of tools if you need to buy them
- Factor in permit costs
- Set aside money for unexpected issues
- Keep all receipts in one place
5. Make Detailed Plans
Good plans prevent problems. I spent time on these details:
- Drew the design from the front view
- Made side-view drawings to show depth
- Marked exact measurements on drawings
- Noted joining points for all pieces
- Listed the order of assembly steps
- Marked spots for any electrical needs (like light fixtures)
- Drew where trim pieces would go
6. Prepare Your Space
Before the first cut, get your work area ready:
- Clear the area around the fireplace
- Put down drop cloths
- Set up good lighting
- Make sure you have power outlets available
- Create a clean, flat work surface
- Set up a cutting station in a well-ventilated spot
- Have a first-aid kit handy
7. Timeline Planning
Based on my experience, plan for:
- Shopping and material delivery: 1-2 days
- Basic construction: 1-2 days
- Trim work: 1 day
- Painting and finishing: 1-2 days
- Drying time between steps
- Extra time if you’re new to DIY
This careful planning helped me finish my project without major setbacks. Take your time with each planning step – it’s worth it.
Step-by-Step Process to Build DIY Fireplace Surround
Materials & Tools Required
| Materials | Tools |
|---|---|
| MDF boards (1×6 inch) | Miter saw |
| 1×2 inch boards | Brad nailer |
| 1×4 inch boards | Level |
| Cove molding | Measuring tape |
| Electric fireplace insert | Pencil |
| Wood filler | Sanding block or electric sander |
| Caulk | Caulk gun |
| Paint (suitable for MDF) | Paint brushes/rollers |
| Primer | Safety glasses |
| Wood glue | Dust mask |
| Brad’s nails | Work gloves |
Step-by-Step Process
1. Remove Existing Mantle (if applicable)
- Take off any existing mantle or trim
- Clean the wall surface
- Mark level lines on the wall for a new surround
2. Build the Base Frame
- Cut 1×6 MDF boards to the desired height and width
- Attach 1×2 boards along edges for added depth
- Use wood glue and brad nails to secure pieces
- Check the level as you build
3. Create Main Structure
- Cut 1×6 boards at 45-degree angles for the top piece
- Join corners carefully to create clean seams
- Use a spacer (1×2 board) to maintain consistent gaps
- Attach to wall backing with Brad’s nails
4. Add Trim Details
- Install 1×6 boards around the outer edge
- Place 1×4 boards for inner trim
- Cut beveled edges at 45 degrees for corners
- Attach cove molding for softer edges
5. Finishing Work
- Fill nail holes with wood filler
- Sand all filled areas until smooth
- Apply caulk to all seams and joints
- Sand any rough spots
- Clean surface thoroughly
6. Paint Application
- Apply primer suitable for MDF
- Let the primer dry completely
- Paint with your chosen color
- Apply a second coat if needed
- Let dry between coats
Tips From My Experience:
- Take extra time measuring – this saves fixes later
- Make test cuts on scrap pieces first
- Check the level frequently during the installation
- Keep gaps consistent for a clean look
- Sand between paint coats for a smooth finish
An Approximate Cost While Building a DIY Fireplace Surround
| Item | Estimated Cost | Notes |
|---|---|---|
| MDF Boards | $30–$60 | For the mainframe and inner trim, depending on the project size |
| 1×2, 1×4 Boards | $10–$25 | For added thickness and framing |
| Cove Molding | $10–$20 | Decorative edges vary by style |
| Electric Fireplace Insert | $150–$400 | Price varies widely based on size and features |
| Wood Filler and Caulk | $10–$15 | Small containers are sufficient for most projects |
| Paint (suitable for MDF) | $15–$30 | Higher-end paints can cost more; matte or satin finishes may vary in price |
| Primer | $10–$20 | MDF needs primer to seal before painting |
| Wood Glue | $5–$10 | A small bottle should be enough |
| Brad Nails | $5–$10 | Packs of nails for Brad Nailers |
| Molding (optional) | $20–$50 | For adding crown, base, rope, or other trim |
| Hidden Cord Channels | $5–$15 | For managing electrical cords |
| LED Lighting Strips | $10–$30 | Optional; can vary depending on length and features |
| Safety Enhancements | $15–$40 | Heat-resistant backing material, fireproof coating, and temperature monitoring supplies |
| Tools (if not owned) | $0–$200+ | Tools like miter saw, brad nailer, and sander; rentals may also be available |
| Miscellaneous Supplies | $10–$20 | Includes sandpaper, brushes, rollers, safety glasses, and other small supplies |
| Total Estimate | $300–$975 | Range depends on quality of materials, tool ownership, and additional customization options |
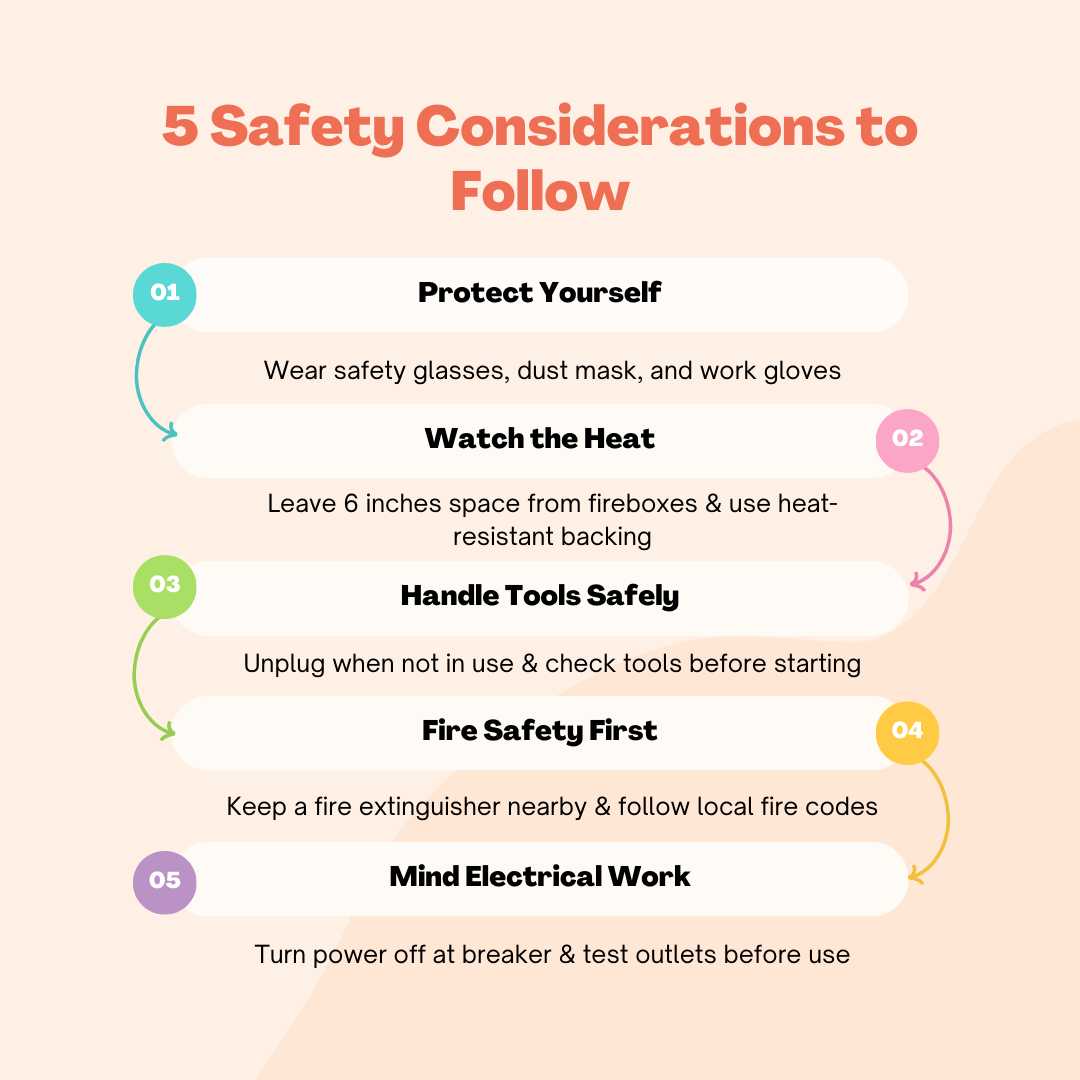
Some Common Safety Considerations
How Do I Maintain and Clean My New Fireplace Surround?
I’ll share simple maintenance tips based on my experience with fireplace surrounds.
Regular Cleaning
- Dust weekly with a soft, dry cloth
- Use gentle, wood-safe cleaner monthly
- Remove marks as soon as you spot them
- Clean the insert screen with a damp cloth
- Keep air vents dust-free
Seasonal Care
1. Every Three Months
- Check all joints stay tight
- Look for heat damage signs
- Clean built-up dust in corners
- Test stability of the mantel
- Wipe down all surfaces well
2. Fixing Small Issues
- Fill tiny cracks with wood filler
- Touch-up paint marks right away
- Tighten loose trim pieces
- Fix loose caulk lines
- Clean stubborn stains
3. When to Get Help
- Large cracks appear
- Paint starts peeling
- Structure feels loose
- Heat damage shows
- Water marks form
Quick Tips:
- Don’t use harsh cleaners
- Keep water use minimal
- Test cleaners on hidden spots
- Clean spills right away
- Check seals regularly
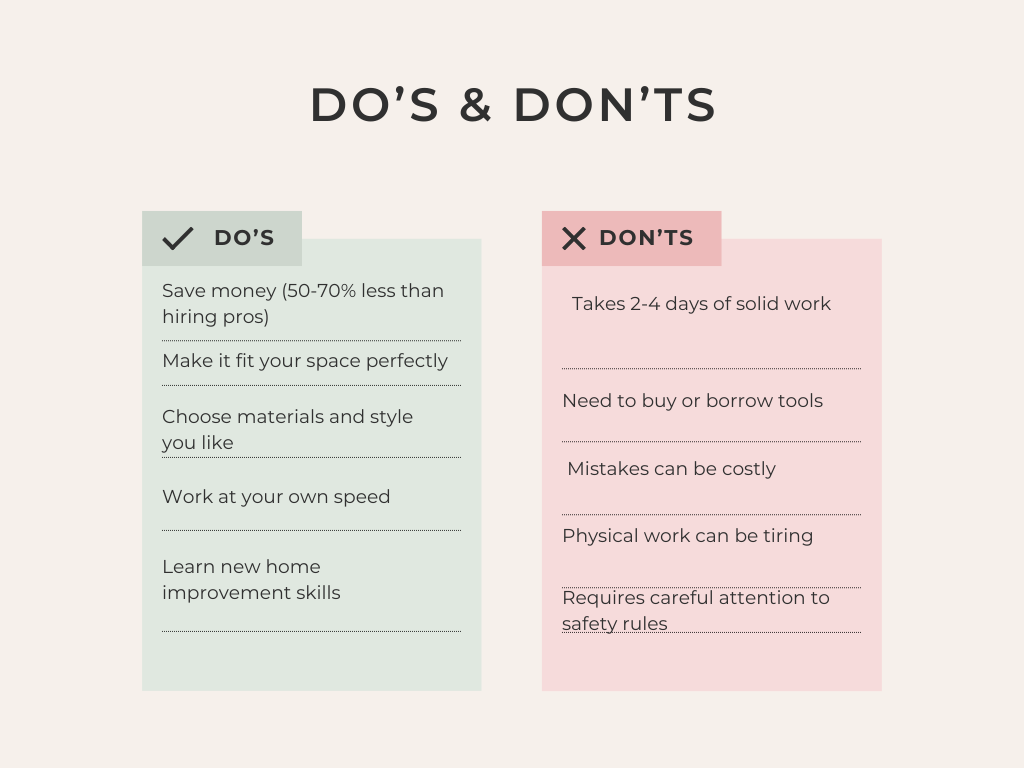
What are the Pros & Cons of Building This
Some Amazing Customization and Enhancement Tips to Follow
| Category | Tips |
|---|---|
| Paint Techniques | – Try a matte finish for a soft look – Use satin paint for easy cleaning – Add two thin coats instead of one thick layer – Sand lightly between coats – Pick colors that match your room’s trim |
| Molding Options | – Simple crown molding at the top – Beadboard inside the frame – Flat panel trim for clean lines – Rope molding for subtle detail – Base molding that matches your room |
| Practical Add-ons | – Hidden cord management channels – Built-in LED lighting strips – Extra shelf depth for decor – Removable panels for maintenance – Corner blocks for stronger joints |
| Size Adjustments | – Extend side panels for tall ceilings – Make it narrow for small rooms – Add width for large wall spaces – Build shallow depth for tight spots – Scale trim size to room size |
| Storage Solutions | – Hidden drawers below the mantel – Side cabinets for equipment – Pull-out tool storage – Built-in wood storage look – Remote control pocket |
| Material Mix Ideas | – MDF with real wood trim – Painted base with stained top – Stone veneer accents – Tile inlay details – Metal accent strips |
| Seasonal Flexibility | – Add hooks inside for decor – Install magnetic attachment points – Create removable panel sections – Include adjustable shelving – Design changeable insert frames |
| Safety Enhancements | – Heat-resistant backing material – Proper ventilation gaps – Cable management system – Fireproof coating application – Temperature monitoring spots |
| Cost-Saving Options | – Mix high and low-end materials – Use MDF for painted sections – Build in phases – Shop local surplus stores – Make templates from cardboard first |
Conclusion
I saved over $500 by making mine instead of hiring someone. Your new fireplace surround will add style to your room and give you a sense of pride every time you look at it.
Take your time with measurements, follow safety rules, and don’t rush the process. Remember to check local building codes before you start, and keep your fire extinguisher handy.
If you’re ready to start your project, get all your materials first and set aside a full weekend. Want more home improvement ideas?
Check out my other DIY guides about built-in shelving and custom trim work.

