The Ultimate Guide to Wood Trim Accent Walls: Inspiration and DIY Tips
Welcome to this guide on wood trim accent walls! I’m thrilled to walk you through creating stunning wall designs using wood trim.
I’ll cover everything from picking the right style to adding those final touches. In my experience, wood trim adds a cozy feel and interesting texture to any room.
Plus, it’s a wallet-friendly way to refresh your space. Whether you’re into modern or classic looks, I’ve found there’s a trim style for everyone.
In this guide, I’ll share my favorite wood trim patterns, tips I’ve learned for choosing the best trim for your space, and my step-by-step process for installation.
I’ll also pass on my advice for painting, staining, and keeping your new accent wall looking great.
Ready to transform your walls? Let’s dive into the world of wood trim accent walls together!
What Is a Wood Trim Accent Wall?
Wood trim accent walls are a clever way to enhance a room’s appearance.
They involve attaching thin wood pieces to a wall in various patterns, transforming the space without a hefty price tag.
A wood trim accent wall uses thin wood strips on one wall of a room. Unlike full wood paneling, it creates patterns or shapes with these strips.
These walls are excellent for improving a room’s look, making a plain wall stand out, or adding a cozy feel.
Styles of Wood Trim Accent Walls
Wood trim offers many design options:
- Simple linear trim: Straight lines running up and down the wall
- Geometric patterns: Creating shapes like diamonds or squares
- Paneled looks: Mimicking the appearance of fancy wall panels
Adding Depth and Character
Wood trim walls are great at changing how a room feels:
- They add layers to a flat wall, making the room feel more put-together
- These walls can create a focal point, drawing attention to a specific area
- They work well in various room types and can suit different style preferences
Wood trim accent walls are a versatile way to change your home’s look. Whether you prefer a modern or traditional style, there’s a wood trim design that can work for you.
Neutral Color Palettes Design Ideas for Wood Trim Accent Walls
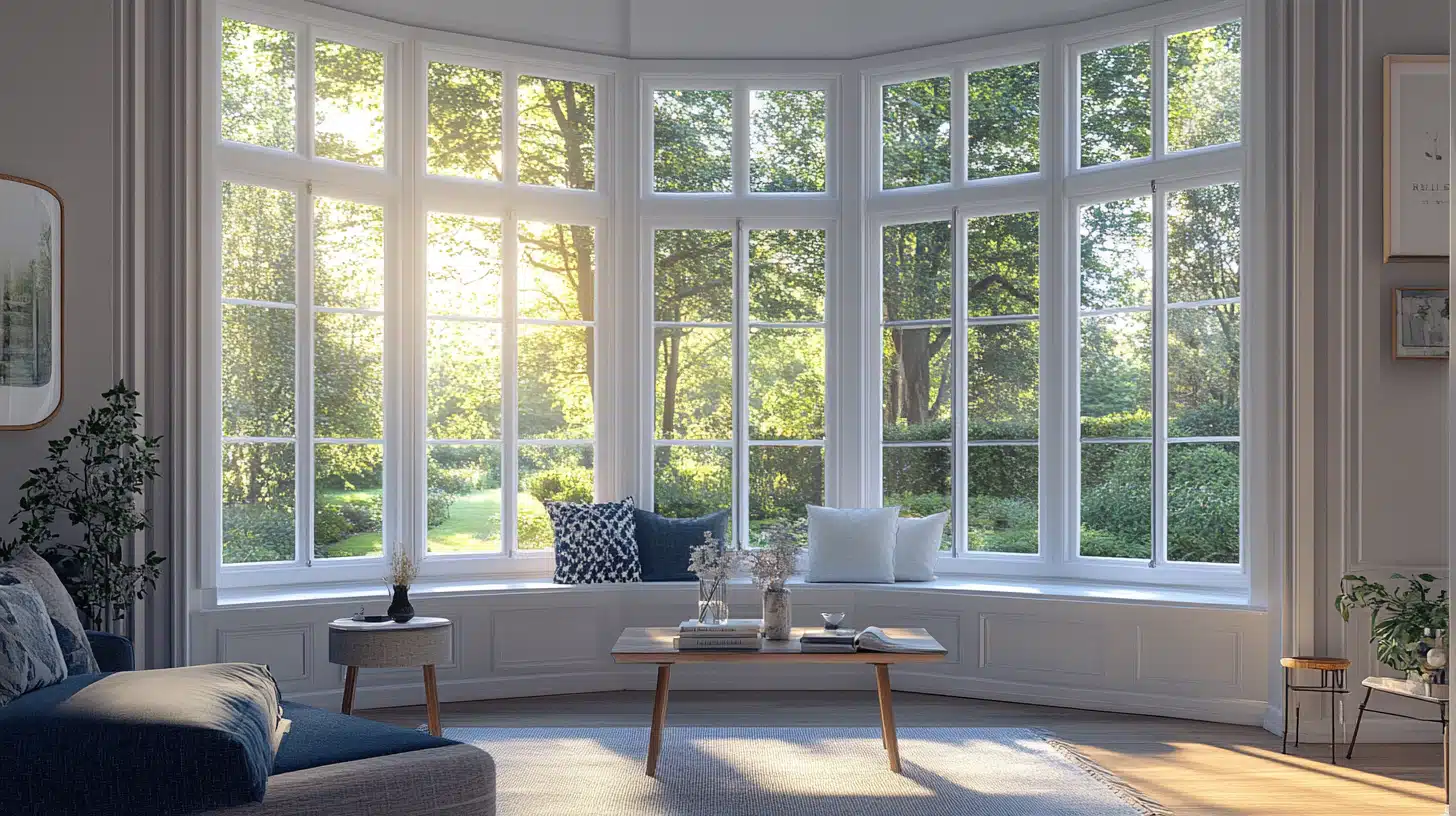
1. Vertical Batten Accent
Vertical battens bring height and texture to a room. They can create the illusion of higher ceilings, adding elegance and visual interest. This minimalist approach is perfect for rooms that require a subtle yet impactful design element.
Suitable For:
Hallways, small bedrooms, and entryways.
Installation Tips:
Space the battens evenly for a uniform look. Use a level and adhesive for easier installation, especially on larger walls.
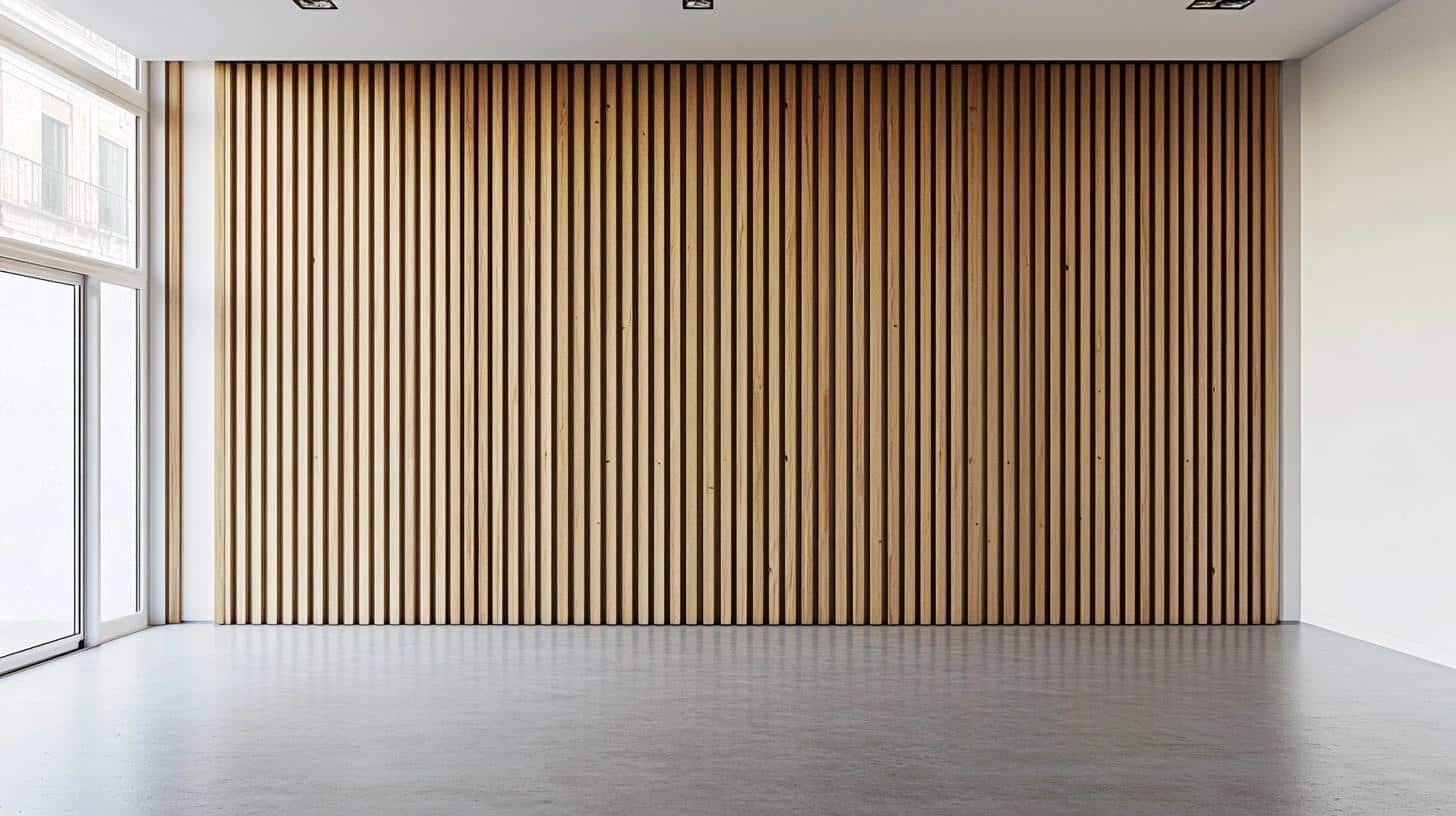
2. Minimalist Horizontal Wood Slats
Thin horizontal wooden slats add a simple, clean aesthetic to any room. This design emphasizes the natural texture of wood while maintaining a subtle, minimalist look that complements neutral color schemes.
Suitable For:
Bedrooms, modern living rooms, and office spaces.
Installation Tips:
Ensure equal spacing between slats for a uniform appearance. Opt for a light wood tone or paint the slats in a neutral shade to maintain the minimalist vibe.
Bold Contrasts Design Ideas for Wood Trim Accent Walls
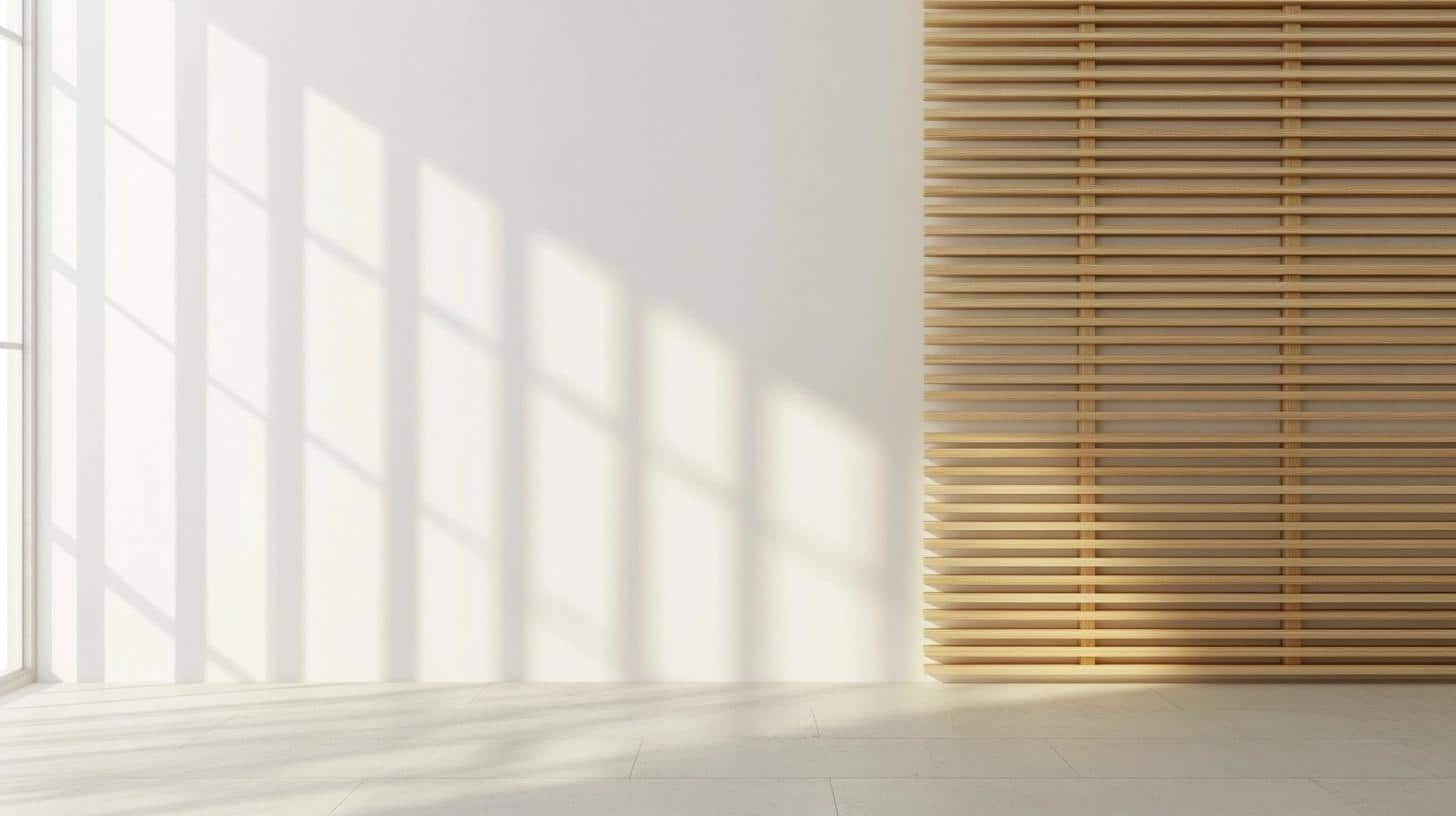
3. Diagonal Slat Wall
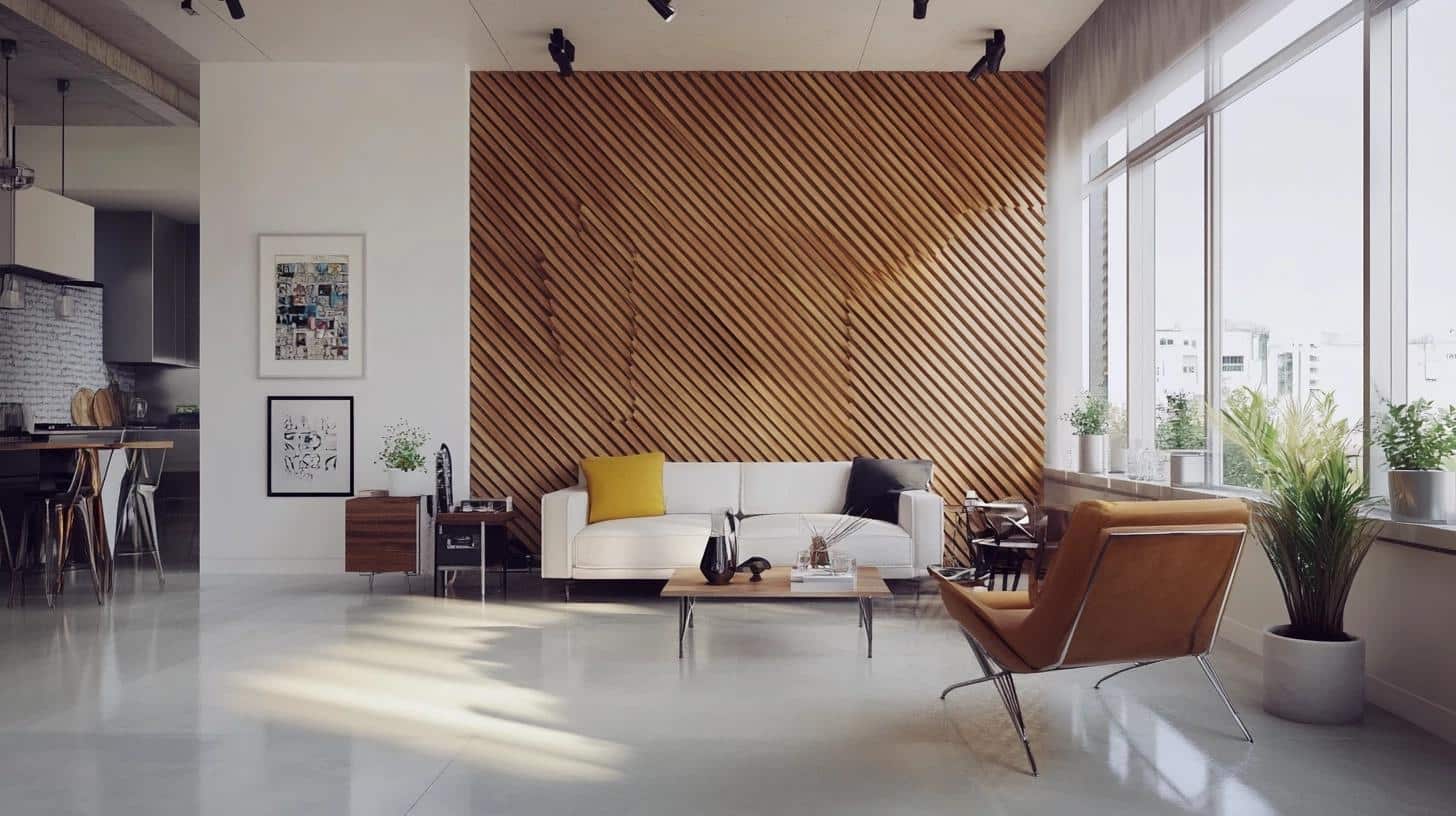
A diagonal slat wall adds a sleek, dynamic touch to any room. By angling the wood slats, this design creates movement and a modern aesthetic. It’s a unique alternative to traditional vertical or horizontal slats and works well in contemporary spaces looking for an unconventional touch.
Suitable For:
Modern living rooms, bedrooms, and office spaces.
Installation Tips:
Carefully measure and plan the angle of the slats to ensure consistency. Use a level to keep the design balanced.
4. Herringbone Wood Accent
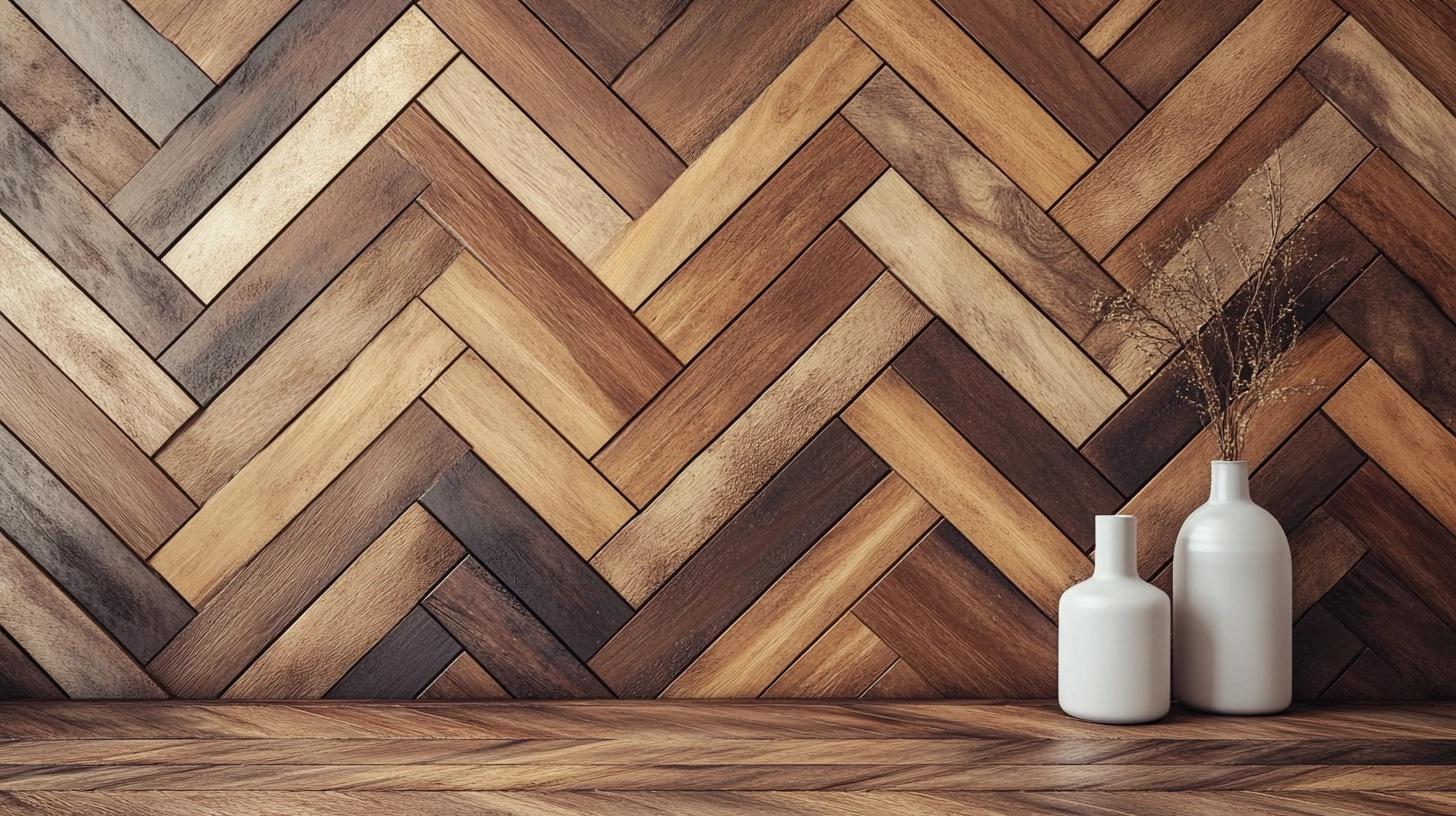
The herringbone pattern is a timeless design, offering a geometric and structured feel. With wood trim, this pattern brings warmth and a bold statement to the wall, ideal for modern or classic interiors.
Suitable For:
Living rooms, home offices, and feature walls.
Installation Tips:
Ensure precise cuts at 45-degree angles to achieve a true herringbone pattern. Use contrasting wood tones for a more dramatic effect.
5. Wood Slat Wall with Ombre Effect

A wood slat wall with an ombre effect creates a bold contrast with a gradual change in color tones from light to dark. This unique gradient adds visual interest and depth, making the wall the room’s focal point.
Suitable For:
Feature walls in living rooms, bedrooms, and dining spaces.
Installation Tips:
Start with the lightest shade at the top, transitioning to darker tones as you move downward. Ensure smooth transitions between shades for the best effect.
Geometric Patterns Design Ideas for Wood Trim Accent Walls
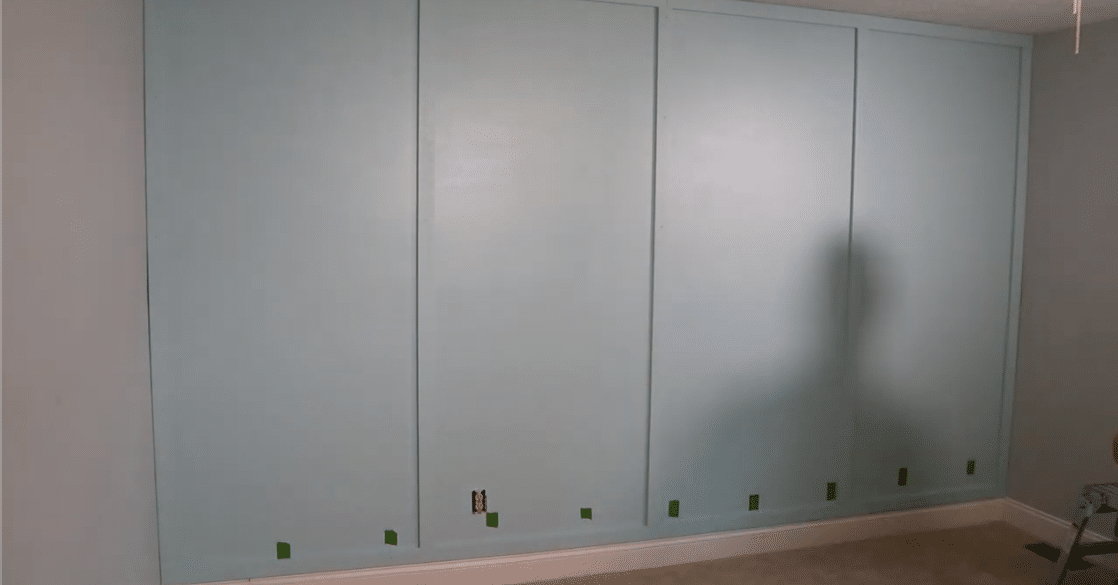
6. Grid Wall with Inset Panels
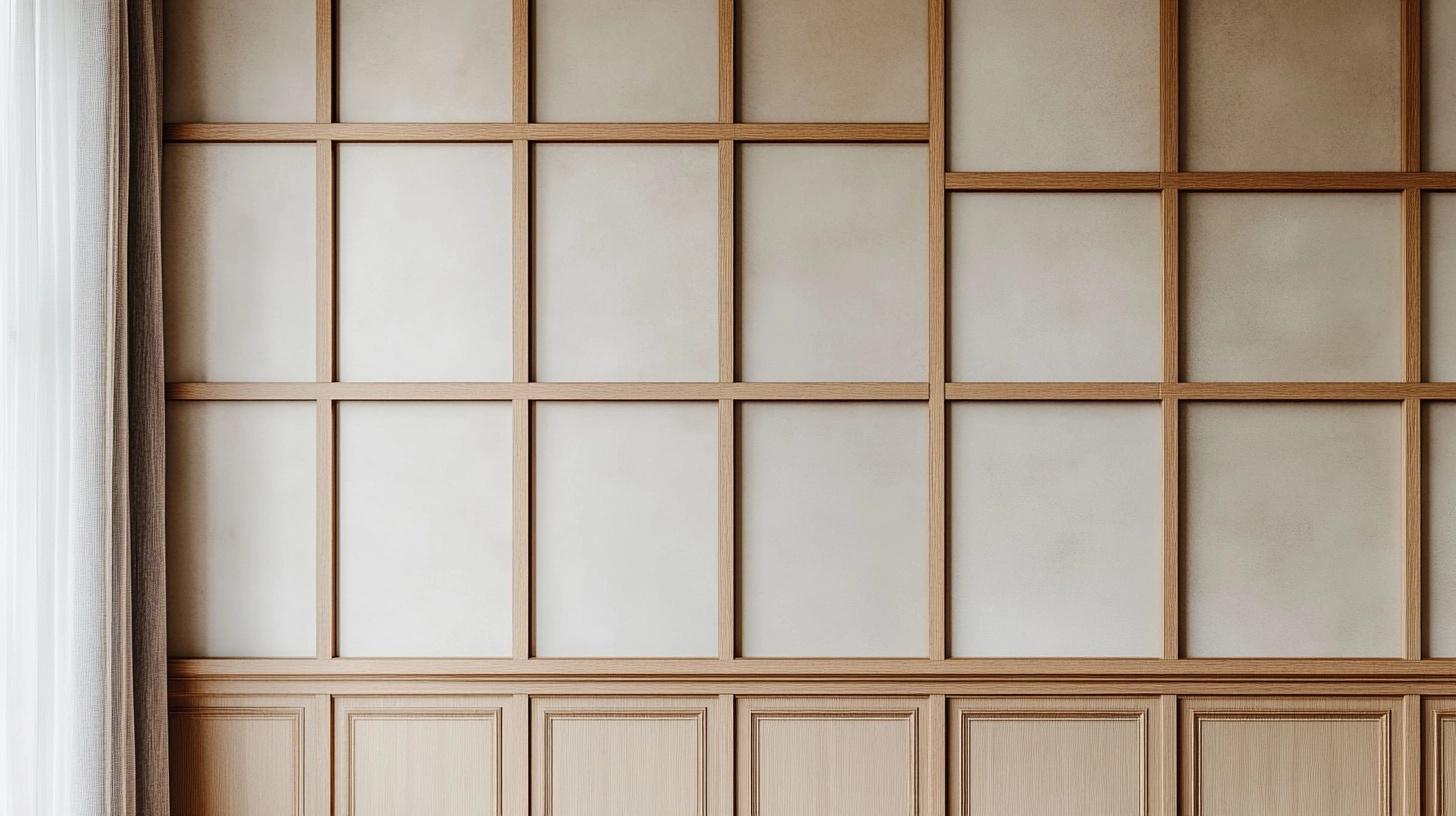
A grid wall with inset panels introduces a structured and refined look. The wood trim forms a grid, and the inset panels can be painted or wallpapered to contrast with the grid lines. This style works well in both formal and casual settings.
Suitable For:
Dining rooms, living rooms, or formal spaces.
Installation Tips:
Measure the grid pattern beforehand and use thinner trim to allow the insets to stand out. Consider pre-painting the insets for a cleaner installation process.
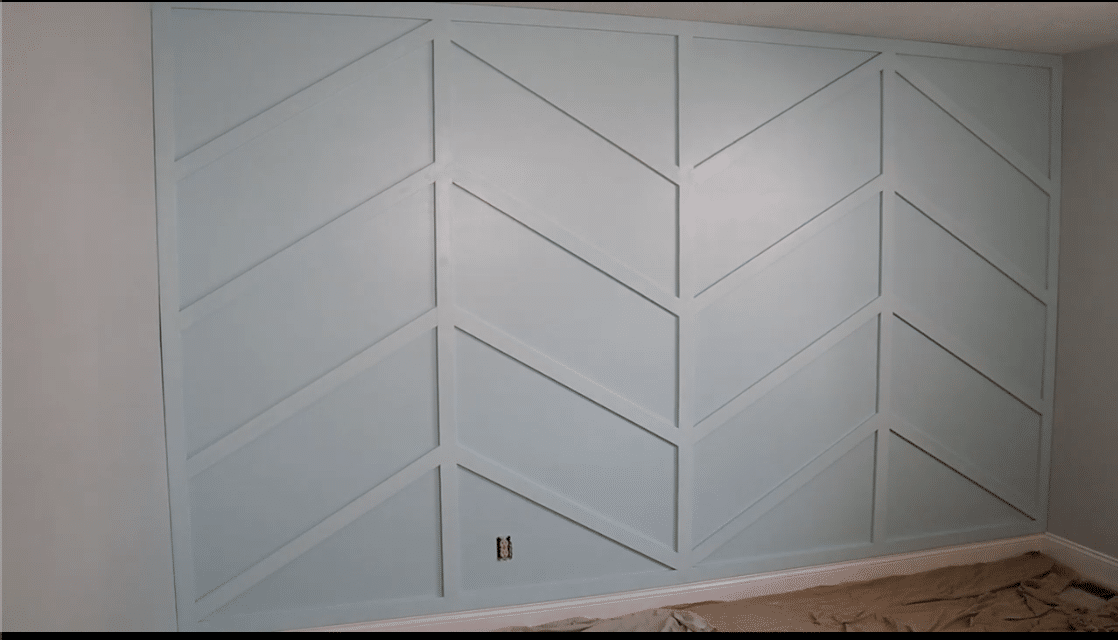
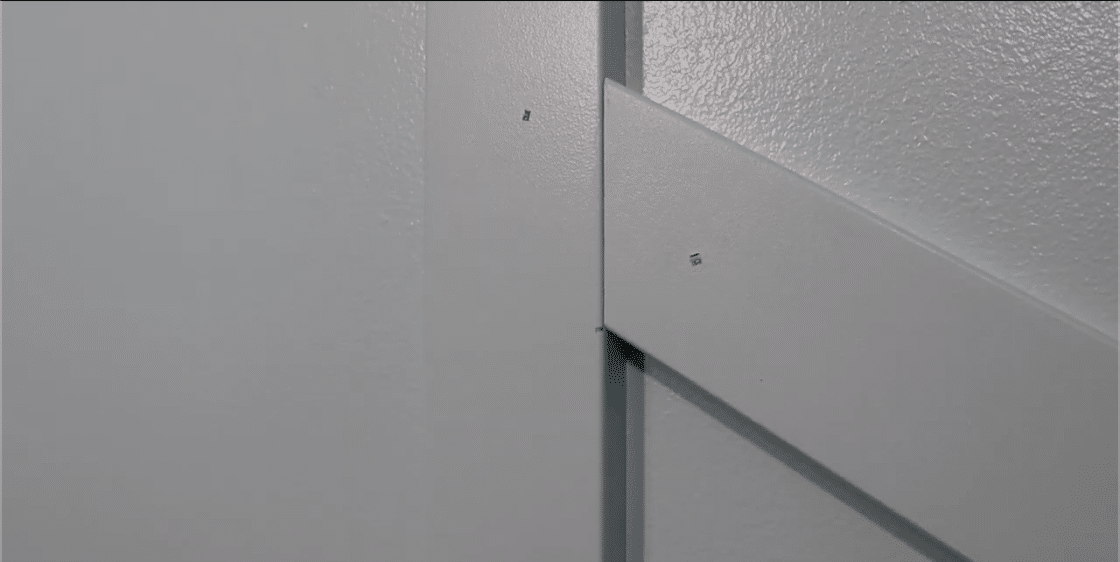
7. Chevron Pattern Wood Trim
![]()
A chevron pattern is created using wood trim in a zigzag pattern, offering a modern and stylish approach to accent walls. It adds a striking geometric feature to any space, ideal for those who want a bold look.
Suitable For:
Bedrooms, living rooms, and hallways.
Installation Tips:
Ensure precise angle cuts to achieve the signature chevron look. Darker stains or contrasting paints enhance the design’s boldness.
8. Diamond Lattice Wood Wall
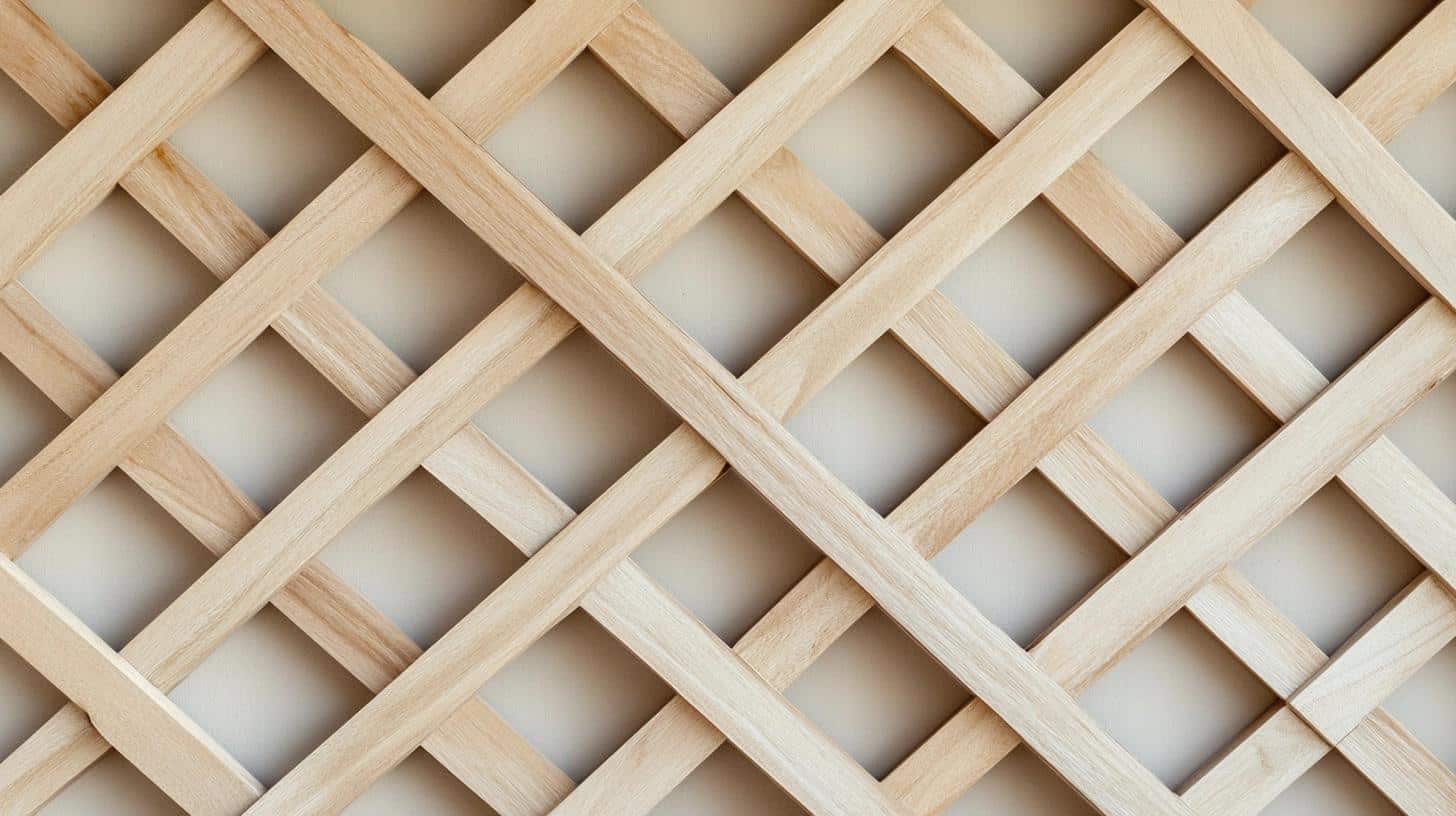
This intricate design uses wood trim to form a diamond-shaped lattice, creating an eye-catching geometric pattern. The detailed design adds sophistication and depth to any space.
Suitable For:
Living rooms, dining areas, or formal spaces.
Installation Tips:
Carefully measure and cut the trim to ensure perfect diamond shapes. Use contrasting wall colors to highlight the pattern.
Classic Styles Design Ideas for Wood Trim Accent Walls
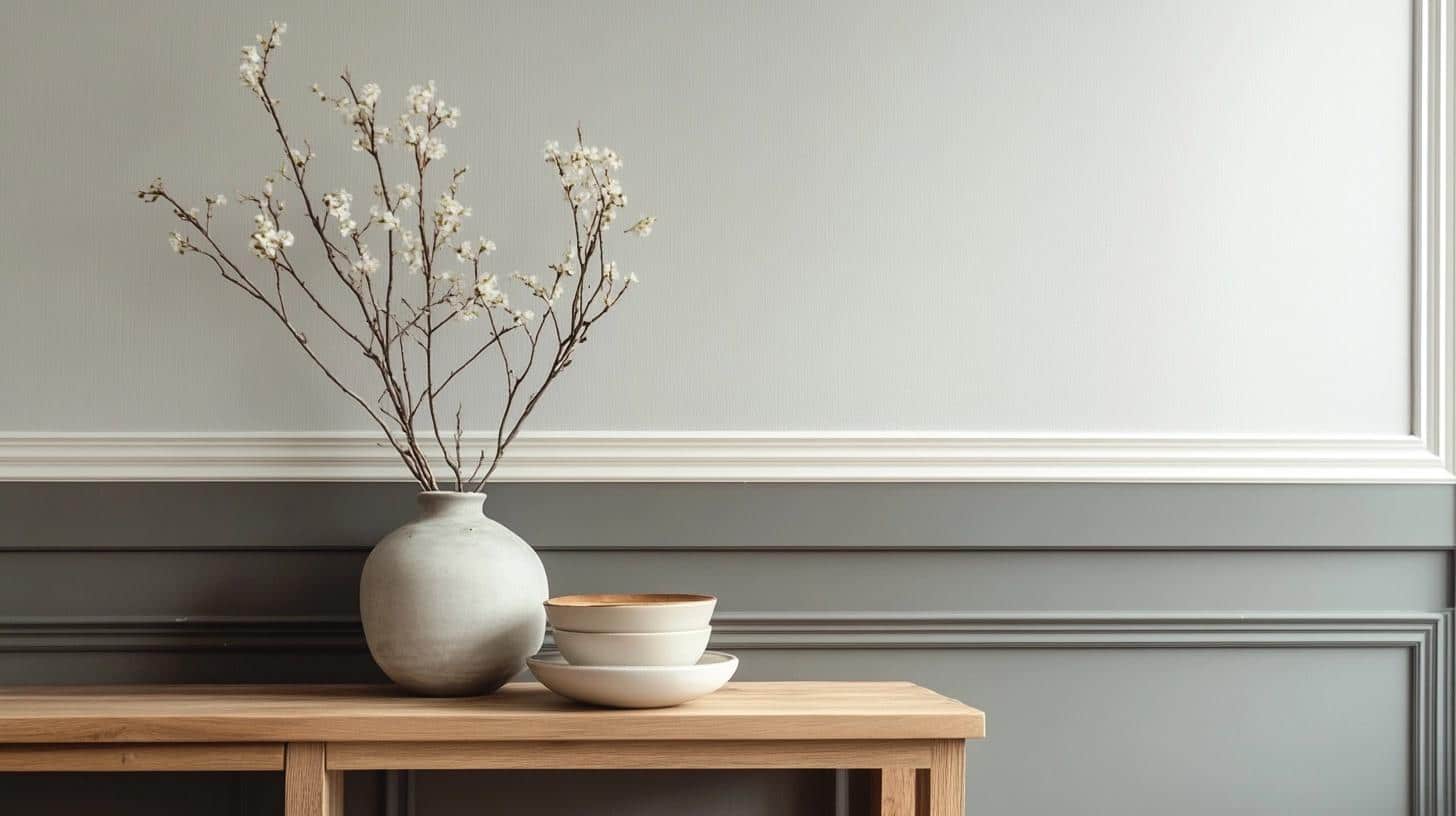
9. Half-Wall Wainscoting with Trim Molding
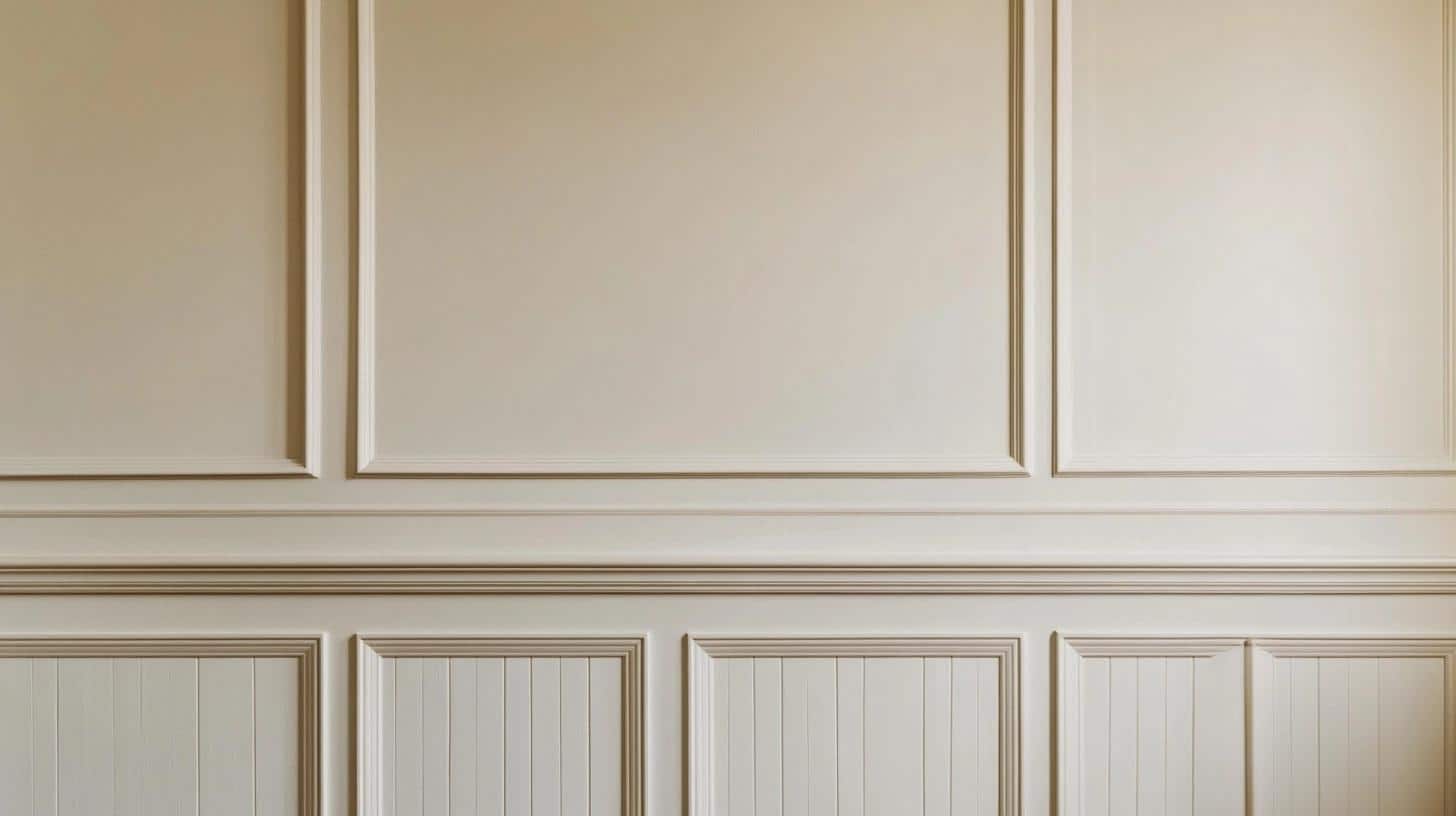
Wainscoting covers the lower half of the wall with wood panels framed by trim molding. This traditional design creates a refined, elegant look that works in various settings, from classic to contemporary.
Suitable For:
Dining rooms, hallways, and formal living spaces.
Installation Tips:
Install the wainscoting panels first, then frame them with trim molding for a professional finish. Paint the upper half of the wall in a complementary shade.
10. Raised Panel Accent Wall
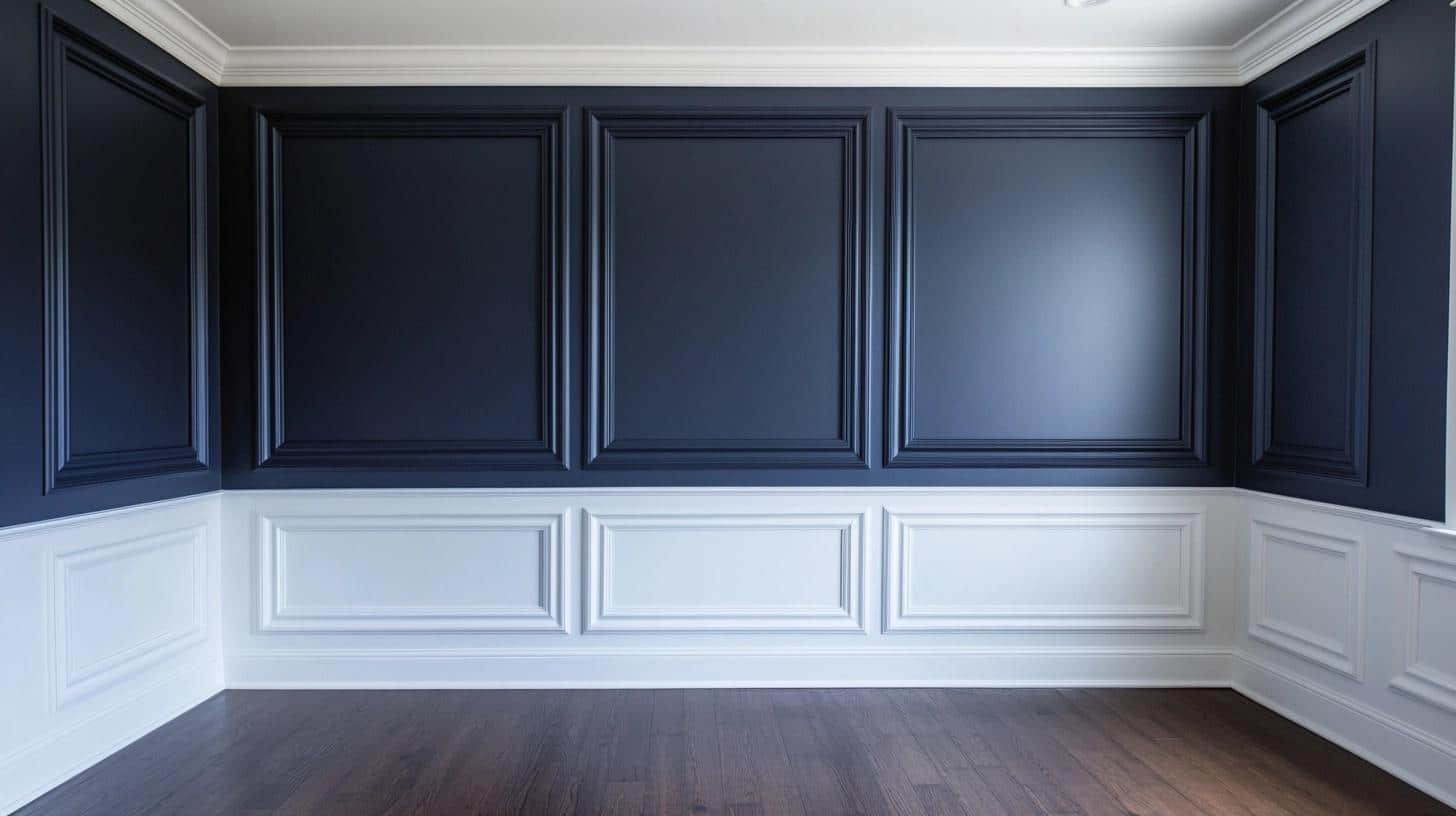
Raised wood panels framed by trim create a formal, elegant look. This classic design adds depth and texture to a room, giving it a sophisticated and polished appearance.
Suitable For:
Dining rooms, formal living rooms, and master bedrooms.
Installation Tips:
Install raised panels first, followed by the trim to frame them. Use darker colors or contrasting tones for added depth.
Unique Applications Design Ideas for Wood Trim Accent Walls
11. Rustic Wood Trim with Mixed Finishes
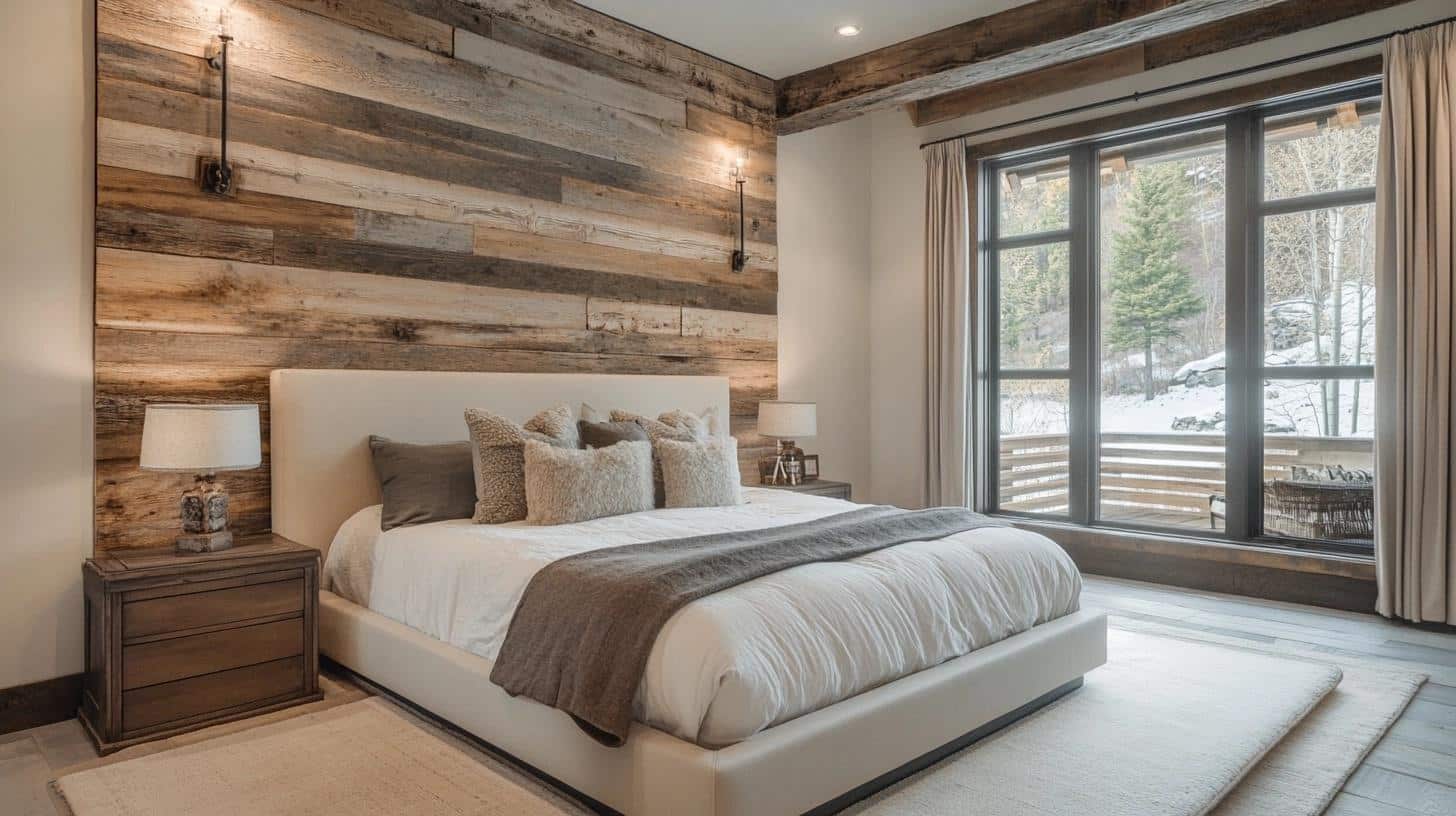
Use wood trim with mixed finishes, such as matte and glossy, to create an accent wall that balances rustic warmth with a modern twist. The variation in finishes adds subtle texture and visual interest.
Suitable For:
Living rooms, bedrooms, and kitchens with a rustic or transitional style.
Installation Tips:
Choose contrasting wood finishes and experiment with different shades. Ensure consistent spacing and alignment for the best visual impact.
12. Wood Trim Accent with Integrated Lighting
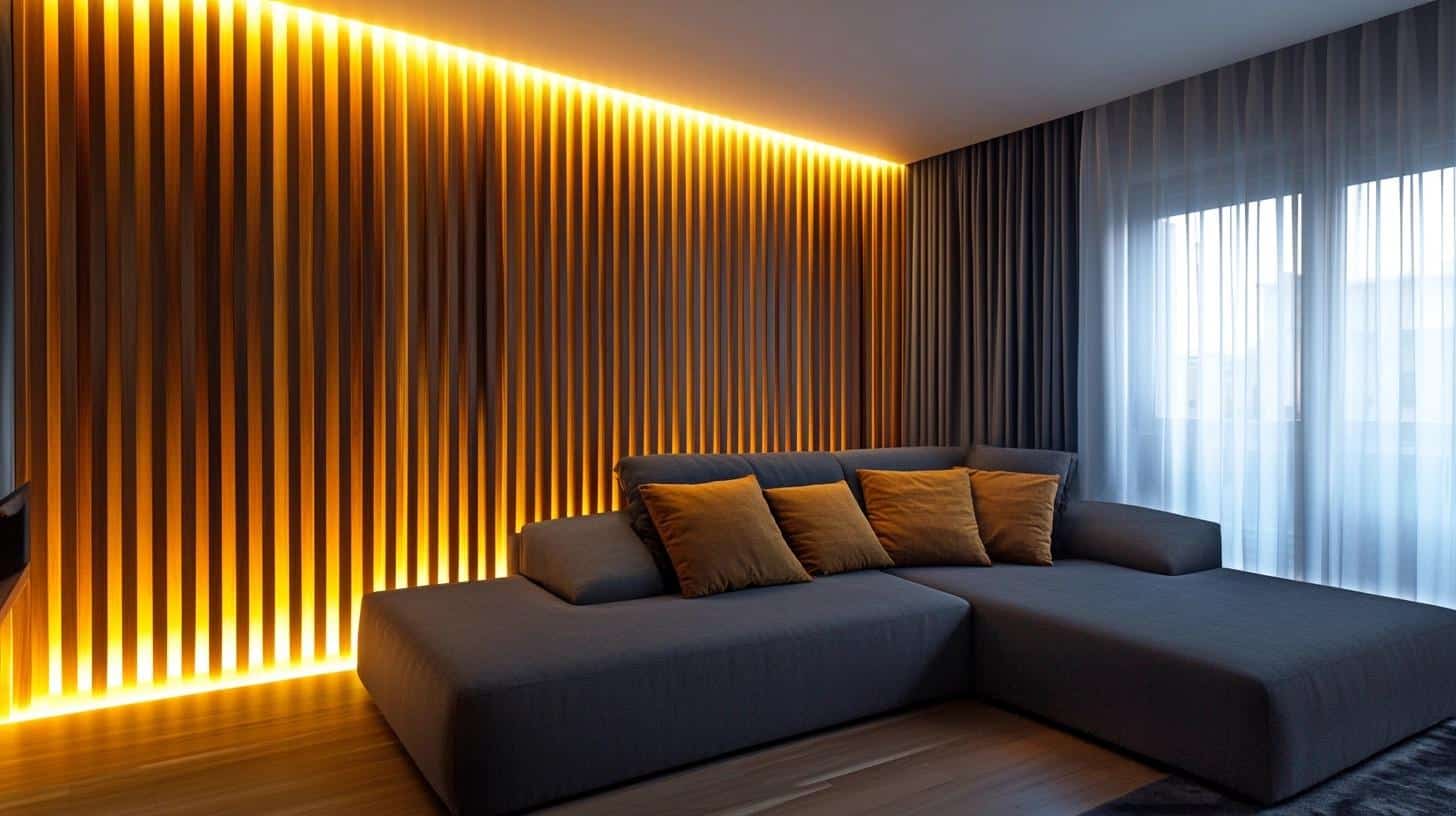
This modern idea combines wood trim with integrated LED strip lighting to add both texture and soft illumination to a wall. The lighting enhances the wood’s natural beauty while providing ambient light.
Suitable For:
Bedrooms, living rooms, and media rooms.
Installation Tips:
Carefully plan the lighting placement to ensure even distribution. Use recessed LED strips to keep the focus on the wood trim.
13. Modern Grid with Mixed Materials
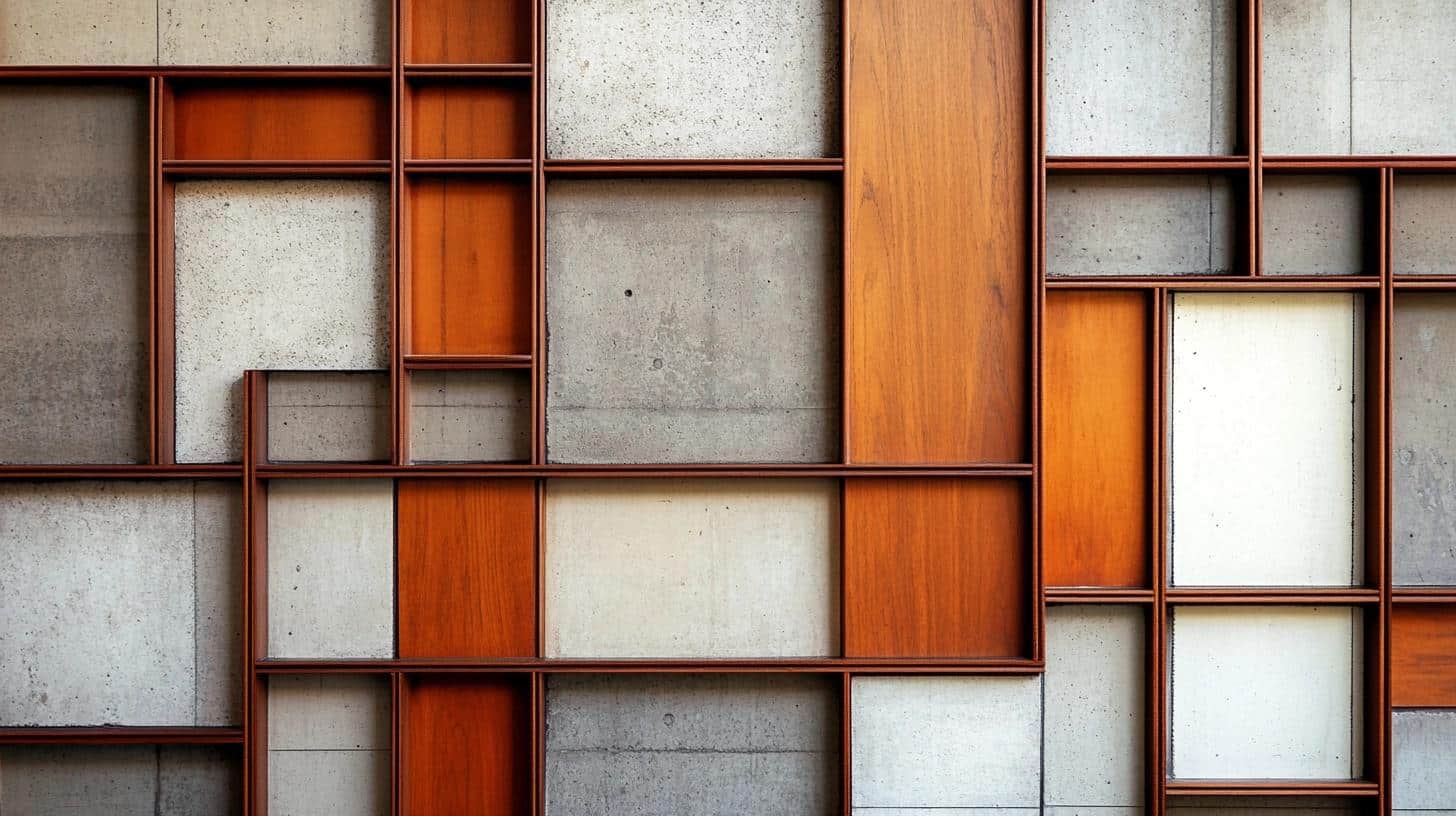
This design mixes wood trim with other materials like metal or concrete panels, creating a modern, industrial-style grid. The combination of textures and materials offers a fresh take on traditional wood accent walls.
Suitable For:
Loft-style living rooms, home offices, and creative spaces.
Installation Tips:
Ensure proper alignment of different materials within the grid. Use contrasting tones and textures for a striking effect.
14. Recessed Shelving with Wood Trim Frame
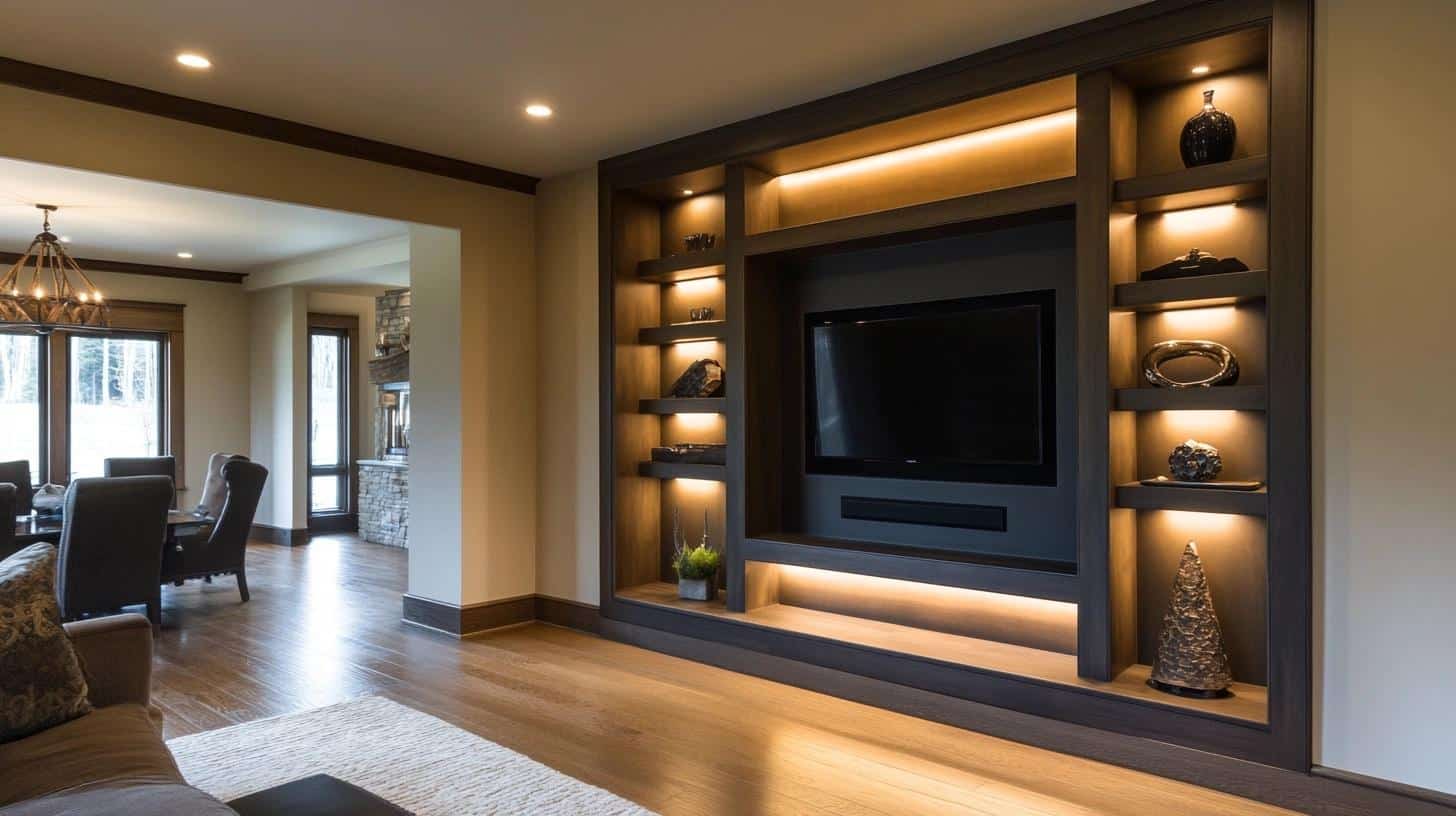
Recessed shelves framed by wood trim blend functionality with style. The shelves provide practical storage while the wood trim adds a decorative touch, making this idea perfect for small spaces.
Suitable For:
Home offices, living rooms, and entryways.
Installation Tips:
Install the shelves first, then frame them with wood trim. Use wood that contrasts with the shelf color for visual interest.
15. Shiplap Accent Wall with Wood Trim Overlay
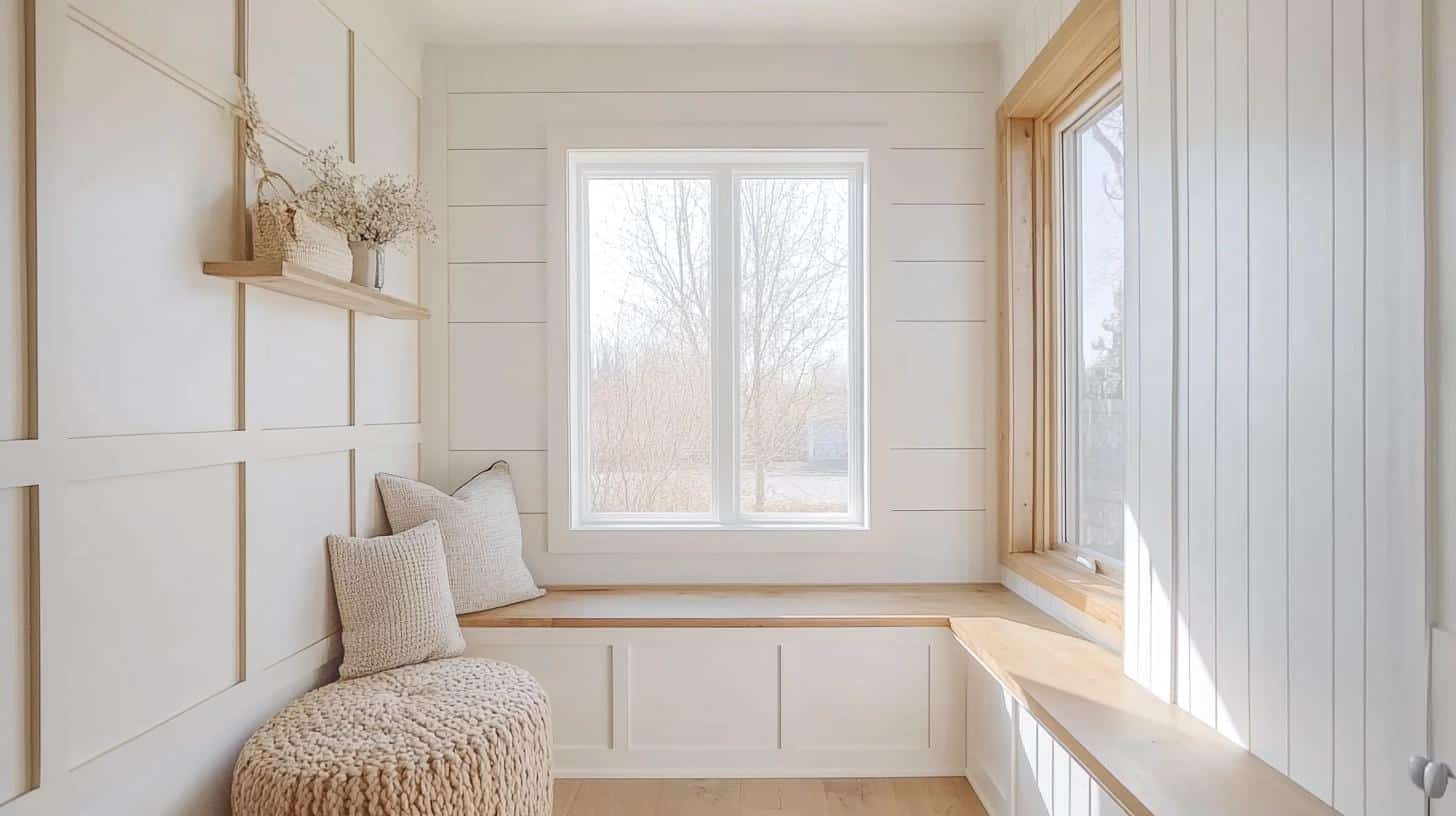
Shiplap creates a cozy, rustic foundation, and when overlaid with wood trim in geometric patterns, it adds layers and depth to the design. This combination merges farmhouse style with modern accents.
Suitable For:
Living rooms, dining areas, or bedrooms in modern farmhouse designs.
Installation Tips:
Install shiplap first, then overlay with trim to create the geometric pattern. Pre-paint or stain the trim for easier installation.
16. Textured Wood Trim in a Sunburst Pattern
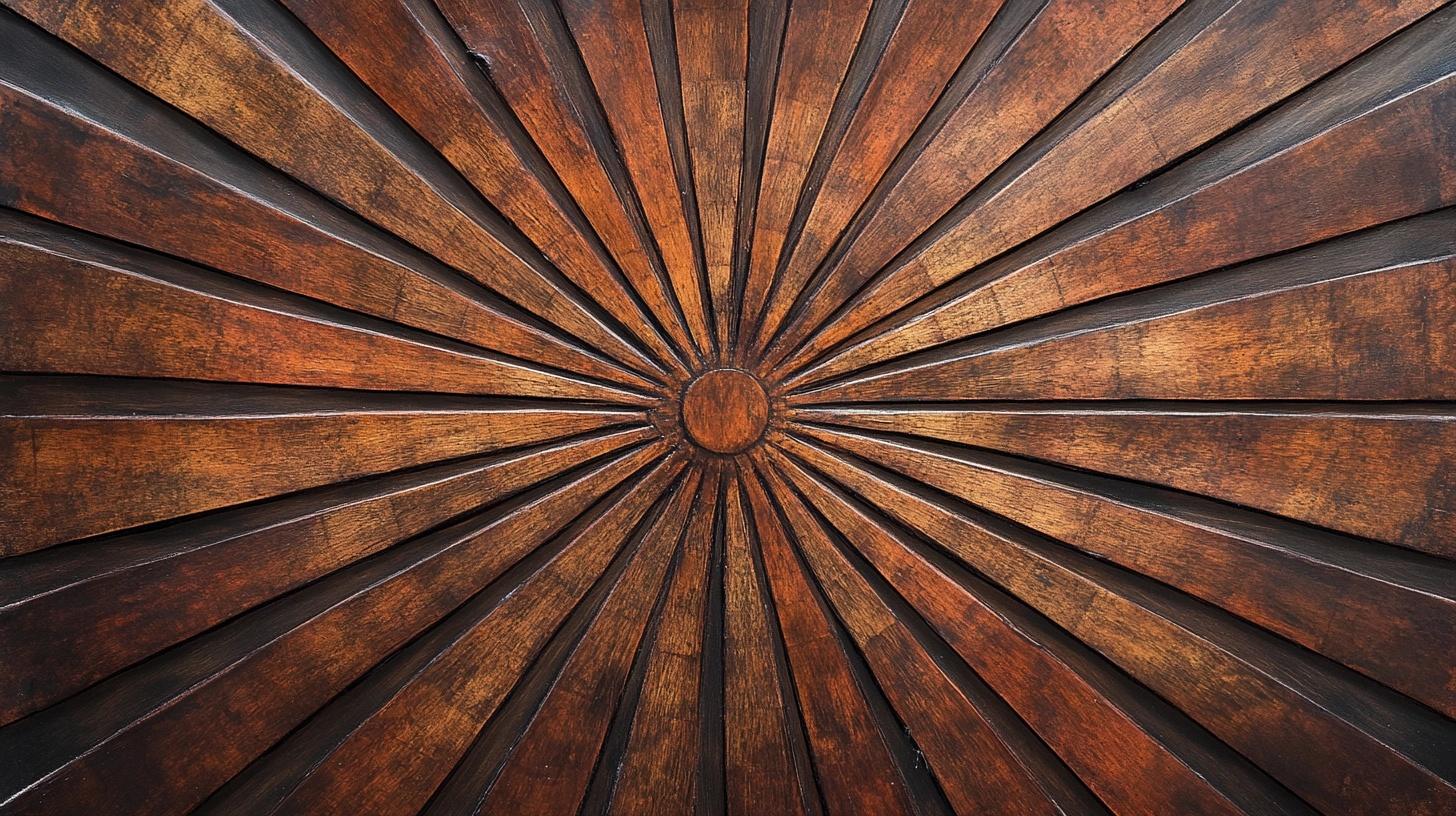
Wood trim is arranged to radiate from a central point, forming a sunburst pattern. This design brings visual interest and energy to a space, perfect for making a statement.
Suitable For:
Living rooms, dining rooms, or entryways as a focal feature.
Installation Tips:
Carefully measure the trim placement for symmetry. Start from the central point and work outward, ensuring precise alignment.
17. Double Trim in Two-Tone Color Scheme
This design uses two layers of wood trim in different colors, creating a double-framed effect. The combination of colors adds depth and complexity to the accent wall, offering a unique and modern look.
Suitable For:
Bedrooms, living rooms, and formal spaces.
Installation Tips:
Paint or stain the layers in contrasting tones for a striking look. Ensure even spacing between the layers for the best effect.
18. Wood Trim with Textured Wallpaper Insets
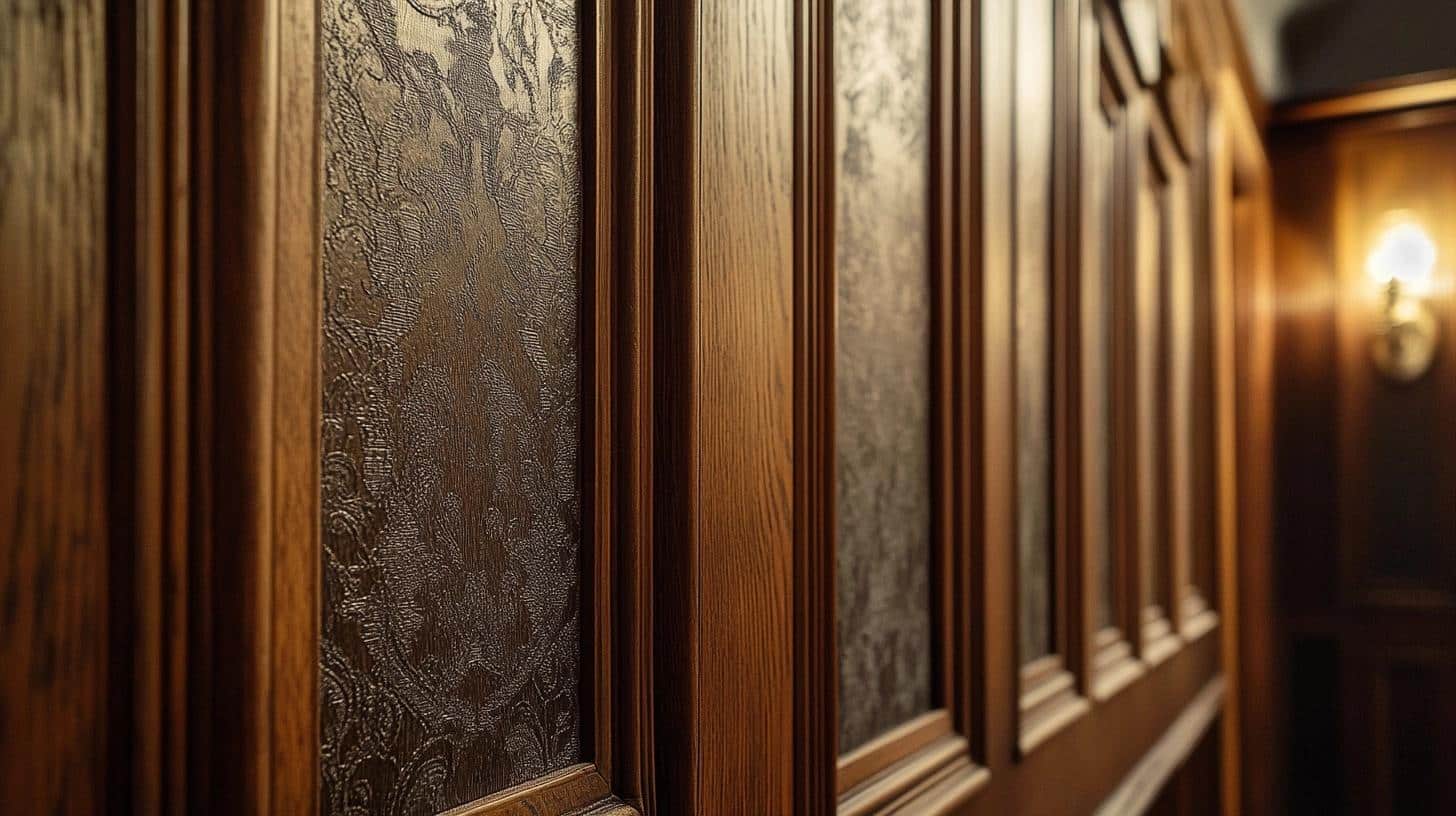
Wood trim frames sections of textured wallpaper, blending natural wood with soft, tactile elements. This combination creates a visually pleasing and dynamic wall design, perfect for a balanced aesthetic.
Suitable For:
Living rooms, bedrooms, and creative spaces.
Installation Tips:
Install the wood trim first, leaving space for the wallpaper inserts. Choose wallpaper with texture to contrast against the wood trim.
Essential Tools and Materials
Getting ready for your wood trim accent wall project means having the right stuff on hand. This section will go over the important things you’ll need, from the wood itself to the tools that make the job easier. Having these items ready will help your project go smoothly.
Recommended Wood Types
Different woods can give your wall a unique look:
- MDF: Good for painting, affordable
- Pine: Easy to work with, takes stain well
- Oak: Strong and durable, nice grain pattern
- Reclaimed wood: Adds character, eco-friendly option
Trim Options
You can use various trim styles for your accent wall:
- Crown molding: Fancy trim for the top of the wall
- Baseboards: Goes at the bottom of the wall
- Chair rails: Placed about a third of the way up the wall
- Custom-cut trim: Made to fit your specific design
Necessary Tools
These tools will help you do the job right:
- Miter saw: For making angled cuts
- Level: Ensures your trim is straight
- Nail gun: Attaches trim to the wall quickly
- Caulk: Fills in small gaps
- Wood glue: Helps secure trim pieces
Finishes and Paints
The final look of your wall depends on how you finish it:
- Stains: Bring out the wood’s natural color and grain
- Varnishes: Protect the wood and add shine
- Paint colors: Can match or contrast with your room’s style
DIY Guide: Creating a Modern Wood Trim Accent Wall
Materials Needed
- 2.5-inch wide primed MDF trim with beveled corners
- Paint for wall and trim
- 1.5-inch 18-gauge nails
- 2.5-inch 16-gauge nails
- Spackling compound
- Sandpaper
Tools Required
- Miter saw
- Nail gun
- Level
- Stud finder
- Paint roller and brushes
Step-by-Step Instructions
1. Prepare the Wall
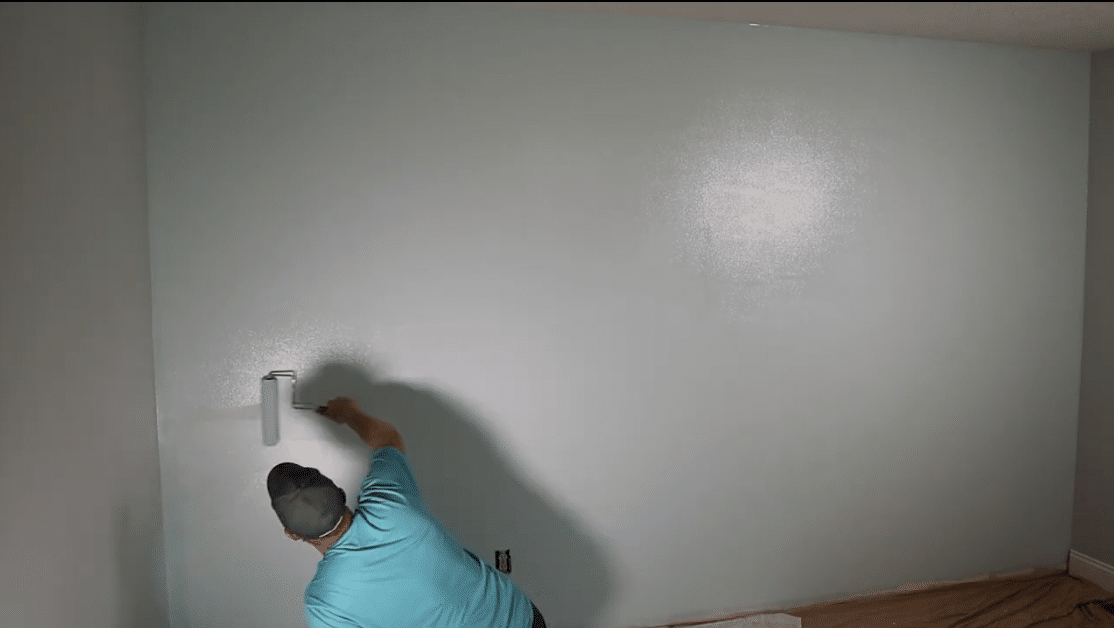
- Paint the wall your chosen color
- Let the paint dry for at least 7 days
- This helps prevent paint damage during trim removal
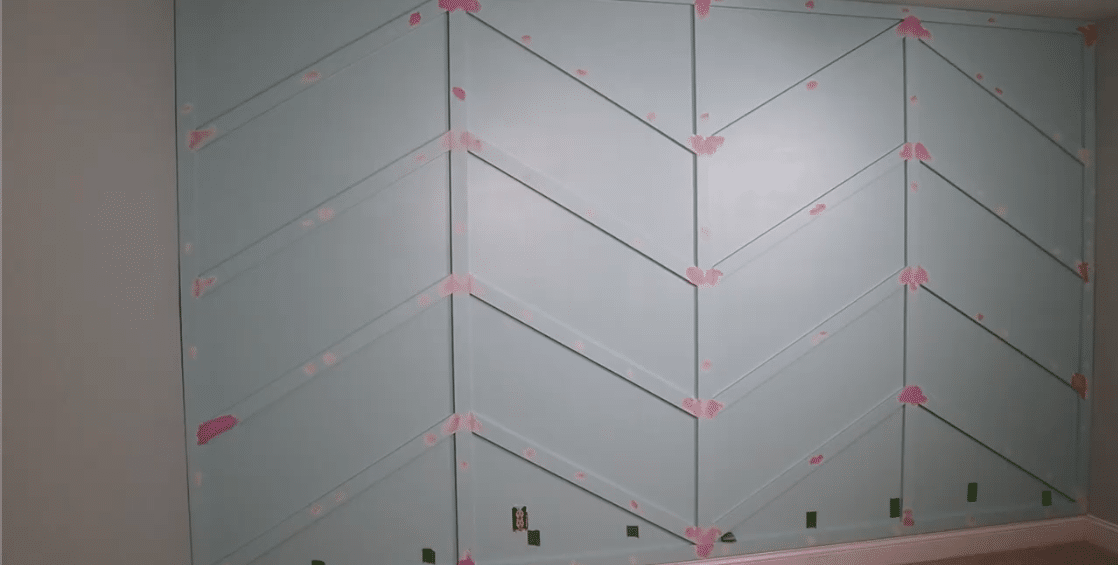
2. Plan Your Design
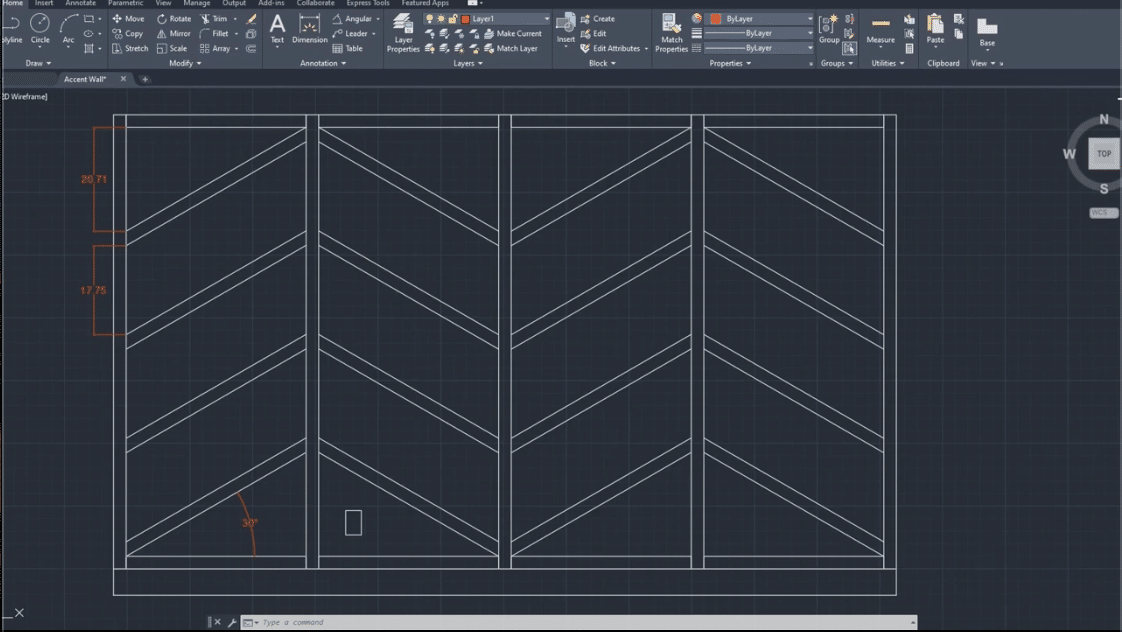
- Sketch out your pattern (e.g., chevron design)
- Measure the wall and calculate trim needed
- Mark key points for trim placement
- Note: Simple patterns work best for beginners
3. Prepare the Trim
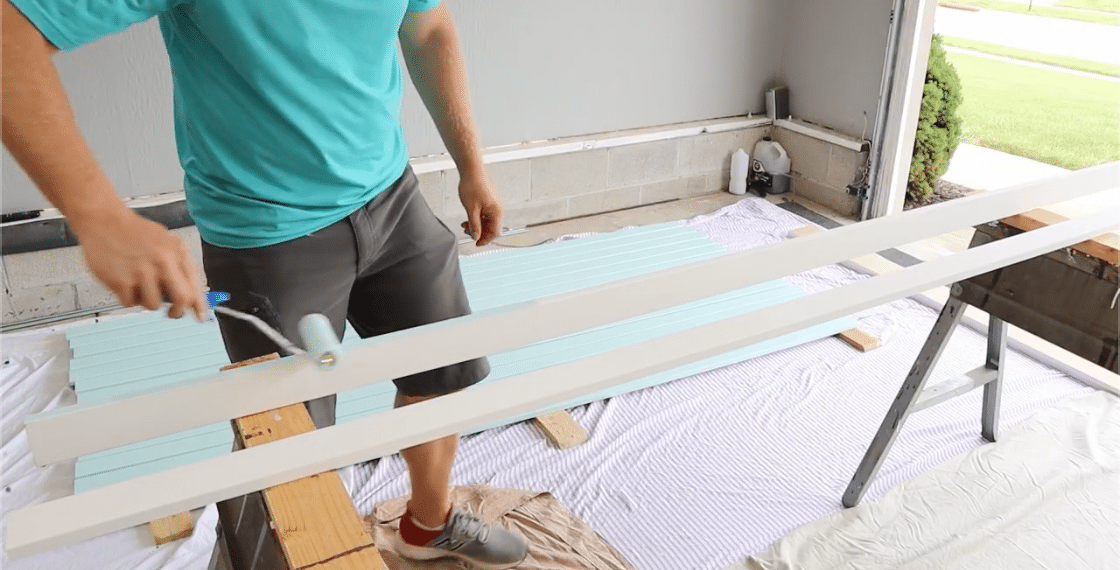
- Cut the MDF trim to size
- Pre-paint the trim pieces
- Use a foam roller for smooth finish
- Let trim dry completely
- Label pieces to match your design
4. Mark the Wall
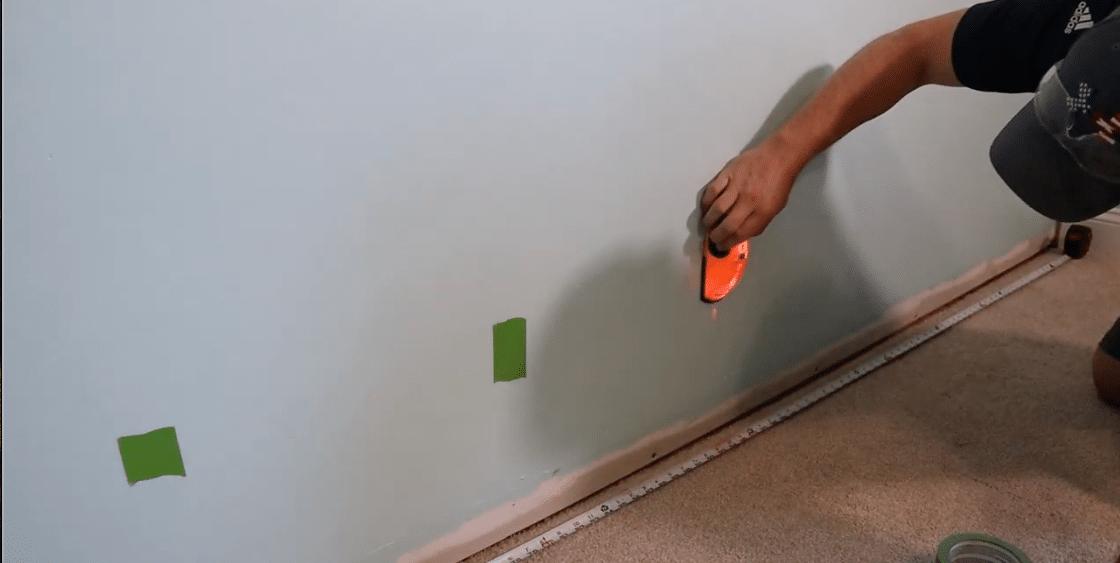
- Use a stud finder to mark stud locations
- Draw guidelines for your design on the wall
5. Install Perimeter Trim
- Start with the outer edges of your design
- Use 1.5-inch nails to secure trim to the wall
- Check level as you go
- Space nails every 16-18 inches
6. Add Design Elements
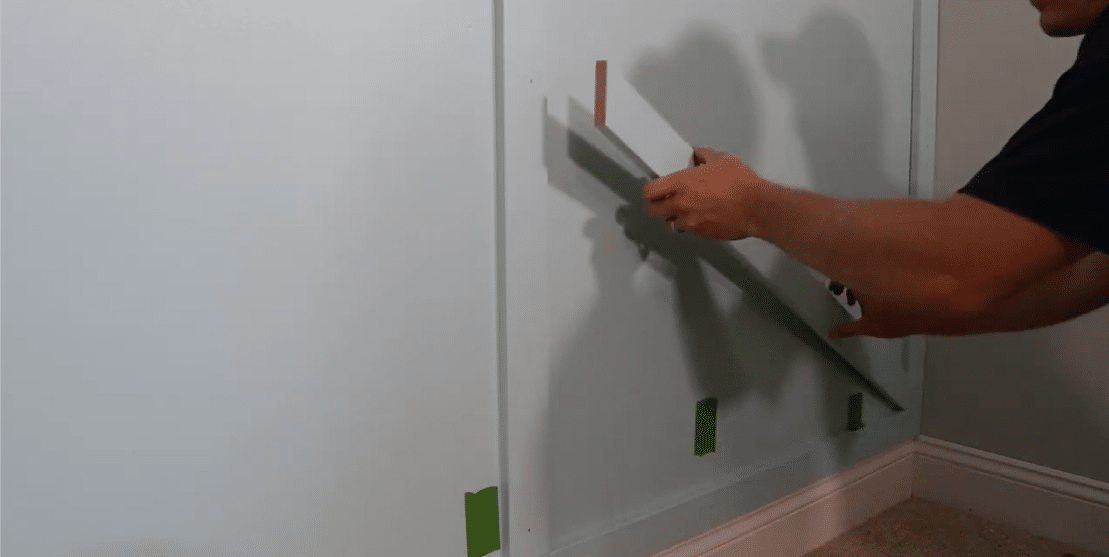
- Cut angled pieces as needed (e.g., 30-degree for chevron)
- Nail these pieces into place, following your guidelines
- Test fit before nailing
- Mark each piece’s location
- Fix mistakes right away
7. Secure to Studs
- Use 2.5-inch nails to secure trim to wall studs for extra stability
- Nail into marked stud locations
- Keep trim flat against wall
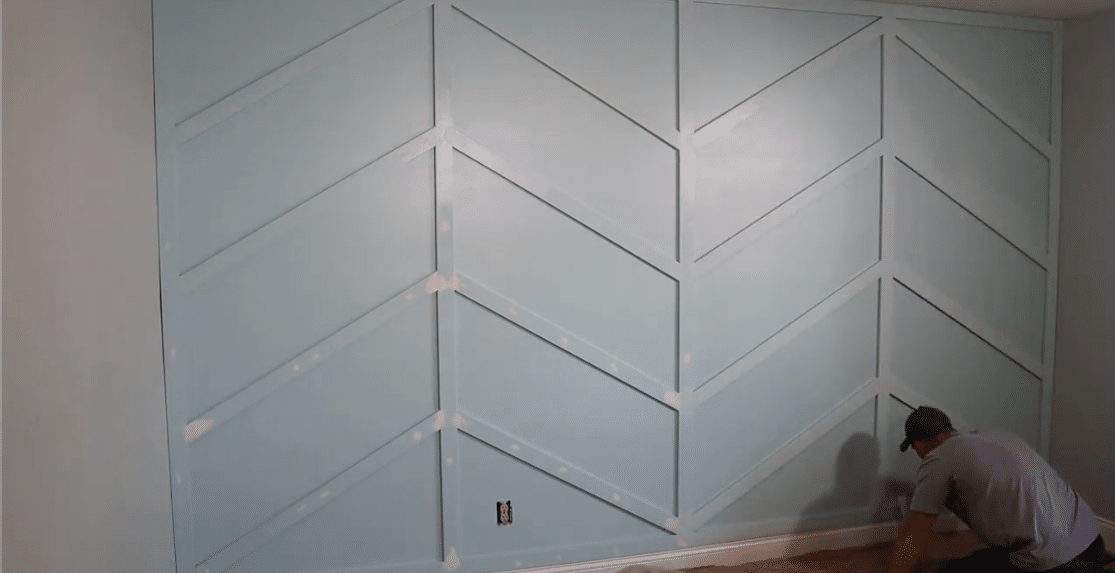
8. Fill and Sand
- Use spackling to fill nail holes and gaps
- Apply small amounts
- Once dry, sand the filled areas smooth
9. Clean Up
- Vacuum or blow away all dust and debris
- Clean dust thoroughly
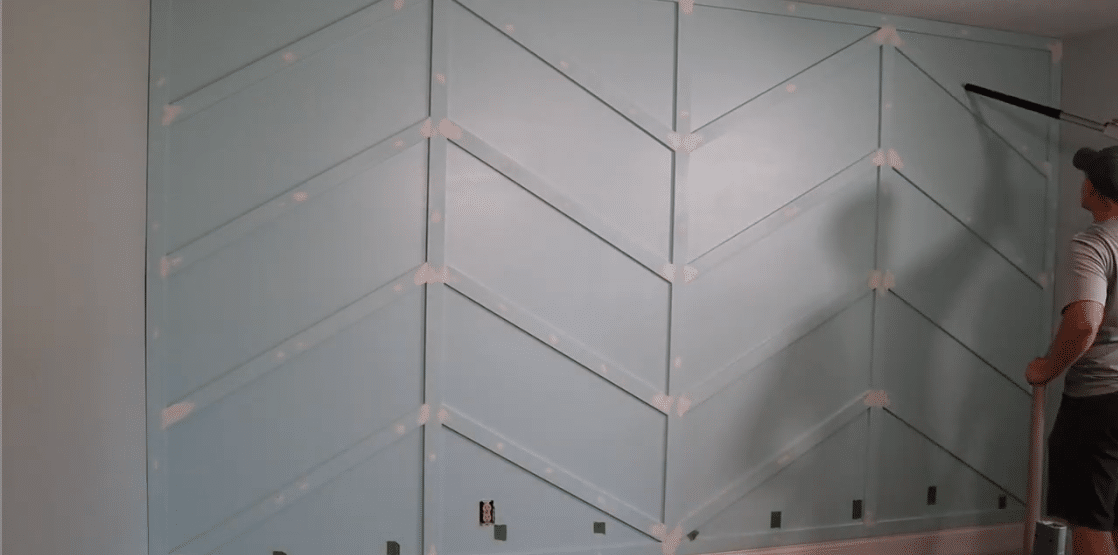
10. Final Painting
- Apply 1-2 coats of paint to the trim
- Touch up the wall paint if needed
- Use mini roller for trim
- Paint trim face only
Tips:
- Pre-painting the trim saves time and gives a smoother finish
- Double-check all measurements before cutting
- Use a level frequently to ensure straight lines
For the whole detailed process, click here.
Tips for Success: Avoid Common DIY Mistakes
When making a wood trim accent wall, small details can make a big difference. This section will help you avoid common errors that DIY-ers often make. By following these tips, you can create a wall that looks like a pro did it.
Proper Measurement Techniques
Getting your measurements right is key:
- Always measure twice before cutting
- Use a tape measure and mark your measurements clearly
- Don’t forget to account for corners and edges
- Write down all measurements to avoid confusion
Cutting Tips
Making clean, accurate cuts helps your trim fit well:
- Use a sharp blade in your saw
- Mark your cutting line clearly
- Support long pieces of trim when cutting
- Cut a little long at first, then trim to fit if needed
Installation Tricks
Putting up the trim correctly keeps it looking good:
- Use a level to make sure each piece is straight
- Start in a corner and work your way out
- Secure trim with nails every 16 inches or so
- Pre-drill holes if you’re working with hard wood
Finishing Touches
The final steps make your wall look polished:
- Fill nail holes with wood filler
- Use caulk to close small gaps between trim and wall
- Sand any rough spots before painting or staining
- Apply paint or stain evenly for a smooth finish
By paying attention to these details, you can avoid common mistakes and create a wood trim accent wall that looks great. Remember, taking your time with each step will lead to better results overall.
Budget-Friendly Options
Creating a wood trim accent wall doesn’t have to break the bank. This section explores ways to make your project more affordable without sacrificing style. We’ll look at cheaper materials, where to find good deals, and how to decide if doing it yourself is the best choice for your wallet.
Affordable Wood Trim Alternatives
You can save money by choosing less expensive materials:
- MDF (Medium-Density Fiberboard): Cheaper than solid wood and easy to paint
- Pre-cut trim: Often less expensive than custom-cut options
- Lightweight polyurethane trim: Looks like wood but costs less
Reclaimed or Recycled Wood
Using old wood can save money and add character:
- Check local building sites for leftover materials
- Look for salvage yards or ReStore locations in your area
- Ask friends or neighbors if they have extra wood from past projects
- Search online marketplaces for people selling old wood
DIY vs. Hiring a Professional
Deciding to do it yourself or hire someone depends on your skills and budget:
DIY Costs:
- Materials: Usually $100 to $500, depending on the size of your wall and type of wood
- Tools: If you need to buy or rent, add $50 to $200
- Time: Your free time spent on the project
Professional Costs:
- Labor: Often $200 to $650 per day
- Materials: Pros might get better deals on supplies
- Guaranteed results: You pay for expertise and a polished finish
When choosing, think about your comfort with DIY projects, the time you can spend, and how much you want to invest. Sometimes, doing part of the work yourself and getting help with trickier parts can be a good middle ground.
Maintenance and Care of Wood Trim Accent Walls
Taking good care of your wood trim accent wall will keep it looking great for years. This section covers how to clean and protect your wall, what to watch out for, and when to give it a fresh look. With the right care, your accent wall can stay a beautiful part of your home for a long time.
Cleaning Tips
Keeping your wood trim clean doesn’t have to be hard:
- Use a soft, dry cloth to remove dust regularly
- For deeper cleaning, use a slightly damp cloth, but don’t let water sit on the wood
- Avoid harsh cleaners that might hurt the finish
- If you used a special finish, follow the maker’s cleaning advice
Preventing Warping and Damage
Your wood trim can last longer if you protect it from:
- Too much moisture: Use a dehumidifier in damp rooms
- Direct sunlight: Consider curtains or blinds to protect the wood
- Temperature changes: Try to keep room temperature steady
- Bumps and scratches: Be careful when moving furniture near the wall
Repainting and Refinishing
Over time, you might want to refresh your wall:
- Check your wall once a year for signs of wear
- Touch up small marks with matching paint or stain
- For bigger changes, sand the trim lightly before applying new paint or finish
- If the wood looks very worn, you might need to remove old finish and start fresh
By following these care tips, you can keep your wood trim accent wall looking its best. Regular, gentle cleaning and being aware of what might harm the wood will go a long way. And when it’s time for a new look, a fresh coat of paint or stain can make your wall feel brand new again.
Modern Trends in Wood Trim Accent Walls
Wood trim accent walls are always changing to fit new styles. This section looks at what’s popular now. From simple designs to mixing different materials, there are many ways to make your wall stand out.
Minimalist Designs
Simple, clean looks are in style:
- Thin, straight lines of trim
- Light colors or natural wood tones
- Patterns with lots of open space
- Focus on one or two main lines or shapes
Rustic and Reclaimed Wood
Natural, old-looking wood is popular:
- Wood with knots and rough textures
- Weathered finishes that look worn
- Uneven or mismatched pieces for a handmade feel
- Colors that look faded or sun-bleached
Mixing Materials
Combining wood with other things can look really cool:
- Wood trim around wallpaper sections
- Stone or brick with wood accents
- Metal pieces mixed with wood trim
- Painted sections next to natural wood
Sustainable Design
People care more about the environment now:
- Using wood from forests that grow new trees
- Choosing paints and finishes that don’t have harsh chemicals
- Picking local wood to reduce shipping
- Using leftover or recycled wood when possible
These trends show that wood trim accent walls can fit any style. Whether you like things simple and modern or more natural and old-fashioned, there’s a way to make it work. And by thinking about the environment, you can make choices that look good and feel good too.
Where to Buy Wood Trim and Materials
Finding the right materials is key to making your wood trim accent wall look great. This section will help you know where to shop for what you need.
Online Retailers
You can find lots of options on the internet:
- Big websites like Amazon or Home Depot have many choices
- Specialty online stores might have unique trims
- Some sites let you order custom-cut pieces
- Read reviews to make sure you’re getting good quality
Local Hardware Stores
Buying from nearby stores can be handy:
- Big chains often have a good selection and fair prices
- Small, local stores might give more personal help
- You can see and feel the wood before you buy
- It’s easier to return things if needed
Sustainable Sources
For those who want to be kind to the environment:
- Look for stores that sell reclaimed wood
- Check if lumber yards have leftover pieces they’ll sell cheap
- Some companies make new wood trim from old buildings
- Ask about certifications that show the wood comes from responsibly managed forests
When you’re looking for wood trim and materials, think about what matters most to you. If you want lots of choices, online might be best. If you like to see things in person, try local stores. And if you care about the environment, look for places that sell eco-friendly options.
Conclusion
Wrapping up, wood trim accent walls are a great way to add character to your home without breaking the bank.
I’ve walked you through the process, from planning to painting, showing you it’s a doable DIY project.
Remember, the key steps are careful planning, proper wall preparation, and patience during installation.
Whether you’re going for a modern chevron pattern or a classic paneled look, this project allows for personal creativity.
The potential removability is a bonus, especially for renters or decor enthusiasts who like to change things up.
Ready to transform your space? Grab your tools and get started!
Don’t forget to share your accent wall creations in the comments below!
Frequently Asked Questions
What is the best wood for accent walls?
Pine, oak, and cedar are popular choices. MDF is good for painted designs. Reclaimed wood adds character. Choose based on your style, budget, and the look you want.
How do I maintain and clean my wood accent wall?
Dust regularly with a soft cloth. For deeper cleaning, use a slightly damp cloth. Avoid harsh cleaners. Refinish or touch up paint as needed every few years.
Are wood trim accent walls suitable for small rooms?
Yes, they can work well in small rooms. Use lighter colors and simple patterns to avoid overwhelming the space. Vertical designs can make the room feel taller.
What’s the average cost of a wood trim accent wall?
Costs vary, but typically range from $200 to $800 for a DIY project. This includes wood, paint, and basic tools. Professional installation can increase the price to $1000-$3000.